
 Pin it
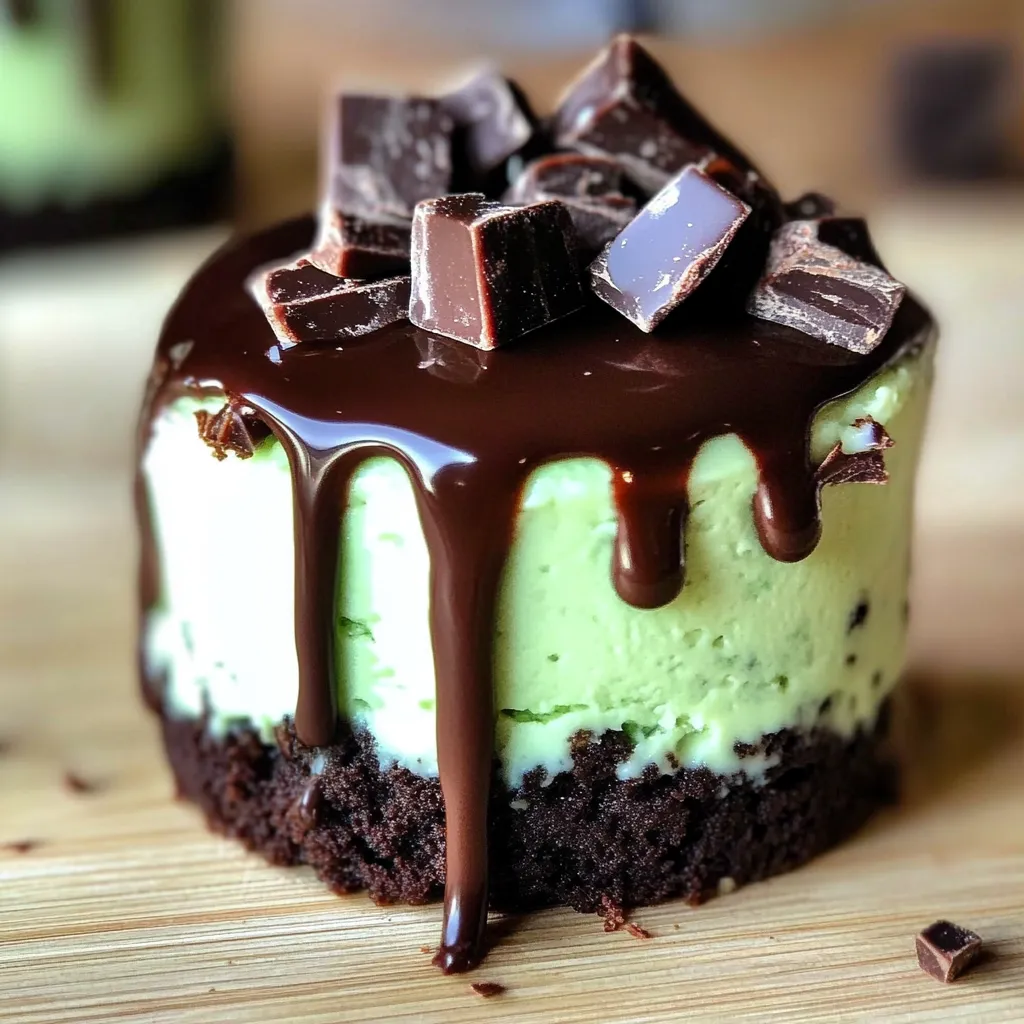
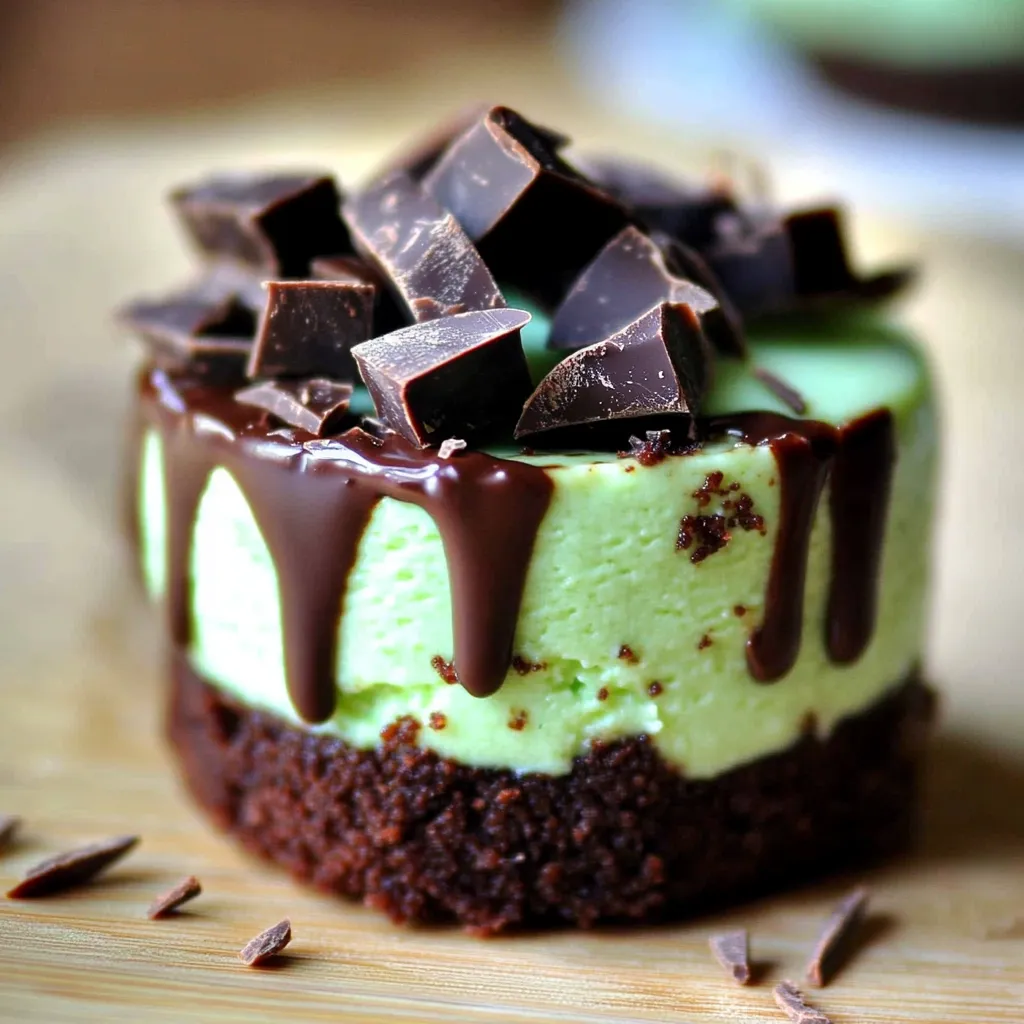
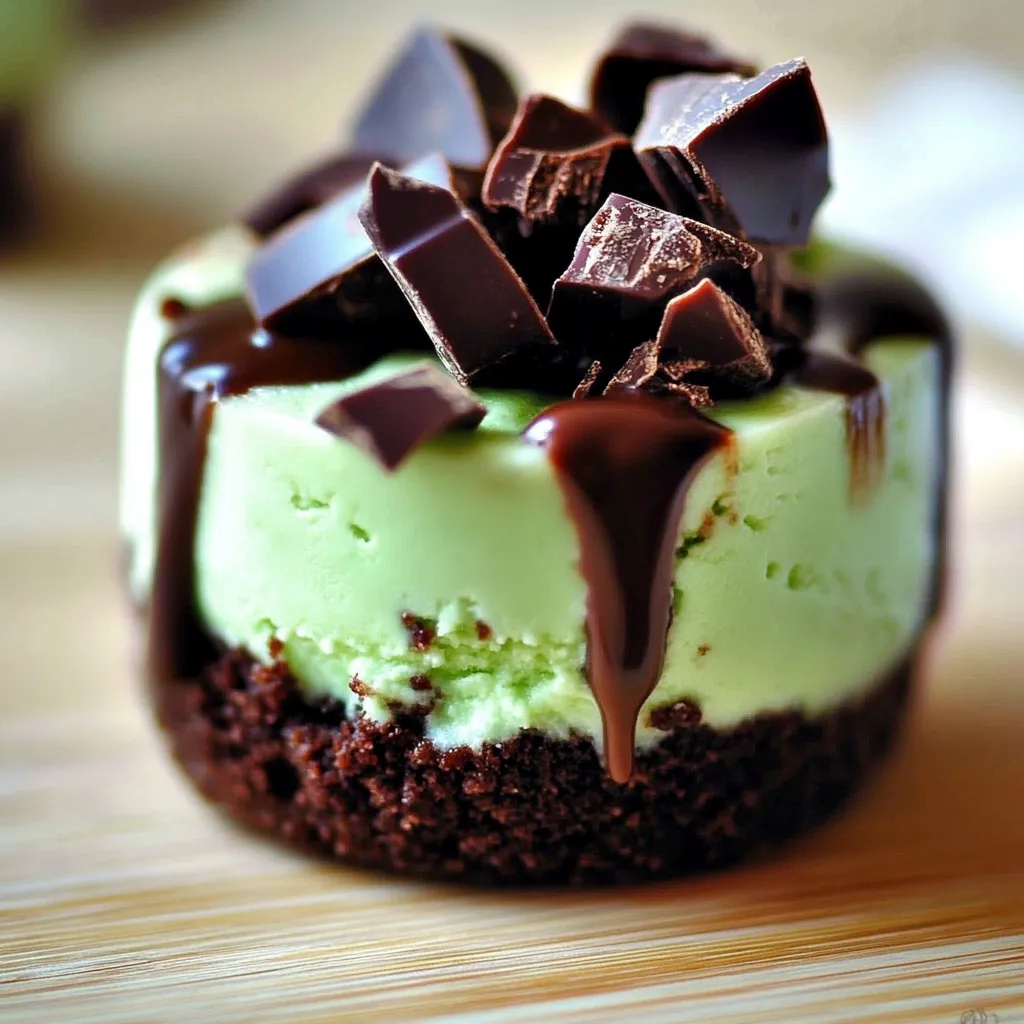
These Andes Mint Mini Cheesecakes bring together a buttery chocolate graham crust, a mint-infused creamy filling, and a luscious chocolate topping scattered with cool mint candy pieces. Bite-sized and perfectly portioned, they're ideal for entertaining or indulging in something sweet without overdoing it. They also freeze beautifully, making them a stress-free option to prep in advance for parties, holidays, or quiet nights with a cup of tea.
These mini cheesecakes were a hit the first time I made them for a family birthday. The crisp chocolate base with that soft minty center was so satisfying. Everyone kept asking if I bought them from a bakery. Now I always keep a batch frozen for impromptu guests—or cravings.
Choosing Your Ingredients Wisely
- Chocolate graham crackers: Their deep cocoa flavor gives the base a firm, dessert-like crunch. Use fresh ones and pulse them in a food processor for a finer crumb.
- Unsalted butter: Melted and mixed with crumbs for structure and richness. Room-temperature butter sets the texture just right.
- Granulated sugar: Blends into both the crust and filling, enhancing the sweetness without overpowering the mint.
- Full-fat cream cheese: Essential for that rich, creamy body. Let it soften at room temperature so it blends without lumps.
- Large egg: Helps the cheesecake set while keeping the texture smooth. Bring it to room temperature to ensure even mixing.
- Mint extract: Just enough to bring out the refreshing minty flavor without becoming medicinal. Pure mint extract gives the cleanest taste.
- Green food coloring: Optional, but adds that classic minty hue. A tiny drop goes a long way.
- Semi-sweet chocolate chips: For the topping, melted into a glossy finish that complements the creamy center.
- Andes Mints: The final touch—chopped and sprinkled on top for texture and a burst of cooling mint.
Let's Make Them
- Prepare the crust:
- In a medium bowl, mix finely crushed chocolate graham crackers with granulated sugar and melted butter until the texture resembles damp sand. Gently press the mixture into the bottoms of a mini cheesecake pan or lined muffin tin, creating a firm base. Chill in the fridge while you prepare the filling.
- Blend the filling:
- In a mixing bowl, beat softened cream cheese with sugar using a hand or stand mixer on medium speed until silky and smooth. Lower the speed, then add in the room-temperature egg, mint extract, and a drop of green food coloring. Mix gently, just until everything is blended—over-mixing can introduce too much air and cause cracks.
- Fill the pans:
- Evenly distribute the cheesecake mixture over the chilled crusts, smoothing the tops with a spoon or spatula. Avoid overfilling to allow for gentle rising in the oven.
- Bake with care:
- Place the pan in a preheated oven at 325°F and bake for about 25 minutes. Once finished, do not open the door. Instead, turn off the oven and prop the door open with a wooden spoon. Let the cheesecakes cool gradually for about an hour inside the oven—this helps prevent cracking.
- Chill overnight:
- After cooling, transfer the cheesecakes to the fridge and let them chill thoroughly, ideally overnight. This firms them up and improves their flavor and texture.
- Top with chocolate:
- Melt chocolate chips in a microwave-safe bowl following the instructions on the package. Spoon a generous dollop onto each cheesecake, then top with chopped Andes Mints. Let the chocolate set in the fridge before serving.
 Pin it
Mint is one of my favorite dessert flavors—it refreshes your palate without feeling too heavy. My family loves these cheesecakes after dinner because they feel indulgent without being overwhelming.
Perfect For Parties
These cheesecakes are elegant enough for special occasions but simple enough to make any day. I love placing them on a platter with fresh mint leaves and extra chopped Andes for a polished touch. They also pair wonderfully with coffee or a glass of dessert wine.
Try Something New
If you want a flavor twist, try swapping the mint extract for orange or raspberry. You can also replace the chocolate graham base with crushed Oreos for a richer bite. Dairy-free cream cheese and egg substitutes also work surprisingly well if you're baking for guests with dietary needs.
Keep Them Fresh
Store leftover cheesecakes in an airtight container in the fridge for up to 5 days. For longer storage, wrap each individually in plastic, then seal them in a freezer-safe container or bag. Thaw them gently in the refrigerator—never on the counter—to keep their texture intact.
These cheesecakes are pure joy in a bite—cool, creamy, and completely satisfying. They're one of those recipes that turns out perfect every time, and once you've made them once, you'll find yourself coming back to them again and again.
 Pin it
Frequently Asked Questions
- → Do I need a special pan to make these mini cheesecakes?
- Yes, a mini cheesecake pan works best for this recipe. These pans typically have removable bottoms that make it easy to pop out the cheesecakes. If you don't have one, you can use a muffin tin lined with paper liners, though they may be a bit harder to remove.
- → Can I substitute the mint extract with something else?
- Yes! You can use peppermint extract for a stronger mint flavor, or try other flavors like vanilla or almond extract for a different twist. If using peppermint, start with a smaller amount (1/2 teaspoon) as it tends to be more potent.
- → How can I tell when the mini cheesecakes are done baking?
- The edges should be set but the centers should still have a slight jiggle. Don't worry if they seem a bit underdone in the middle - they'll continue to set as they cool. Overbaking can cause cracks and a dry texture.
- → Can I make these without food coloring?
- Absolutely! The green food coloring is purely for visual appeal to hint at the mint flavor. The cheesecakes will taste exactly the same without it, they just won't have the green color.
- → What can I use instead of Andes mints?
- If you can't find Andes mints, you can substitute with any mint chocolate candy like mint chocolate chips, chopped After Eight mints, or Ghirardelli mint chocolate squares. You could also use regular chocolate chips and add a drop of mint extract to the melted chocolate.