
 Pin it
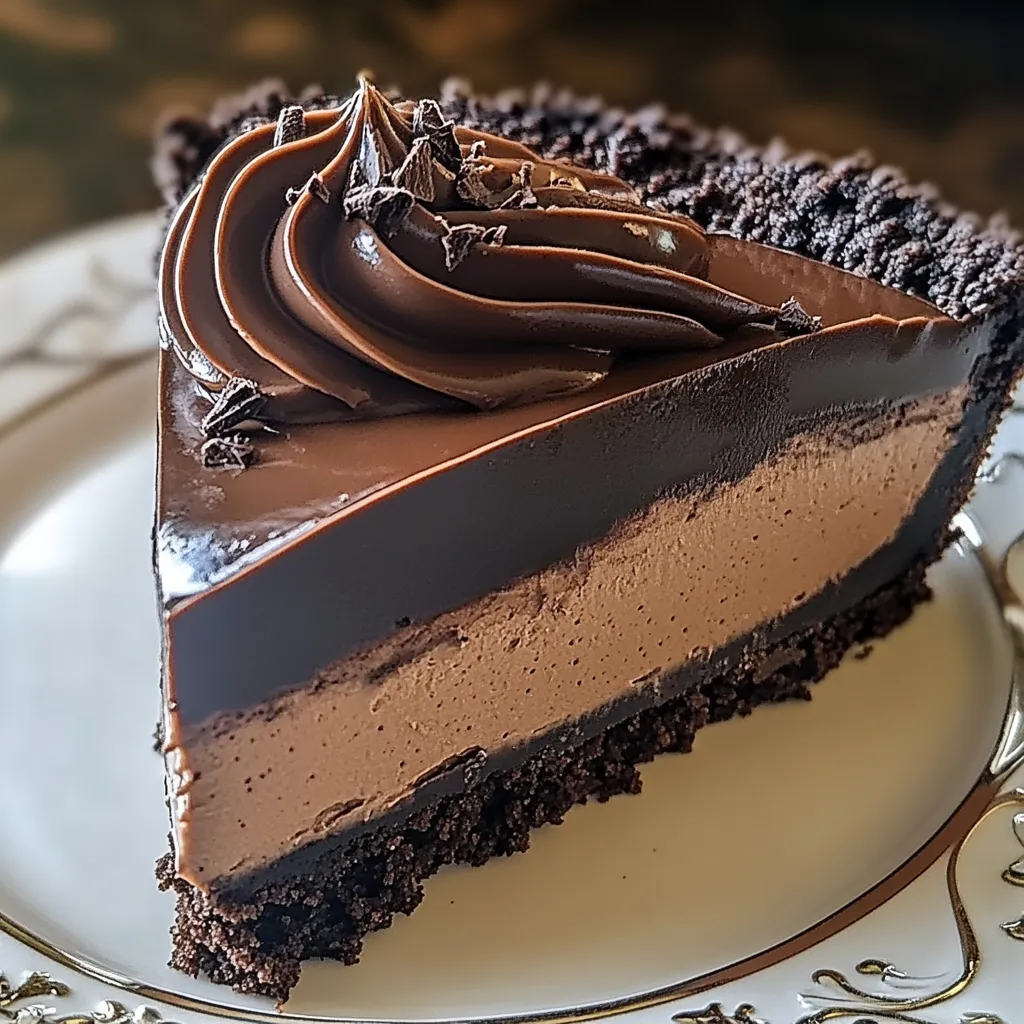
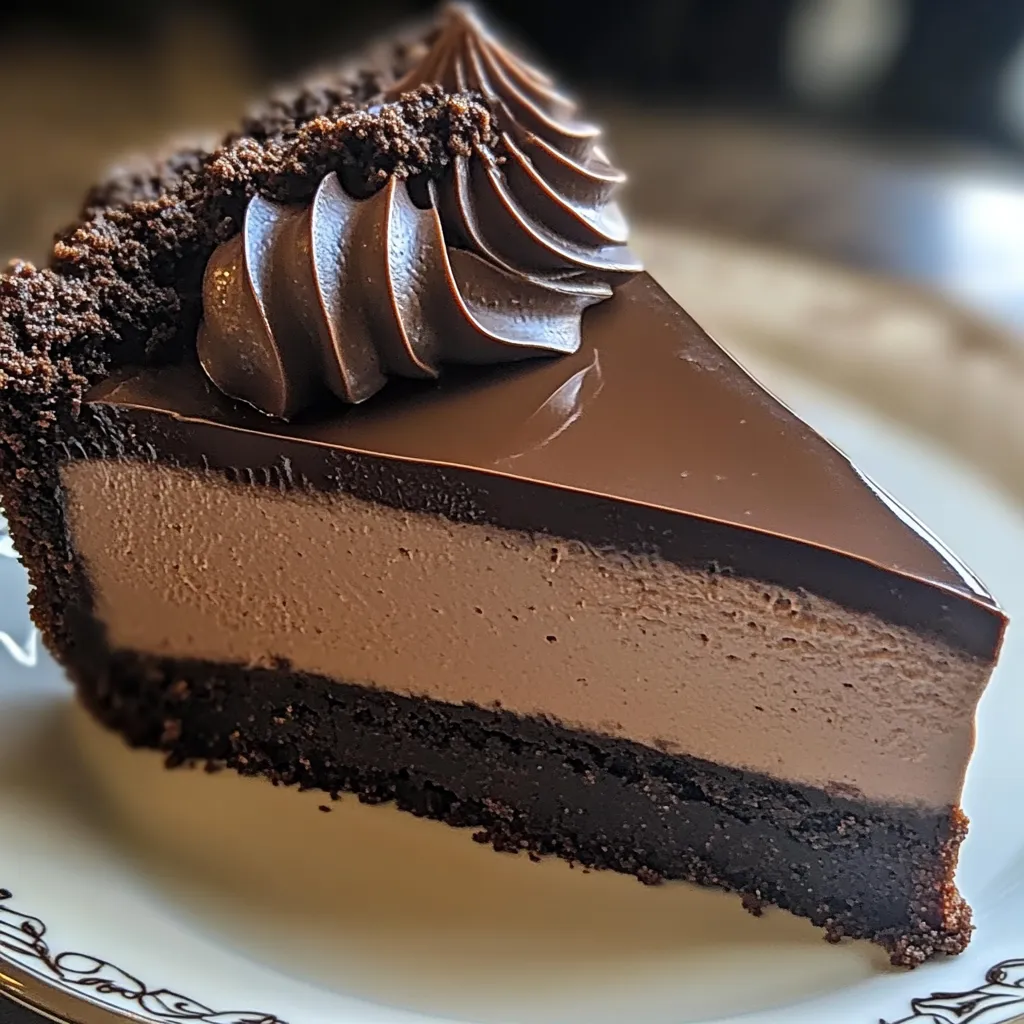
Brownie crust chocolate cheesecake marries two beloved desserts into one spectacular creation that satisfies multiple cravings simultaneously. This indulgent masterpiece features a fudgy, chewy brownie base that provides the perfect foundation for a silky-smooth chocolate cheesecake layer. The contrasting textures create a multi-dimensional dessert experience that outshines either treat on its own, while the double dose of chocolate delivers intense flavor that true chocolate enthusiasts crave.
Perfect for special occasions yet simple enough to make when you desire something extraordinary, this show-stopping dessert combines familiar comfort with impressive presentation. The rich, dense brownie foundation holds up beautifully beneath the creamy cheesecake layer, creating slices that maintain their structure while delivering that perfect mouthfeel.
I discovered this recipe when planning a birthday celebration for my chocolate-obsessed sister. The first time I sliced into this dessert, revealing the distinct layers of fudgy brownie and creamy cheesecake, I knew I'd found something special. What surprised me most was how the brownie layer remained distinct yet tender even after baking with the cheesecake on top. My brother-in-law, who typically reaches for fruit desserts, requested this for his own birthday three months later!
Essential Components
- Unsalted butter: Creates a rich, tender brownie base. Melting the butter rather than creaming it produces that distinctive dense, fudgy texture.
- Cocoa powder: Provides intense chocolate flavor in the brownie layer without adding excess moisture. Dutch-processed cocoa creates deeper color and smoother flavor.
- Cream cheese: Forms the foundation of the cheesecake layer. Use full-fat, room temperature cream cheese for the creamiest, smoothest results without lumps.
- Sour cream: Adds tanginess that balances the sweetness while contributing to the silky texture. The slight acidity helps stabilize the cheesecake structure.
- Semi-sweet chocolate chips: Incorporate pure chocolate flavor into the cheesecake layer. Melting and cooling before adding ensures even distribution without compromising texture.
- Eggs: Provide structure and richness to both layers. Room temperature eggs incorporate more evenly into batters.
- All-purpose flour: Creates structure in the brownie base without making it tough. Measuring accurately prevents dry, cakey results.
- Vanilla extract: Enhances the chocolate flavors in both layers. Pure extract delivers cleaner flavor than imitation.
Creation Method
- Brownie base preparation:
- Begin by preheating your oven to 350°F and preparing a 9-inch springform pan with parchment paper and cooking spray. In a medium bowl, whisk together melted butter and granulated sugar until well combined and slightly thickened. Add eggs one at a time, incorporating fully before adding the next, then stir in vanilla extract. The mixture should appear glossy and smooth.
- Dry ingredient incorporation:
- Sift cocoa powder, flour, and salt directly into the wet ingredients to prevent lumps. Using a gentle folding motion, mix just until no dry streaks remain. Overmixing activates gluten, creating a tough rather than fudgy brownie base. Spread this thick batter evenly across the bottom of the prepared springform pan.
- Initial baking:
- Place the brownie base in the preheated oven and bake for exactly 15 minutes. This partial baking sets the structure while keeping it slightly underdone, allowing it to finish cooking perfectly during the cheesecake phase. Remove from the oven and reduce temperature to 325°F for the cheesecake layer.
- Cheesecake mixture:
- While the brownie base bakes, prepare the cheesecake layer. Beat room temperature cream cheese until completely smooth with no lumps remaining. Gradually add sugar and continue beating until light and fluffy, about 2-3 minutes. This extended mixing incorporates air for a lighter texture.
- Egg incorporation:
- Add eggs one at a time, mixing on low speed just until each disappears into the batter. High speed or overmixing introduces too much air, which can lead to cracks during baking. Stir in vanilla extract and sour cream until just combined.
- Chocolate integration:
- Melt chocolate chips in short microwave bursts or over a double boiler until smooth, then allow to cool slightly. Slowly fold the melted chocolate into the cheesecake batter using a spatula rather than electric mixer. This preserves the airy texture while ensuring even chocolate distribution.
- Assembly:
- Pour the chocolate cheesecake mixture over the partially baked brownie crust, spreading evenly to the edges. The contrast between the dense brownie and creamy cheesecake creates both visual appeal and textural interest. Tap the pan gently against the counter several times to release any trapped air bubbles.
- Careful baking:
- Bake at the reduced temperature of 325°F for 50-60 minutes until the edges appear set but the center still has a slight jiggle when gently shaken. The lower temperature prevents cracking by allowing more even heating throughout the cheesecake.
- Gradual cooling:
- Turn off the oven, crack the door slightly, and allow the cheesecake to cool inside for one hour. This slow temperature transition prevents the dramatic change that causes cracks and sinking. After an hour, remove to room temperature until completely cooled.
- Final chilling:
- Refrigerate the cheesecake for at least 4 hours, preferably overnight, to fully set the structure and develop flavors. The waiting period may test your patience but rewards you with perfect texture and enhanced taste.
 Pin it
I discovered a wonderful variation of this recipe when preparing for a holiday gathering last year. Adding a half teaspoon of espresso powder to the brownie base and a teaspoon to the cheesecake layer created incredible depth of flavor without tasting like coffee. Another successful experiment involved adding a teaspoon of orange zest to the cheesecake mixture, which brightened the chocolate notes beautifully. My guests couldn't stop raving about the "chocolate-orange version," with three people requesting the recipe before the evening ended!
Serving Suggestions
Present this impressive dessert on a simple cake stand for maximum visual impact. For special occasions, dust the top lightly with cocoa powder using a small sieve or stencil for an elegant finishing touch. Fresh raspberries or strawberries arranged around the base create beautiful color contrast while complementing the rich chocolate flavors.
When slicing, warm a sharp knife under hot water and wipe dry between cuts for the cleanest presentation. Serve slightly chilled rather than cold from the refrigerator—allow about 15-20 minutes at room temperature before serving to enhance flavors and achieve the perfect creamy texture.
Consider offering accompaniments that balance the richness: a dollop of barely sweetened whipped cream, a scattering of fresh berries, or a small pour of raspberry sauce creates delightful contrast. For truly decadent occasions, drizzle individual slices with warm chocolate ganache just before serving.
Flavor Variations
Transform this versatile dessert with simple adaptations that create entirely new experiences while maintaining the brownie-cheesecake concept. Add a layer of caramel between the brownie and cheesecake for a turtle-inspired variation—simply drizzle 1/2 cup of thick caramel sauce over the partially baked brownie before adding the cheesecake mixture.
For peppermint enthusiasts, add 1/2 teaspoon of peppermint extract to the cheesecake layer and sprinkle crushed candy canes over the top after baking. This version makes a stunning holiday dessert that combines familiar flavors in an unexpected format.
Coffee lovers might appreciate a mocha version—add 1 1/2 teaspoons of espresso powder to the brownie base and 1 teaspoon to the cheesecake filling. The coffee notes enhance the chocolate flavor while adding complexity throughout both layers.
For a nutty variation, fold 1/2 cup of toasted, chopped pecans or hazelnuts into the brownie batter before baking. The crunchy elements create textural contrast against the smooth cheesecake layer.
Storage Solutions
Maintain optimal freshness by storing this cheesecake properly in the refrigerator. Cover loosely with aluminum foil rather than plastic wrap to prevent condensation from forming on the surface. When properly stored, it maintains peak quality for up to five days, though the brownie layer may gradually soften slightly.
For longer storage, this cheesecake freezes beautifully for up to two months. Cut into individual slices before freezing, wrap each in plastic wrap, then aluminum foil to prevent freezer burn. This method allows you to thaw only what you need for unexpected guests or chocolate cravings.
When serving from frozen, thaw slices overnight in the refrigerator for the best texture restoration. Avoid thawing at room temperature, which can make the filling weepy, or using a microwave, which creates uneven warming.
If you need to transport this dessert, keep the springform ring in place for stability and place in a cake carrier with ice packs. Remove the ring only after arrival and chilling for at least 30 minutes to ensure clean slices.
The brownie crust chocolate cheesecake represents the perfect marriage between two beloved desserts. While it looks and tastes like something from an upscale bakery, its straightforward preparation makes it accessible to home bakers. The brilliant combination of textures—fudgy brownie foundation and silky cheesecake topping—creates a multi-dimensional treat that feels special enough for celebrations yet satisfying enough for everyday chocolate cravings. I've found that this impressive dessert consistently generates enthusiastic reviews, becoming a frequently requested favorite for gatherings and special occasions.
 Pin it
Frequently Asked Questions
- → Can I make this cheesecake ahead of time?
- Yes, this cheesecake is perfect for making 1-2 days ahead. Keep it refrigerated until about 30 minutes before serving for the best flavor and texture.
- → How do I prevent my cheesecake from cracking?
- Avoid overmixing the batter (especially after adding eggs), bake with a water bath if possible, and allow the cheesecake to cool gradually in the oven with the door ajar before refrigerating.
- → Can I freeze this cheesecake?
- Yes, you can freeze it for up to 2 months. Wrap it tightly without the ganache topping, then thaw overnight in the refrigerator and add fresh ganache before serving.
- → What if I don't have a springform pan?
- While a springform pan works best, you can use a deep cake pan lined with parchment paper with extra hanging over the sides to help lift the cheesecake out after cooling.
- → How do I know when the cheesecake is fully baked?
- The edges should be set and slightly puffed, while the center should still have a slight jiggle (like Jell-O). It will continue to set as it cools. An instant-read thermometer should read 150°F in the center.
- → Can I use dark chocolate instead of semi-sweet?
- Yes, you can substitute dark chocolate for a more intense flavor. You may want to increase the sugar slightly if using very dark chocolate (70% or higher).