
 Pin it
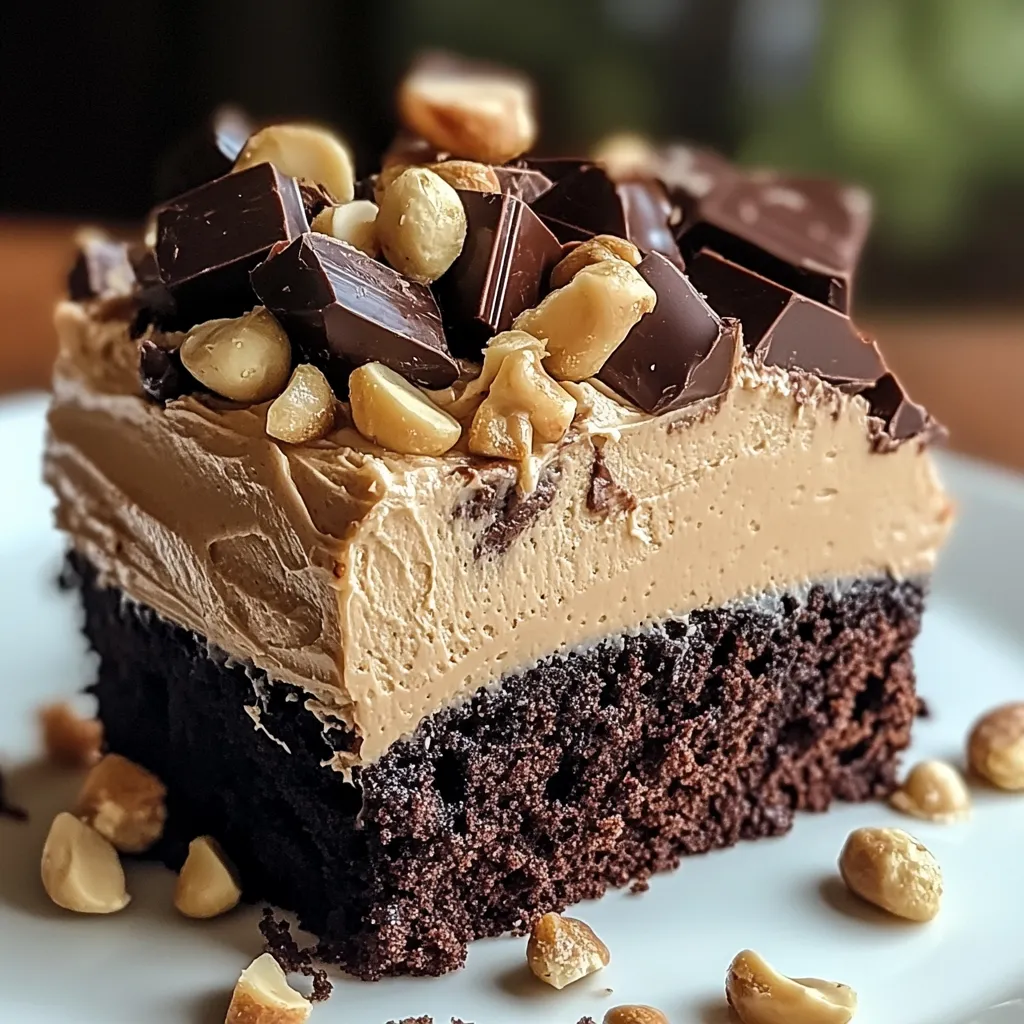
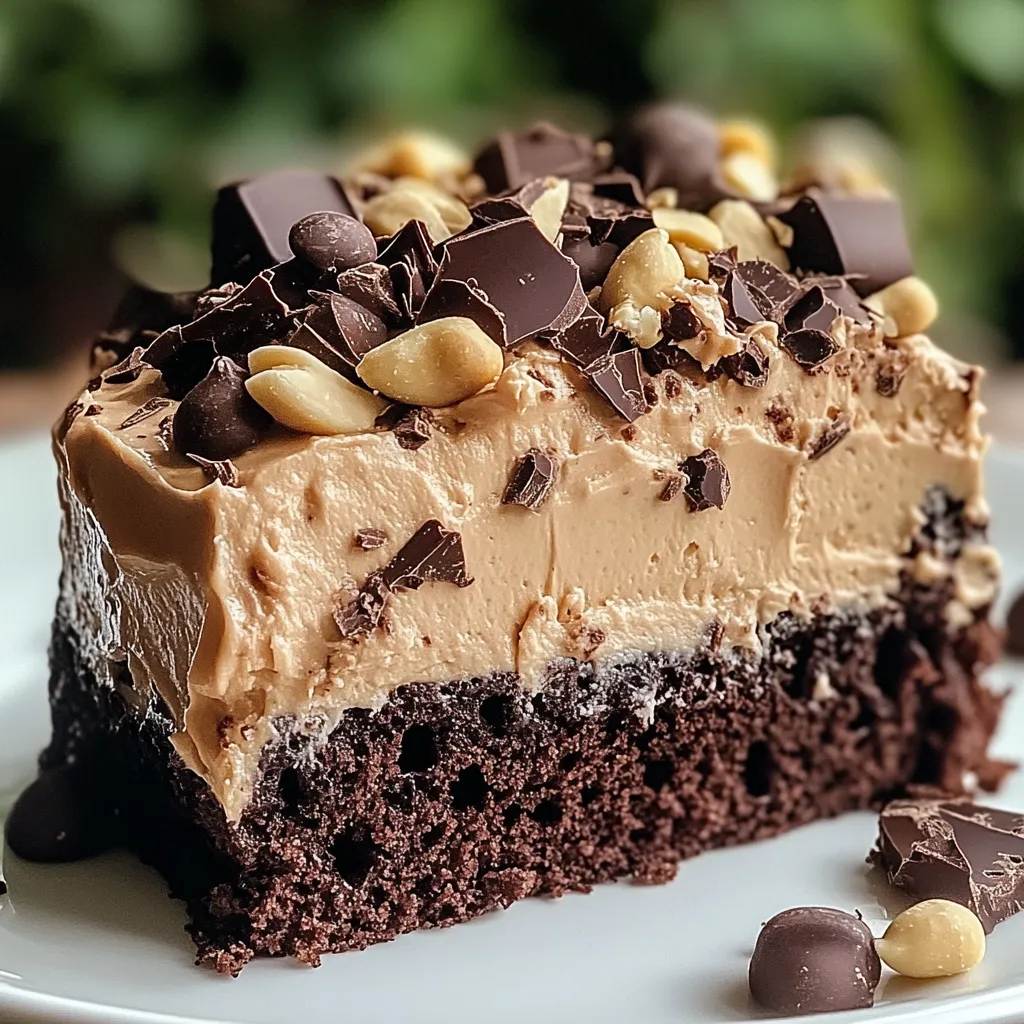
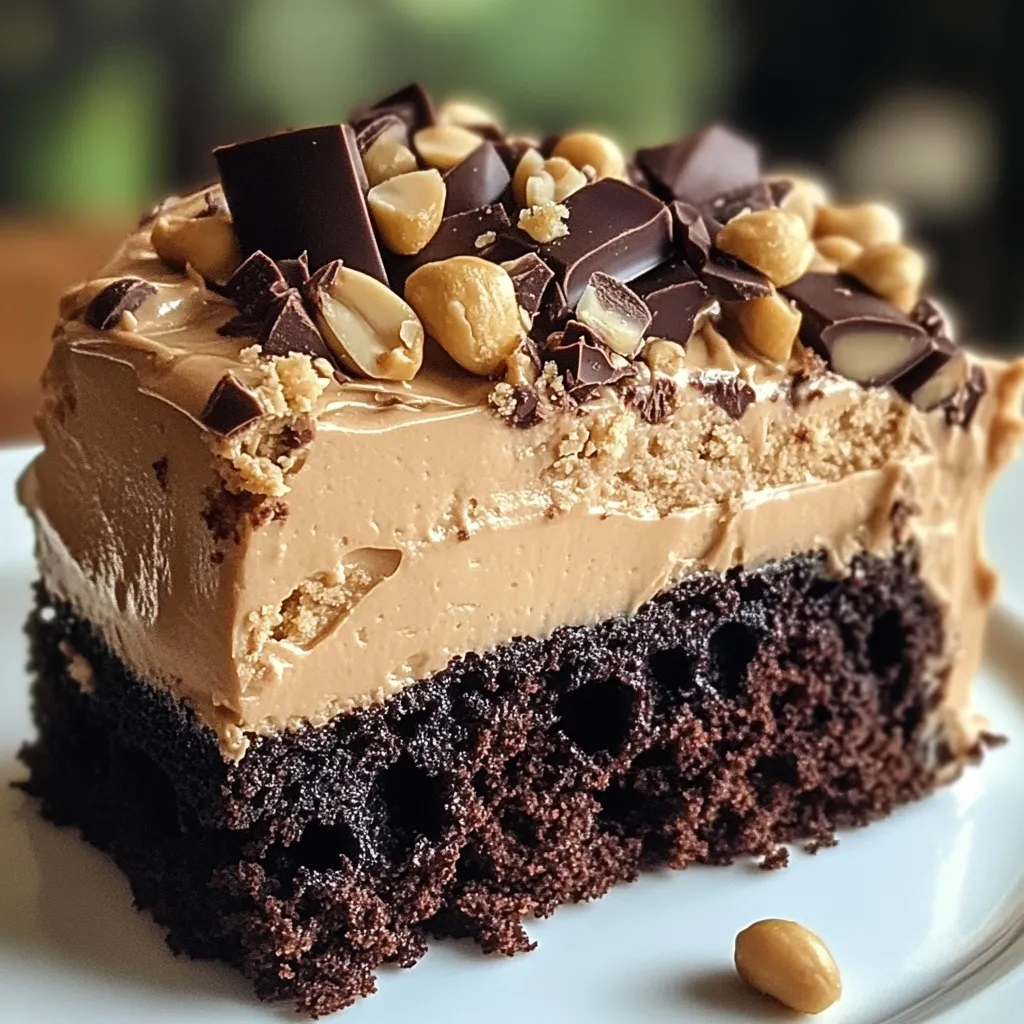
Chocolate Peanut Butter Poke Cake transforms beloved flavor combinations into an unforgettable dessert experience. This indulgent creation begins with a moist chocolate cake that becomes extraordinary when punctured with holes that allow melted peanut butter and sweetened condensed milk to saturate every bite. The magic continues with a fluffy peanut butter whipped cream topping, drizzled chocolate, and optional candy garnishes that create both visual appeal and textural contrast. The result is a dessert that perfectly balances rich chocolate notes with creamy, nutty peanut butter in multiple layers of flavor and texture.
I discovered this recipe while searching for a crowd-pleasing dessert that would satisfy both chocolate and peanut butter enthusiasts. The first time I served it at a family gathering, conversations stopped mid-sentence as everyone took their first bite. What surprised me most was how the simple poke cake technique transformed ordinary cake mix into something that tasted completely homemade and special. My typically dessert-indifferent spouse requested this specifically for his birthday, claiming it combined "the perfect amount of both flavors" in every bite.
Essential Elements
- Chocolate cake mix: Provides the perfect foundation that absorbs the flavorful fillings.
- Peanut butter: Used in multiple ways—melted for filling and creamy for topping—creating layers of nutty flavor.
- Sweetened condensed milk: Infuses incredible moisture while adding gentle sweetness.
- Heavy cream: Creates a light, fluffy topping that balances the rich cake beneath.
- Chocolate chips: When melted and drizzled, they add visual contrast and another layer of chocolate flavor.
- Reese's cups: Optional but recommended for decoration, texture, and intensified peanut butter-chocolate flavor.
Creating Cake Magic
Preparing Perfect Foundation
Begin by baking a chocolate cake according to package directions in a 9x13-inch pan. While using a mix offers convenience, this simple starting point will be transformed completely by the subsequent steps. Allow the cake to cool slightly after baking—warm enough to absorb fillings but cool enough to handle. This temperature balance is crucial for proper filling absorption.
Creating Flavor-Absorbing Channels
Using the handle of a wooden spoon, carefully poke holes throughout the entire cake surface, spacing them approximately one inch apart. These holes create pathways for the fillings to penetrate deep into the cake. The size matters—too small and fillings won't penetrate, too large and the cake structure could be compromised. The wooden spoon handle creates the ideal diameter.
Infusing Rich Flavors
Melt peanut butter until it reaches a pourable consistency, then carefully pour it over the entire cake surface, ensuring it flows into the prepared holes. Follow with sweetened condensed milk, which adds incredible moisture and sweetness while helping distribute the peanut butter further into the cake. Allow the cake to cool completely, giving the fillings time to fully permeate the cake structure for uniform flavor distribution.
Creating Cloud-Like Topping
Whip cold heavy cream with powdered sugar until stiff peaks form, creating a light, airy base. Carefully fold in creamy peanut butter until fully incorporated without deflating the whipped cream. This technique creates a topping with the perfect balance between rich peanut butter flavor and light, fluffy texture. Spread this luxurious mixture evenly across the cooled cake for a beautiful presentation and additional flavor layer.
Adding Final Flourishes
Melt chocolate chips until smooth, then drizzle decoratively across the peanut butter whipped topping. For extra indulgence and visual appeal, sprinkle chopped Reese's cups or peanut butter cups across the surface. These finishing touches not only enhance presentation but add textural contrast and intensify the chocolate-peanut butter flavor combination.
My most memorable experience with this dessert involved preparing it for a potluck where several professional bakers would be attending. Despite its simple preparation, it received more compliments than elaborate layered cakes and fancy pastries. What continues to impress me is its versatility for different occasions—it's casual enough for family dinners yet can be dressed up with careful garnishing for special celebrations. My neighbor, who claims to "not have a sweet tooth," now requests this recipe whenever she needs to bring a dessert to gatherings.
Perfect Accompaniments
This rich dessert pairs beautifully with simple accompaniments that enhance without overwhelming. A glass of cold milk provides the classic complement to the chocolate-peanut butter combination. For coffee enthusiasts, a cup of hot coffee balances the sweetness beautifully. When entertaining, consider serving small slices alongside fresh berries that provide bright acidity against the rich, sweet flavors.
Creative Variations
Consider substituting dark chocolate cake mix for deeper chocolate flavor that contrasts more intensely with the peanut butter elements. For cooling contrast, incorporate a thin layer of vanilla ice cream between the cake and whipped topping, allowing it to freeze before serving. Those seeking additional texture might fold chopped peanuts into the whipped topping or sprinkle them across the finished cake for pleasant crunch.
Keeping Everything Fresh
This cake maintains its quality beautifully when stored properly. Cover tightly with plastic wrap or transfer to an airtight container in the refrigerator for up to five days, where it actually improves as flavors continue melding. For longer storage, freeze individual slices wrapped in plastic wrap and then foil for up to three months. Thaw overnight in the refrigerator for best texture and flavor.
After exploring countless dessert combinations throughout the years, this Chocolate Peanut Butter Poke Cake remains unmatched for its perfect balance of flavor, texture, and impressive presentation-to-effort ratio. What began as a convenience recipe has become our household's definition of comfort dessert—satisfying enough for cravings yet special enough for celebrations. The beauty lies in how simple ingredients and techniques transform into something that tastes far more complex and special than its preparation suggests. This remains the dessert most frequently requested by both family and friends—proof that sometimes the most memorable treats combine beloved flavors in new and exciting formats.
Frequently Asked Questions
- → Can I use a different cake mix flavor?
- Yes! While chocolate pairs perfectly with peanut butter, you could also use yellow cake mix or even vanilla cake mix for a different flavor profile. The peanut butter filling and toppings will still create a delicious dessert.
- → What's the best way to melt peanut butter?
- The easiest way to melt peanut butter is in the microwave. Place it in a microwave-safe bowl and heat in 20-second intervals, stirring between each until smooth and pourable. You can also melt it in a small saucepan over low heat, stirring constantly.
- → Can I make this cake with crunchy peanut butter?
- While creamy peanut butter is recommended for a smooth filling that can easily flow into the holes, you can use crunchy peanut butter if you prefer that texture. Just be aware that the filling might not penetrate the holes as evenly, and you'll have bits of peanuts throughout.
- → How long will this poke cake last in the refrigerator?
- This cake will stay fresh for up to 5 days when stored properly in the refrigerator. Cover it tightly with plastic wrap or store in an airtight container to prevent it from drying out or absorbing other flavors from the fridge.
- → Can I freeze this poke cake?
- Yes, you can freeze this cake for up to 2 months. For best results, freeze it without the whipped topping and candy garnishes. Wrap it tightly in plastic wrap and then aluminum foil. Thaw overnight in the refrigerator and add fresh toppings before serving.