
 Pin it
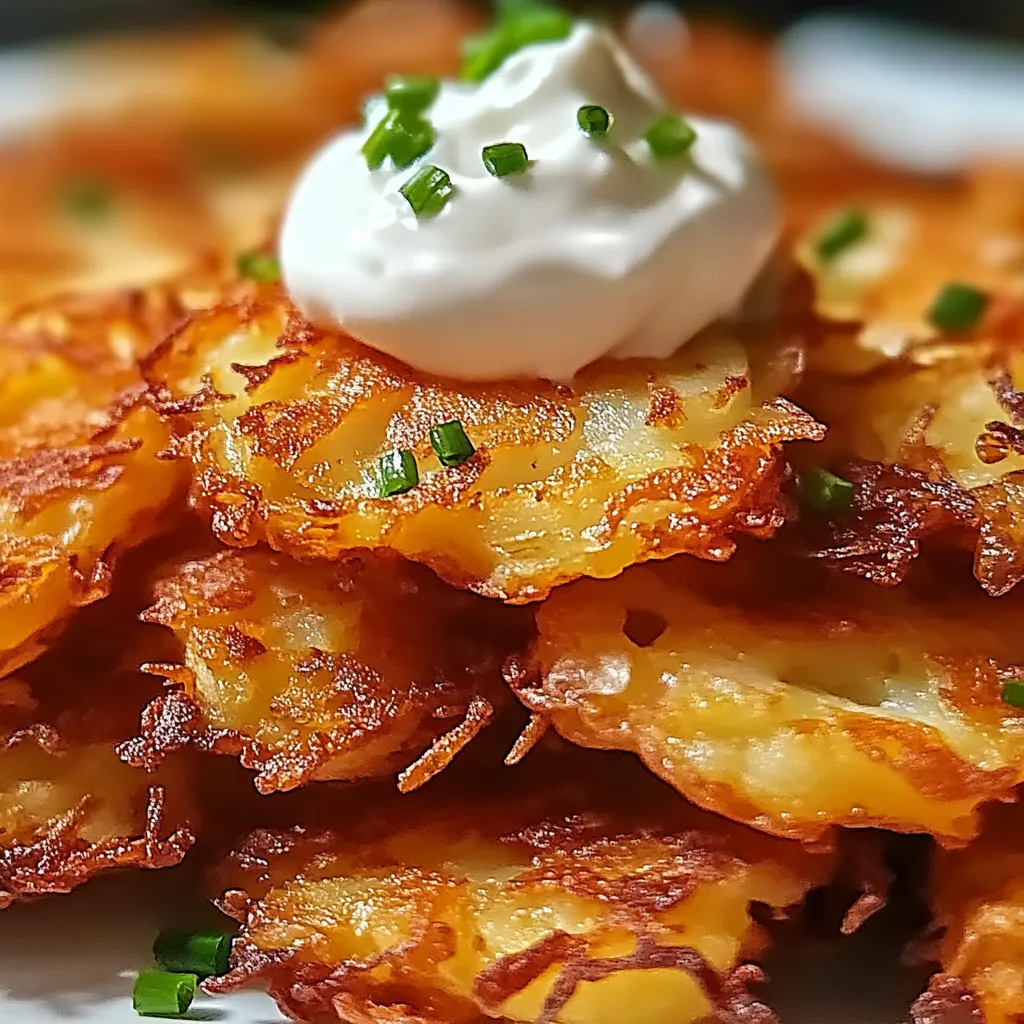
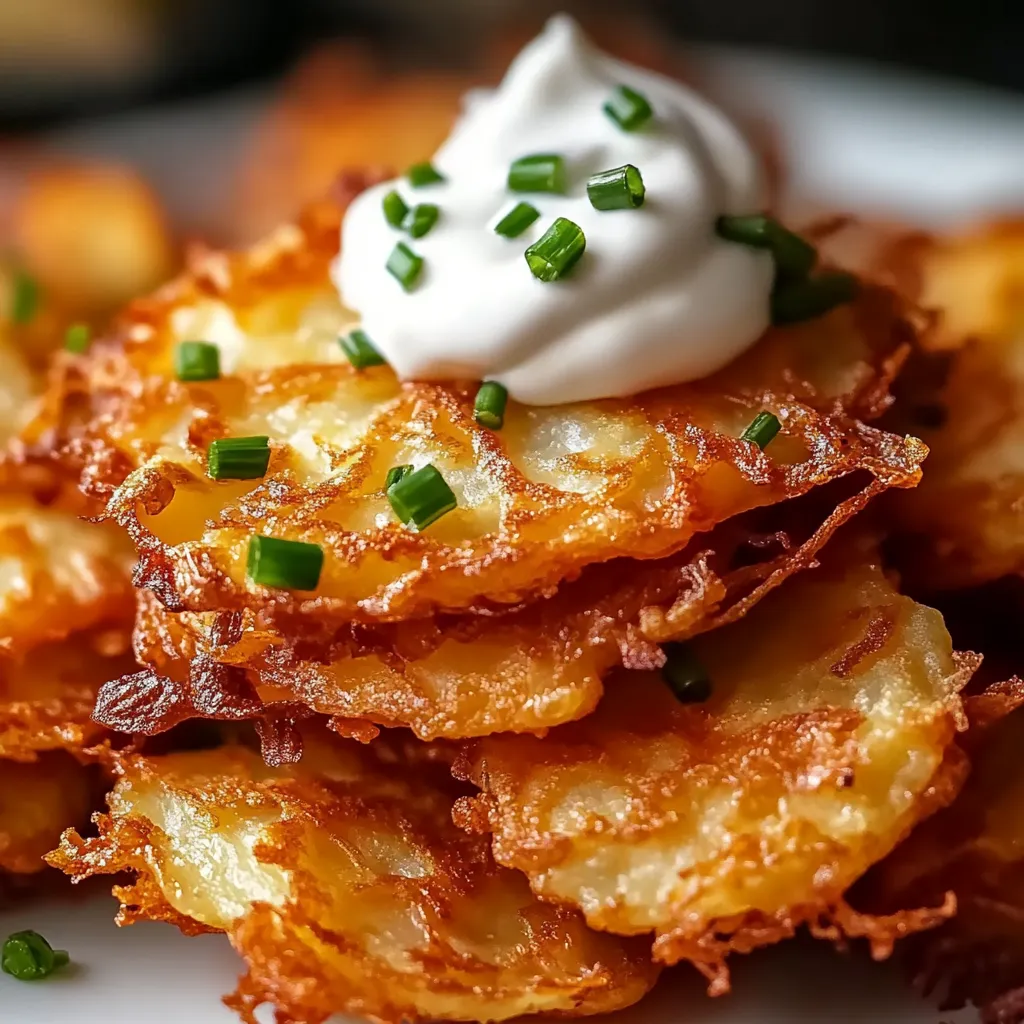
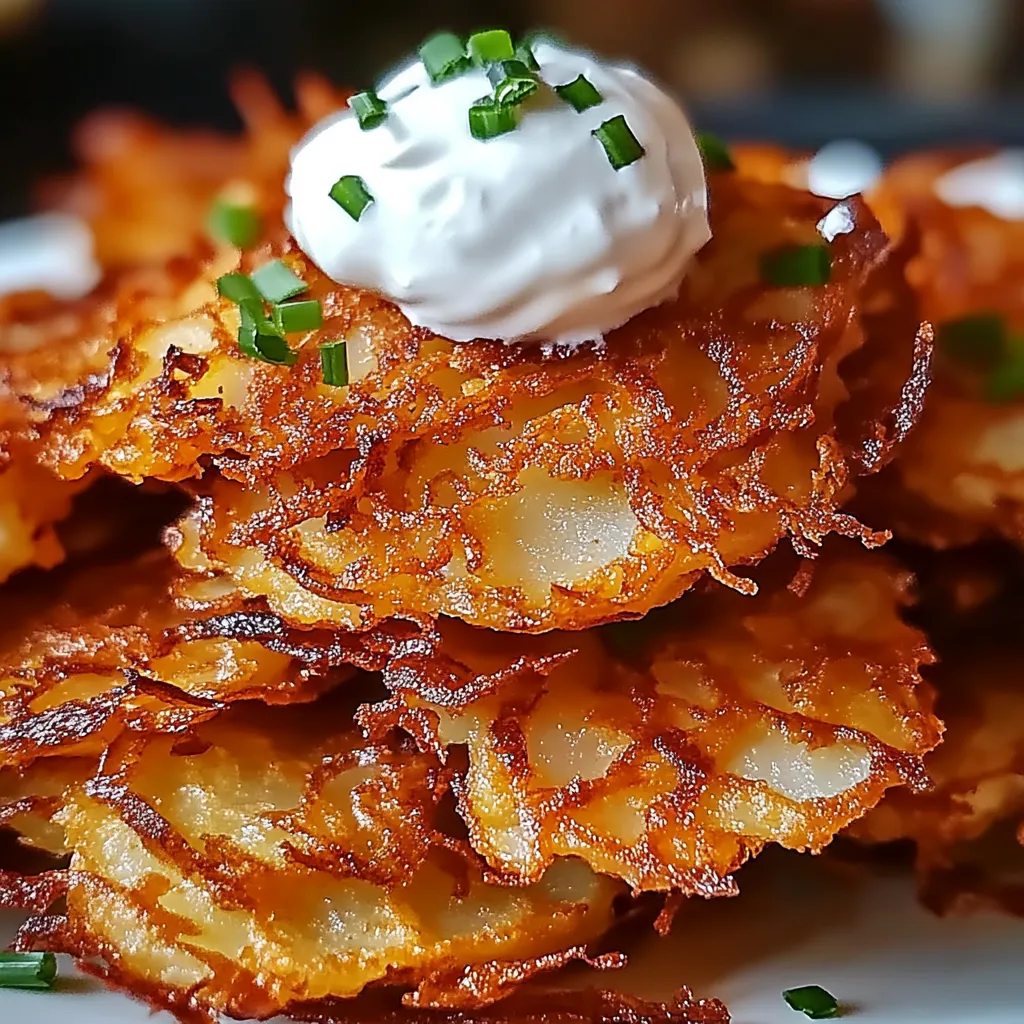
Amish Onion Fritters transform humble onions into crispy, golden discs with savory centers that deliver comforting flavor with every bite. These simple yet satisfying fritters combine finely chopped onions with basic pantry ingredients to create a versatile side dish or snack that perfectly represents Amish cooking traditions. The magic happens when spoonfuls of batter hit hot oil, creating the ideal contrast between crispy exteriors and tender, flavorful interiors that showcase the natural sweetness of cooked onions.
I first encountered these fritters during a visit to Pennsylvania Dutch country, where they appeared alongside homemade apple butter at a small roadside restaurant. After watching my typically vegetable-averse son devour three without hesitation, I knew I needed the recipe. What surprised me most was discovering how something so simple could create such deep satisfaction – the transformation of basic onions into golden, savory bites seems like culinary alchemy. The straightforward preparation method reflects traditional Amish values of simplicity and resourcefulness, creating something extraordinary from ordinary ingredients.
Essential Elements
- Fresh onions: Form the foundation with their natural sweetness and texture. Yellow onions provide classic flavor while sweet varieties like Vidalia offer milder character with increased natural sweetness.
- All-purpose flour: Creates structure that holds fritters together during frying. Unbleached varieties provide slightly better flavor than bleached alternatives.
- Farm-fresh eggs: Act as crucial binding agents while contributing richness. Their protein structure helps fritters maintain integrity during cooking process.
- Baking powder: Provides gentle leavening creating lighter texture throughout. Even small amount makes noticeable difference in final consistency.
- Simple seasonings: Enhance natural onion flavor without overwhelming. Salt and pepper form baseline while optional additions like paprika add subtle complexity.
- Neutral oil: Creates proper frying medium for golden exteriors. Vegetable or canola varieties withstand higher temperatures without smoking or influencing flavor.
Preparation Method
- Prepare perfect onions:
- Peel and finely chop onions creating uniform pieces for even cooking. This careful preparation ensures balanced texture throughout each fritter. Some traditional cooks prefer slicing rather than chopping for different textural experience.
- Create ideal batter:
- Combine dry ingredients ensuring even distribution of leavening agents. Beat eggs with milk separately before gradually incorporating into flour mixture. This technique creates smooth batter without lumps that would create inconsistent cooking.
- Achieve proper consistency:
- Fold prepared onions into batter coating each piece thoroughly. Ideal batter should be thick enough to hold shape when spooned into oil while remaining easily workable. Adjust with additional milk if needed creating perfect dropping consistency.
- Master frying technique:
- Heat oil to proper temperature before beginning cooking process. Test with small amount of batter which should immediately sizzle without smoking. Maintain consistent temperature throughout cooking for golden, crispy results without excess oil absorption.
- Cook with precision:
- Drop spoonfuls of batter into hot oil creating individual fritters of manageable size. Flatten slightly with back of spoon ensuring even thickness for proper cooking. Turn once when edges appear golden allowing complete cooking without burning.
- Drain properly:
- Remove finished fritters to paper towel-lined plate removing excess oil. This critical step prevents finished fritters from becoming greasy while preserving crisp exterior. Serve promptly while still warm for best texture and flavor experience.
 Pin it
My first attempt at these fritters taught me valuable lessons about onion preparation. I skipped draining the chopped onions and ended up with soggy centers despite perfectly golden exteriors. Now I always place chopped onions on paper towels and press gently to remove excess moisture before adding to the batter. I've also discovered that letting the batter rest for about 10 minutes before frying allows the flour to fully hydrate, creating more cohesive fritters. The most surprising discovery was how well these fritters complement both sweet and savory accompaniments – the slight sweetness of cooked onions creates remarkable versatility that works equally well with morning eggs or evening roasts.
Serving Suggestions
Offer with tangy sour cream creating perfect temperature and flavor contrast. Serve alongside apple butter balancing savory notes with subtle sweetness. Consider preparing as breakfast side complementing eggs and bacon with unexpected textural element.
Flavor Variations
Add sharp cheddar cheese creating richer, more indulgent variation. Incorporate fresh herbs like parsley or chives introducing brightness throughout. Mix in grated potato creating heartier fritter reminiscent of traditional potato pancakes.
Storage Solutions
Keep leftover fritters in airtight container in refrigerator maintaining quality up to three days. Reheat in 350°F oven for 5-10 minutes restoring crispness effectively. Avoid microwave reheating which creates soggy rather than crispy texture.
The first time I served these fritters at a family gathering, my brother-in-law who claims to dislike onions had three servings before asking what they contained. There's something about the transformation that happens during cooking – the onions become sweeter, milder, and utterly irresistible even to proclaimed onion skeptics. What makes these fritters truly special isn't complex technique but respect for simple ingredients and traditional methods. The humble onion, often relegated to supporting roles in cooking, becomes the star of a dish that feels simultaneously rustic and sophisticated. I've discovered they're perfect for those occasions when you want to create something memorable that still feels accessible – they consistently earn enthusiastic reactions while using ingredients most kitchens already have on hand.
 Pin it
Frequently Asked Questions
- → Why is it called 'Impossible' Apple Pie?
- It's called 'impossible' because it magically forms its own crust during baking, eliminating the need to make a traditional pie crust. The batter separates as it bakes, creating different layers.
- → What type of apples work best for this recipe?
- Firm, tart apples like Granny Smith work well because they hold their shape and provide a nice contrast to the sweet batter. Honeycrisp, Braeburn, or Pink Lady are also good options.
- → Can I add other spices to this pie?
- Absolutely! Try adding nutmeg, allspice, cardamom, or ginger along with the cinnamon for more complex flavors. A pinch of cloves can add warmth too.
- → Do I need to peel the apples?
- It's a matter of preference. Leaving the peels on adds color, texture, and nutrients, but some prefer the smoother texture of peeled apples. The recipe works either way.
- → Can I make this with other fruits?
- Yes! Try pears, peaches, or a mix of berries. Each fruit will give a different moisture level, so you might need to adjust baking time slightly.
- → How do I know when it's done baking?
- The top should be golden brown, and a toothpick inserted into the cake part (not through an apple) should come out clean. The center should be set and not jiggly.