
 Pin it
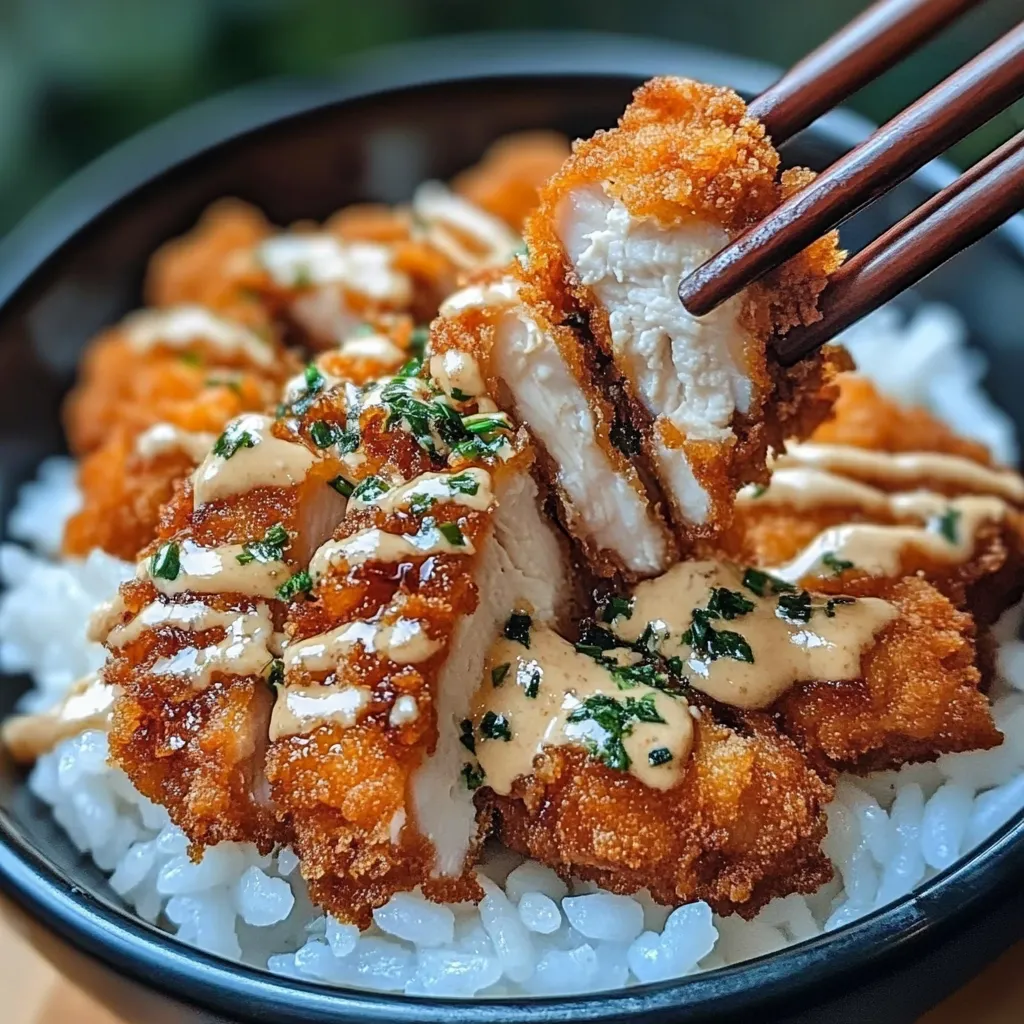
Golden-brown, perfectly crisp cutlets with juicy, tender centers rest atop a bed of steaming white rice, all drizzled with a sweet-tangy sauce that ties every element together in perfect harmony. Each bite delivers an irresistible textural contrast – the satisfying crunch of panko breading giving way to succulent meat, complemented by fluffy rice that soaks up the rich, umami-packed tonkatsu sauce. This Japanese comfort classic transforms simple ingredients into a deeply satisfying meal that feels both homey and special, bringing restaurant-quality flavors to your table with surprising ease.
The first time I made these katsu bowls for my family, my usually picky son went completely silent, focused entirely on his plate. After cleaning every last grain of rice, he looked up and simply said, "Can we have this again tomorrow?" There's something magical about that perfect crunch contrasting with tender meat and savory sauce that appeals to everyone at the table. Now it's become our Friday night tradition – a special treat we all look forward to after a long week.
Flavor Symphony
- Panko breadcrumbs: The secret to that signature light, airy crunch that sets katsu apart from other breaded cutlets; these Japanese-style breadcrumbs create a delicate, crispy coating unlike any other
- Boneless cutlets: Whether you choose chicken breast or pork loin, quality protein provides the foundation; pounding to even thickness ensures perfect cooking
- Short-grain rice: Creates the ideal base with its slightly sticky texture that catches every drop of sauce; Japanese varieties offer the perfect chew
- Tonkatsu sauce: This sweet-savory condiment brings depth and complexity; the perfect balance of fruitiness, umami and tanginess ties everything together
- Neutral frying oil: Allows the natural flavors to shine while creating that perfect golden exterior; choose varieties with high smoke points
- Fresh garnishes: Bright elements like green onions or shredded cabbage add freshness and color that balances the richness of the fried elements
- Eggs and flour: Create the crucial binding layers that ensure perfect breading adhesion for maximum crunch
Crispy Creation
- Prepare perfect cutlets:
- Start with 4 boneless, skinless chicken breasts or pork loin cutlets. Place each between plastic wrap and gently pound to an even ½-inch thickness using a meat mallet or heavy pan. This crucial step ensures quick, even cooking and tender results. Season both sides generously with salt and freshly ground black pepper. The uniform thickness allows for perfect cooking timing – thin enough to cook quickly but thick enough to remain juicy.
- Create the coating station:
- Set up a breading assembly line with three shallow bowls: one with ½ cup all-purpose flour, another with 2 beaten eggs, and a third with 2 cups panko breadcrumbs. Working one at a time, dredge each cutlet in flour, shaking off excess, then dip into the egg mixture, allowing extra to drip off. Finally, press firmly into the panko, ensuring an even coating on both sides. This three-step process creates the perfect foundation for that signature katsu crunch – the flour helps the egg adhere, and the egg helps the breadcrumbs stick.
- Master the fry:
- Heat ½ inch of vegetable or canola oil in a large, heavy-bottomed skillet over medium-high heat until it reaches 350°F (175°C). A cooking thermometer helps, but you can also test by dropping in a panko crumb – it should sizzle immediately without burning. Carefully add the breaded cutlets (working in batches to avoid overcrowding) and fry for 3-4 minutes per side until deeply golden brown and crisp. The internal temperature should reach 165°F (74°C) for chicken or 145°F (63°C) for pork. Transfer to a wire rack set over paper towels to drain excess oil while maintaining that perfect crispness.
- Craft the signature sauce:
- While the cutlets rest, prepare the tonkatsu sauce by whisking together ¼ cup ketchup, 2 tablespoons Worcestershire sauce, 1 tablespoon soy sauce, and 1 tablespoon sugar in a small bowl. This balanced blend creates the perfect sweet-tangy glaze that's a hallmark of katsu dishes. For deeper flavor, add a teaspoon of grated fresh ginger or a dash of garlic powder. The sauce can be made ahead and stored in the refrigerator for up to a week, allowing the flavors to meld even more beautifully.
- Assemble with care:
- Place a generous portion of hot steamed rice in each bowl, creating a foundation for your katsu. Slice the crispy cutlets into ½-inch strips against the grain for the most tender bite. Arrange these artfully over the rice, then drizzle with the tonkatsu sauce – be generous, as the sauce is a key flavor component. Finish with thinly sliced green onions, a sprinkle of sesame seeds, or traditional shredded cabbage for freshness and crunch. Serve immediately while the contrast between hot, crispy katsu and fresh garnishes is at its peak.
 Pin it
My Japanese grandmother would always insist on two things when making katsu: never crowd the pan, and always use fresh oil. "Patience makes perfect katsu," she'd say while demonstrating how to fry just one or two pieces at a time to maintain the proper oil temperature. The first time I rushed and added too many cutlets at once, the temperature dropped dramatically, resulting in soggy, oil-laden coating instead of that signature light crunch. Now I follow her wisdom, taking my time with each batch, and the results are consistently perfect – golden, crisp exteriors protecting juicy, tender meat inside.
Perfect Pairings
These versatile katsu bowls welcome thoughtfully chosen accompaniments that enhance the Japanese dining experience. Serve alongside a small bowl of miso soup for a traditional start. A simple cucumber and wakame seaweed salad dressed with rice vinegar provides refreshing contrast to the rich katsu. For a complete meal, add Japanese pickles (tsukemono) on the side – their tangy crunch balances the dish beautifully. Green tea makes an excellent beverage pairing, its slight bitterness cutting through the richness, or try a crisp Japanese lager for a more indulgent option.
Creative Variations
The basic recipe welcomes thoughtful adaptations to suit different tastes and dietary needs. Create a chicken katsu curry by serving the crispy cutlets with Japanese curry sauce instead of tonkatsu sauce. For a lighter version, try an air fryer katsu – spray the breaded cutlets with oil and air fry at 390°F for about 10-12 minutes, flipping halfway through. Vegetarians might enjoy using thick slices of firm tofu or eggplant in place of meat. For a nutritional boost, try using half white rice and half cauliflower rice as the base. Add a soft-boiled egg with a jammy center for an extra layer of richness that complements the crispy katsu beautifully.
Storage Wisdom
While katsu is at its absolute best fresh from the fryer, proper storage techniques can maintain quality for later enjoyment. Store cooled cutlets separately from rice in airtight containers in the refrigerator for up to 3 days. To reheat, avoid the microwave which will soften the crispy coating. Instead, place katsu on a wire rack over a baking sheet in a 350°F oven for 7-10 minutes until heated through and re-crisped. The tonkatsu sauce can be refrigerated separately for up to two weeks, developing even deeper flavor over time. For meal prep, you can bread the raw cutlets, freeze them on a baking sheet until solid, then transfer to freezer bags where they'll keep for up to a month – fry directly from frozen, adding 1-2 minutes to the cooking time.
These Japanese Katsu Bowls represent the perfect balance of comforting familiarity and exciting flavors. They showcase how relatively simple cooking techniques can transform everyday ingredients into something truly special when executed with care. Whether you're looking to expand your culinary horizons or simply craving a deeply satisfying meal, these crispy, saucy bowls deliver restaurant-quality results that make any dinner feel like a celebration.
 Pin it
Frequently Asked Questions
- → What's the difference between chicken katsu and tonkatsu?
- The preparation method is identical, but tonkatsu is made with pork cutlets (typically pork loin or tenderloin), while chicken katsu uses chicken breasts or thighs. Both are breaded with panko, fried until crispy, and served with the same tonkatsu sauce.
- → Can I make this dish ahead of time?
- The sauce can be made several days ahead and stored in the refrigerator. The rice can also be cooked in advance and reheated. For best results, however, the cutlets should be breaded and fried just before serving to maintain their crispy texture.
- → What sides go well with katsu bowls?
- Traditional Japanese sides include shredded cabbage salad, miso soup, pickled vegetables (tsukemono), or a simple cucumber salad. For a complete meal, you could also add steamed edamame or a small side of seaweed salad.
- → Can I bake the cutlets instead of frying them?
- Yes! For a healthier option, place the breaded cutlets on a wire rack over a baking sheet and spray or brush lightly with oil. Bake at 400°F (200°C) for 15-20 minutes for chicken or 12-15 minutes for pork until golden and cooked through.
- → What can I substitute for panko breadcrumbs?
- Regular breadcrumbs will work, but the texture won't be as light and crispy. For a gluten-free option, try gluten-free panko or crushed rice Chex cereal. For extra crunch, you can also use crushed cornflakes.
- → Is there a vegetarian version of katsu?
- Absolutely! You can make delicious katsu using firm tofu (pressed to remove excess moisture), tempeh, or even thick slices of eggplant, sweet potato, or cauliflower steaks. The breading method and sauce remain the same.