
 Pin it
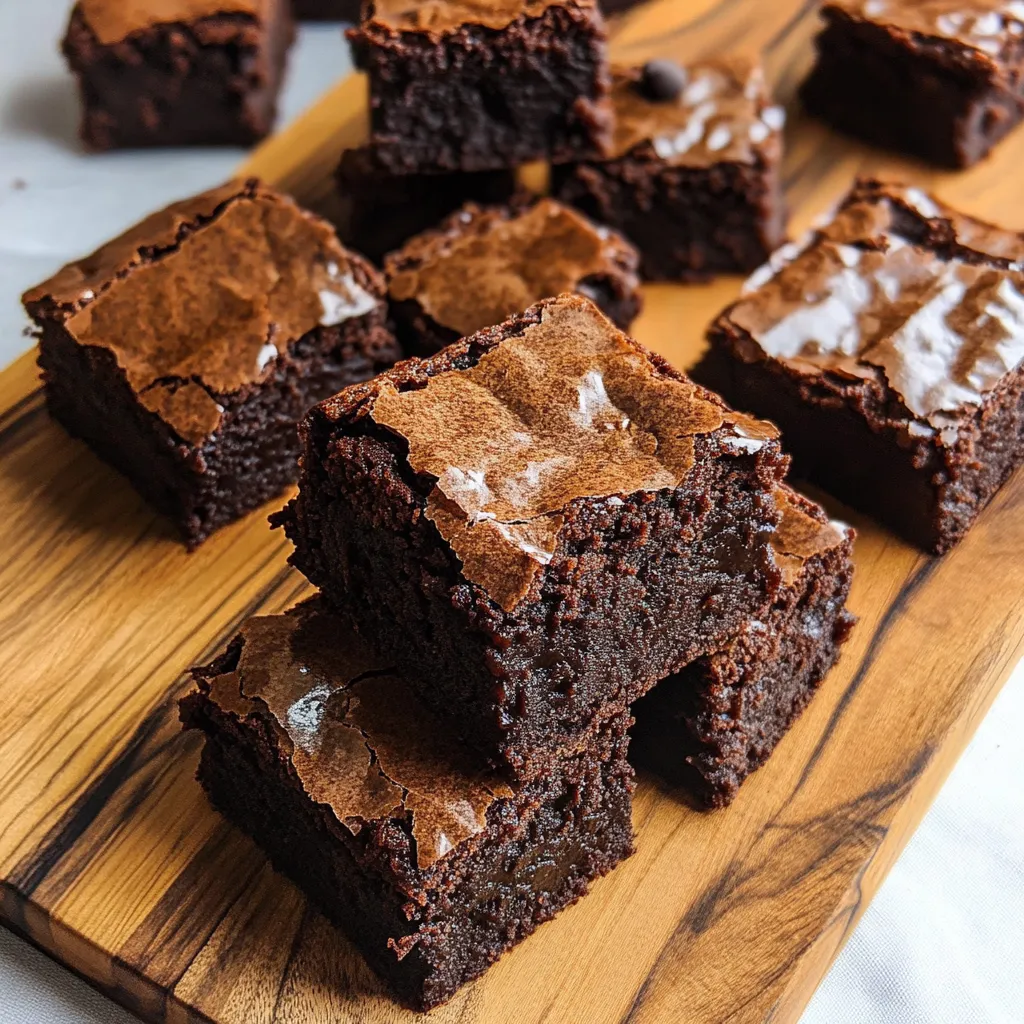
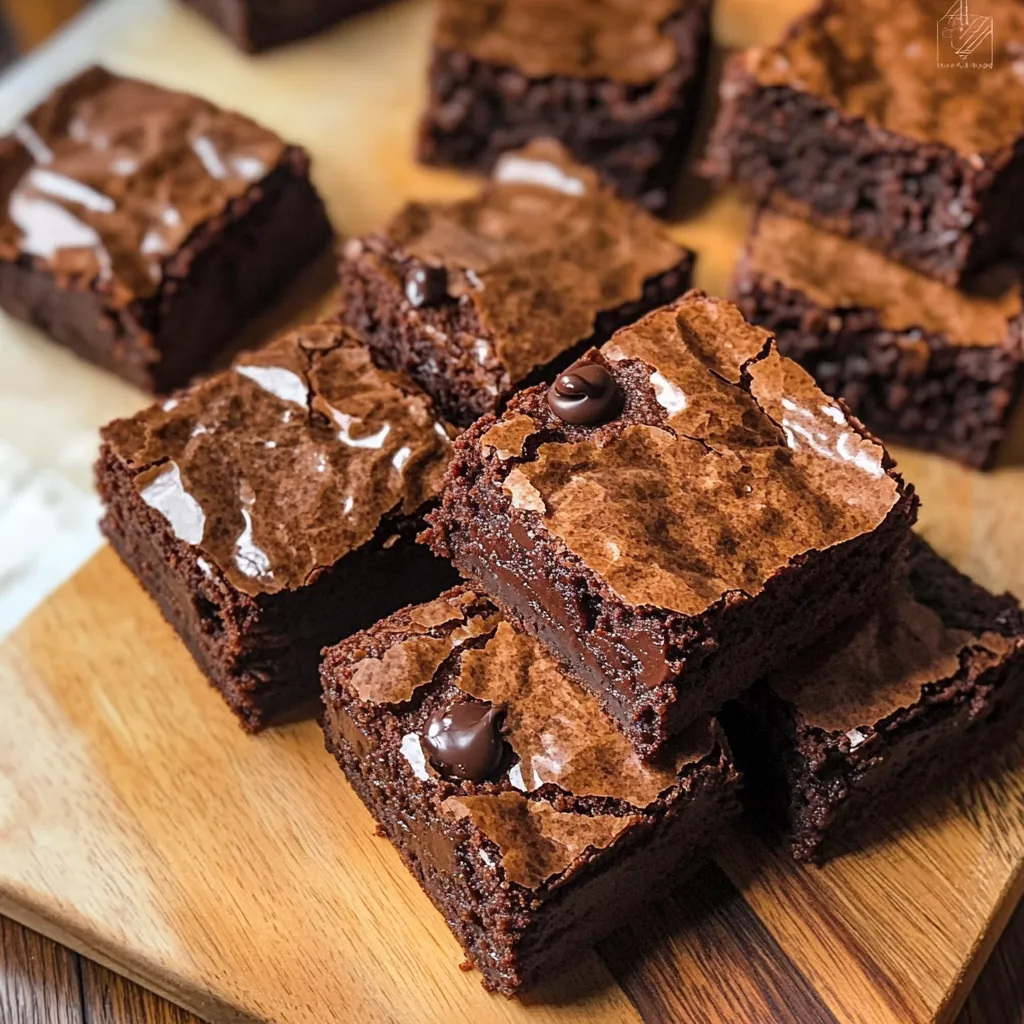
Mochi Brownies deliver an extraordinary textural experience that transforms the familiar chocolate treat into something truly memorable. These gluten-free delights combine the rich, intense flavor of traditional brownies with the uniquely chewy consistency of Japanese mochi, creating a dessert that satisfies multiple cravings at once. Each bite offers contrasting sensations – a crispy, crackly top giving way to a fudgy, stretchy center that pulls slightly as you bite into it, making these brownies an irresistible conversation starter at any gathering.
I discovered mochi brownies at a friend's dinner party and immediately asked for the recipe after my first bite. The unique texture had me completely fascinated – I had never experienced brownies with such a satisfying chew! When I brought them to my family reunion, they disappeared faster than any other dessert on the table. Even my chocolate-averse aunt couldn't resist coming back for seconds.
Essential Ingredients
- Glutinous rice flour (1½ cups): Creates that signature mochi chewiness that makes these brownies special
- Unsweetened cocoa powder (½ cup): Provides rich chocolate flavor and distinctive color
- Dark chocolate (6 oz, chopped): Adds depth and intense chocolate complexity
- Unsalted butter (½ cup): Creates richness and helps develop the perfect brownie texture
- Granulated sugar (1 cup): Balances the chocolate bitterness while helping create that crackly top
- Eggs (3 large, room temperature): Binds the ingredients while contributing to the fudgy texture
- Milk (½ cup): Helps the rice flour hydrate properly for the perfect chewy consistency
- Vanilla extract (1 teaspoon): Enhances and rounds out the chocolate flavors
- Baking powder (1 teaspoon): Provides just enough lift without making them cakey
- Salt (¼ teaspoon): Heightens all flavors and balances the sweetness
- Chocolate chunks (½ cup): Creates pockets of melted chocolate throughout for texture contrast
Brownie Creation
- Chocolate Melting:
- Combine chopped dark chocolate and butter in a heatproof bowl set over simmering water, ensuring the bowl doesn't touch the water. Stir occasionally until completely melted and glossy, then remove from heat and allow to cool slightly. This gentle melting method prevents the chocolate from seizing or burning, preserving its smooth texture and rich flavor. The slight cooling prevents the hot chocolate mixture from cooking the eggs when combined later.
- Wet Ingredient Preparation:
- Whisk eggs in a large bowl until slightly frothy before adding vanilla extract and milk, continuing to mix until well combined. The room temperature eggs blend more easily, creating a smoother batter. Gradually pour the slightly cooled chocolate-butter mixture into the egg mixture while continuously stirring. This careful incorporation prevents the warm chocolate from cooking the eggs while ensuring a homogeneous mixture with no streaks or separation.
- Dry Component Mixing:
- In a separate bowl, whisk together glutinous rice flour, cocoa powder, sugar, baking powder, and salt until evenly distributed. This thorough mixing ensures no pockets of any single ingredient remain, which could affect the texture and flavor of the finished brownies. The glutinous rice flour is the key to achieving that distinctive mochi texture – resist the urge to substitute regular flour as it won't deliver the same chewy result.
- Gentle Combination:
- Pour the wet chocolate mixture into the dry ingredients, folding gently but thoroughly with a spatula until fully incorporated. The batter will be thicker than traditional brownie batter – this is exactly what you want for that perfect mochi texture. For ultimate smoothness, pass the batter through a fine-mesh sieve while transferring it to the prepared baking pan. This extra step removes any tiny lumps of cocoa or flour that might remain.
- Thoughtful Baking:
- Pour the batter into a parchment-lined 8×8-inch baking pan, spreading it evenly to the corners. Sprinkle chocolate chunks across the surface, pressing them slightly into the batter. Bake in a preheated 320°F oven for 55-60 minutes, which is longer than traditional brownies. This lower temperature and longer baking time allows the rice flour to properly cook through while developing that special mochi texture. The brownies are done when the edges pull away slightly from the pan and a toothpick inserted comes out mostly clean with a few moist crumbs.
- Patient Cooling:
- Allow the brownies to cool completely in the pan before removing and cutting. This cooling period is essential for the texture to set properly – cutting too soon will result in messy squares and won't allow the full chewy texture to develop. For the cleanest cuts, oil your knife between slices or run it under hot water and wipe dry before each cut. The brownies will continue to develop flavor and texture as they cool, becoming even more delicious.
 Pin it
My grandmother first introduced me to mochi during a trip to Japan when I was young. The stretchy, chewy texture fascinated me, and I've loved it ever since. Years later, when I discovered I could combine that beloved texture with my favorite chocolate treat, it felt like culinary magic. These brownies remind me of that special trip with my grandmother, where she taught me that food is most exciting when it surprises you with unexpected textures and flavors. Whenever I serve these brownies, I think of her delight in introducing me to new food experiences.
Perfect Pairings
Serve these unique brownies with a scoop of vanilla ice cream, allowing the contrasting temperatures to enhance the chewy texture. For special occasions, drizzle plates with matcha sauce for an authentic Japanese touch that complements the brownie's flavor profile. These brownies also pair wonderfully with coffee, particularly a medium roast that brings out the chocolate notes without overwhelming them. For an extra special treat, serve alongside fresh berries to balance the rich chocolate with bright, fresh flavors.
Creative Variations
Transform these brownies by incorporating matcha powder into the batter for a green tea twist that nods to their Japanese inspiration. For a nutty variation, mix in toasted black sesame seeds which pair beautifully with the chewy texture. Create a coconut version by replacing some of the milk with coconut milk and sprinkling toasted coconut flakes on top before baking. For special celebrations, add a layer of red bean paste in the middle of the batter before baking for an authentic Asian fusion dessert experience.
Storage Solutions
Store these brownies in an airtight container at room temperature for up to three days, separating layers with parchment paper to prevent sticking. For longer storage, refrigerate for up to a week, though this may slightly firm the texture. To revive refrigerated brownies, allow them to come to room temperature or warm briefly in the microwave for 10-15 seconds. These brownies also freeze beautifully for up to three months when wrapped tightly in plastic wrap and placed in a freezer bag.
I've experimented with countless dessert recipes throughout my baking journey, but these mochi brownies remain one of my proudest creations. There's something magical about watching people take their first bite – that moment of surprise when they encounter the unexpected chewiness is priceless. What begins as curiosity quickly turns to delight as they experience how the familiar comfort of chocolate brownies is transformed by this unique texture. While they might seem unusual to those unfamiliar with mochi, I've never met anyone who wasn't immediately won over by these cross-cultural treats. They represent what I love most about baking – the ability to combine traditions and create something new that brings joy to the table.
 Pin it
Frequently Asked Questions
- → What is glutinous rice flour?
- Glutinous rice flour (also called sweet rice flour or mochiko) is made from sticky rice. Despite its name, it's naturally gluten-free and gives these brownies their distinctive chewy texture.
- → Can I substitute regular flour?
- No, regular wheat flour won't work in this recipe. The glutinous rice flour is essential for creating the unique mochi-like texture that makes these brownies special.
- → Why do these take so long to bake?
- Mochi brownies are very moist and dense compared to traditional brownies. The longer baking time ensures they're fully cooked through while maintaining their chewy texture.
- → How do I know when they're done?
- The top should be set and slightly cracked, and a toothpick inserted will come out with a few moist crumbs (not wet batter). The edges may pull away slightly from the pan.
- → How should I store these brownies?
- Store in an airtight container at room temperature for up to 3 days, or refrigerate for up to a week. They can also be frozen for up to 3 months.