
 Pin it
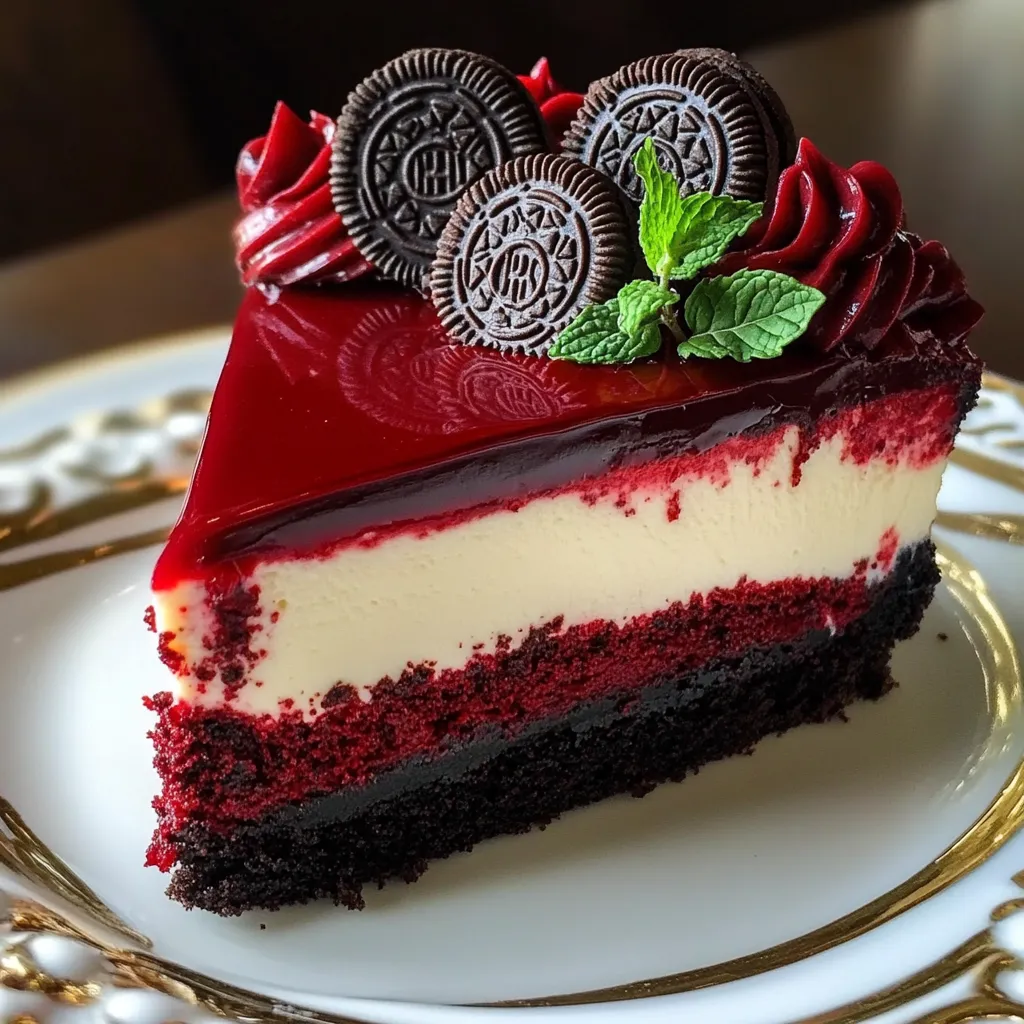
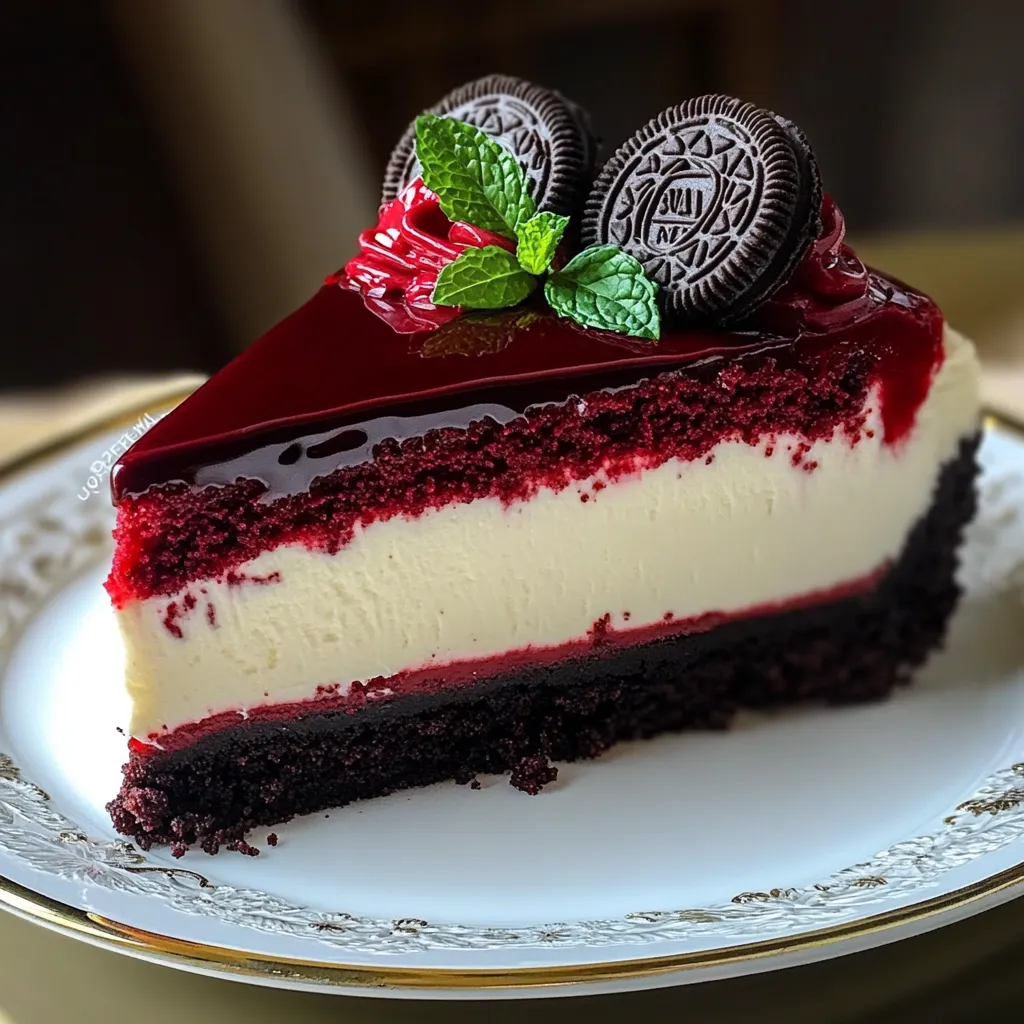
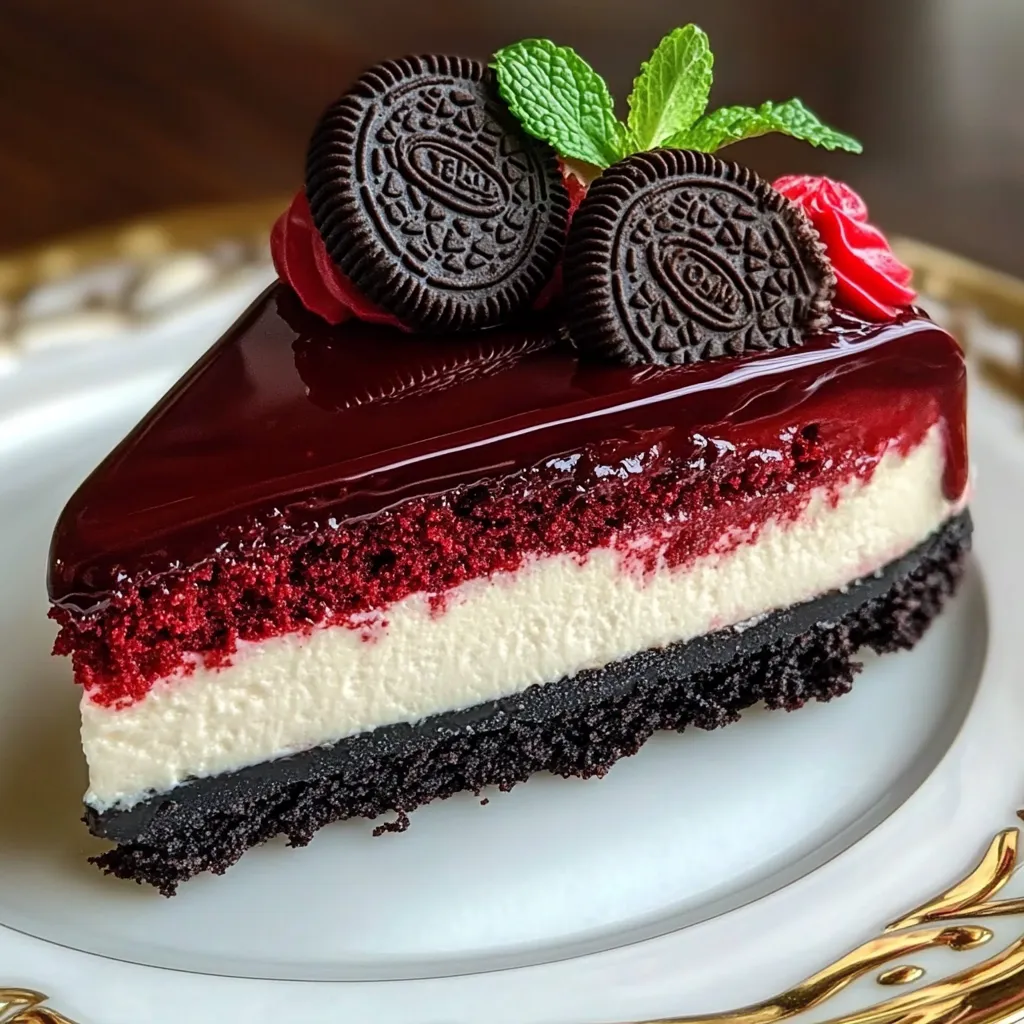
Red velvet oreo cheesecake marries two classic flavors creating an impressive dessert masterpiece worthy of celebration. This luxurious creation features a moist red velvet cake base crowned with creamy oreo-studded cheesecake and finished with silky chocolate ganache. Each forkful delivers multiple flavor experiences simultaneously, from the subtle cocoa notes of red velvet to the distinctive cookie crunch mixed throughout velvety cheesecake. The striking visual appeal makes this showstopper instantly recognizable with its vibrant crimson base contrasting against the cream-flecked filling.
I discovered this recipe during holiday season experimentation last year when my usual cheesecake seemed too predictable. My teenage nephews, notoriously picky eaters, devoured their slices in record time and immediately requested this become our new family tradition. The balance between rich cheesecake and subtly chocolatey red velvet satisfied everyone's sweet cravings perfectly.
Premium Ingredients
- All-purpose flour: (1½ cups) for the red velvet foundation - The protein content creates ideal cake structure supporting the cheesecake layer
- Unsweetened cocoa powder: (2 teaspoons) - Provides subtle chocolate undertones characteristic of authentic red velvet
- Unsalted butter: (½ cup) room temperature - Creates air pockets during creaming for proper leavening
- Granulated sugar: (1 cup for cake, 1 cup for cheesecake) - Balances cocoa bitterness while maintaining proper sweetness
- Sour cream: (½ cup for cake, 1 cup for cheesecake) - Adds moisture and tanginess countering the sweetness
- Vegetable oil: (¼ cup) - Ensures longer-lasting moisture retention compared to butter alone
- Vanilla extract: (2 teaspoons for cake, 1 tablespoon for cheesecake) - Enhances depth while complementing chocolate notes
- Eggs: (2 for cake, 3 plus yolk for cheesecake) - Provide structure and richness essential for proper texture
- Red food coloring: (4 teaspoons) - Creates the signature vibrant color contrasting beautifully with filling
- Buttermilk: (⅔ cup) - Activates leavening agents while adding tenderness to the cake crumb
- Baking soda: (1 teaspoon) and vinegar: (1 teaspoon) - Creates reaction essential for proper rise
- Oreos: (10 crushed wafers for crust, 15 chopped for filling) - Delivers distinctive cookies and cream flavor throughout
- Full-fat cream cheese: (24 ounces) - Provides proper structure impossible with reduced-fat varieties
- Cornstarch: (1 tablespoon) - Stabilizes filling preventing cracking during baking process
- Dark chocolate chips: (1 cup) and heavy cream: (½ cup) - Creates luxurious ganache topping
Preparation Method
- Cake Foundation:
- Preheat oven to 350°F. Prepare springform pan and cake pan with parchment and nonstick spray. Whisk flour, cocoa powder and salt creating dry mixture. Cream butter with sugar until pale and fluffy. Mix sour cream, oil, vanilla, eggs and food coloring into butter mixture. Alternate adding dry ingredients with buttermilk creating smooth batter. Combine baking soda with vinegar separately then immediately add to batter. Divide between prepared pans baking until centers spring back when touched. Cool completely before proceeding.
- Cheesecake Creation:
- Reduce oven temperature to 300°F. Process oreo wafers creating fine crumbs. Beat cream cheese until completely smooth adding reserved cookie filling, sugar and cornstarch. Incorporate sour cream and vanilla ensuring complete integration. Add eggs and yolk individually mixing just until combined. Fold crushed cookies and chopped oreos throughout batter. Pour mixture over cooled cake base inside springform pan. Create water bath by placing wrapped springform inside larger pan filled with hot water. Bake until center jiggles slightly when pan moved gently. Turn off oven leaving door cracked allowing gradual cooling. Refrigerate overnight ensuring complete setting.
- Finishing Elements:
- Combine chocolate chips with heated heavy cream allowing brief melting before stirring into glossy ganache. Pour over thoroughly chilled cheesecake spreading evenly. Crumble reserved red velvet cake pressing gently around sides creating decorative border. Pipe cream cheese frosting decoratively around perimeter positioning chopped oreos between piping. Chill until garnishes set completely before serving.
My grandmother taught me the importance of patience with layered desserts like this one. During my first attempt years ago, I rushed the cooling process resulting in a collapsed center. Now I understand that proper temperature management between steps creates the structural integrity needed for professional results. This recipe rewards patience with spectacular presentation and flavor development.
Ideal Accompaniments
Complete this extraordinary dessert experience with thoughtful pairings enhancing flavor complexity. Fresh berries particularly strawberries provide bright acidity cutting through richness. Strong coffee especially espresso offers complementary bitterness balancing sweetness perfectly. Vanilla bean ice cream creates temperature contrast while amplifying creamy elements throughout each bite.
Recipe Variations
Transform this classic into personalized creations meeting various dietary preferences or flavor desires. White chocolate version substitutes white chocolate chips into both cake and ganache. Peppermint holiday adaptation incorporates crushed candy canes replacing some oreos creating seasonal appeal. Gluten sensitive option replaces regular oreos with gluten-free varieties while using proper flour substitution in cake base.
Preservation Technique
Maintain optimal freshness storing covered cheesecake in refrigerator up to five days. Freeze individual slices wrapped securely for convenient single servings lasting three months. Thaw frozen portions overnight in refrigerator never at room temperature protecting delicate texture. Restore freshness by allowing refrigerated slices twenty minutes at room temperature before serving.
This magnificent red velvet oreo cheesecake represents my signature dinner party finale after years of dessert experimentation. I've watched countless friends experience that moment of silent appreciation with their first bite, eyes closing involuntarily. The visual impact alone creates anticipation, but the flavor complexity delivers beyond expectations. While seemingly complex, the methodical preparation process remains surprisingly manageable when broken into stages. For celebration-worthy desserts that create lasting memories, this recipe consistently delivers both visual and flavor perfection.
Frequently Asked Questions
- → Can I make this cheesecake without a water bath?
- While a water bath helps prevent cracks and ensures even cooking, you can skip it. If you do, bake at 325°F instead and expect some surface cracking, which you can hide under the ganache topping.
- → How far in advance can I make this cheesecake?
- This cheesecake can be made up to 3 days ahead and stored covered in the refrigerator. You can also freeze it (without decorations) for up to 2 months - just thaw overnight in the refrigerator before decorating and serving.
- → Why do the ingredients need to be at room temperature?
- Room temperature ingredients blend together more smoothly and evenly, resulting in a creamier cheesecake with fewer lumps. Cold ingredients can cause the batter to curdle or become lumpy.
- → Can I use a different size pan?
- A 9-inch springform pan is ideal, but you can use a 10-inch pan if needed (reduce baking time by about 10 minutes). Avoid using a smaller pan as it may overflow during baking.
- → How do I know when the cheesecake is done baking?
- The cheesecake is done when the edges are set but the center still has a slight jiggle (like Jell-O). The center will continue to cook and set as it cools. Overbaking can cause the cheesecake to crack and become dry.