
 Pin it
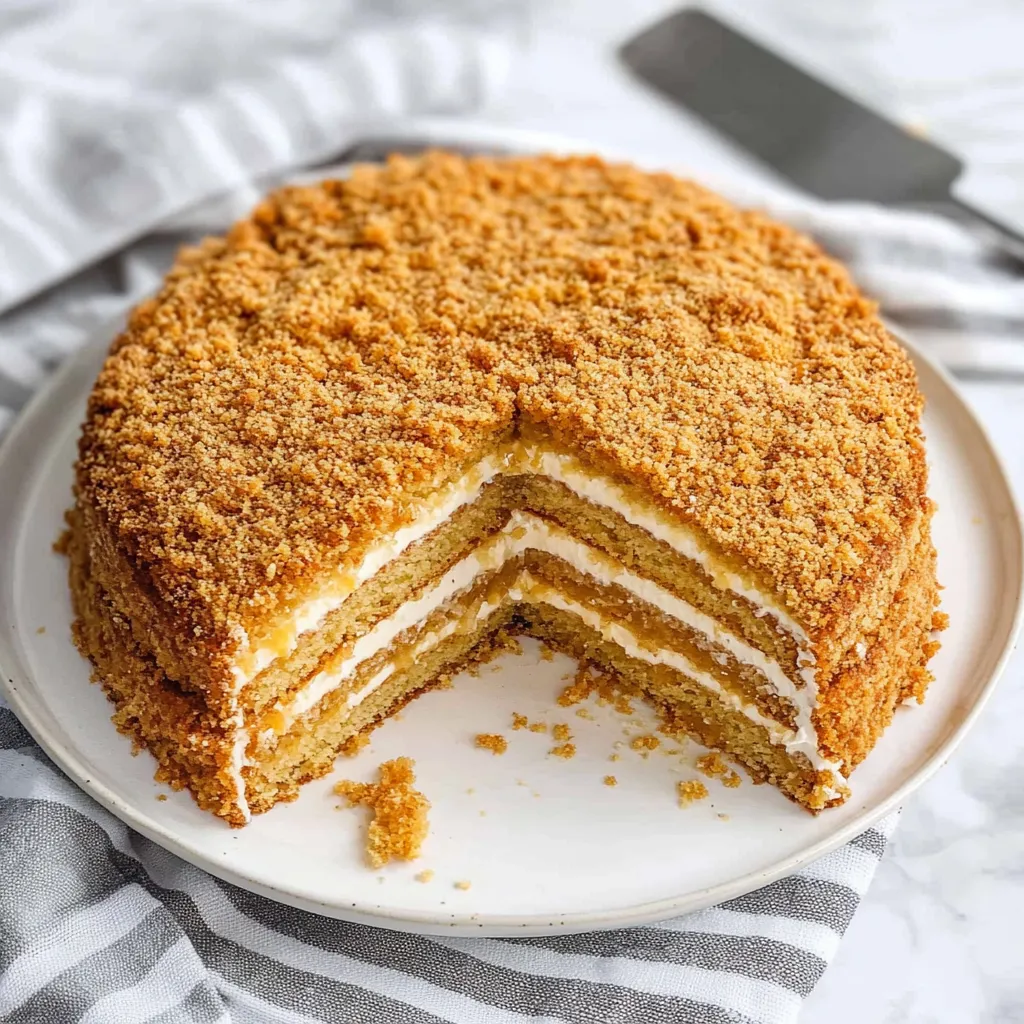
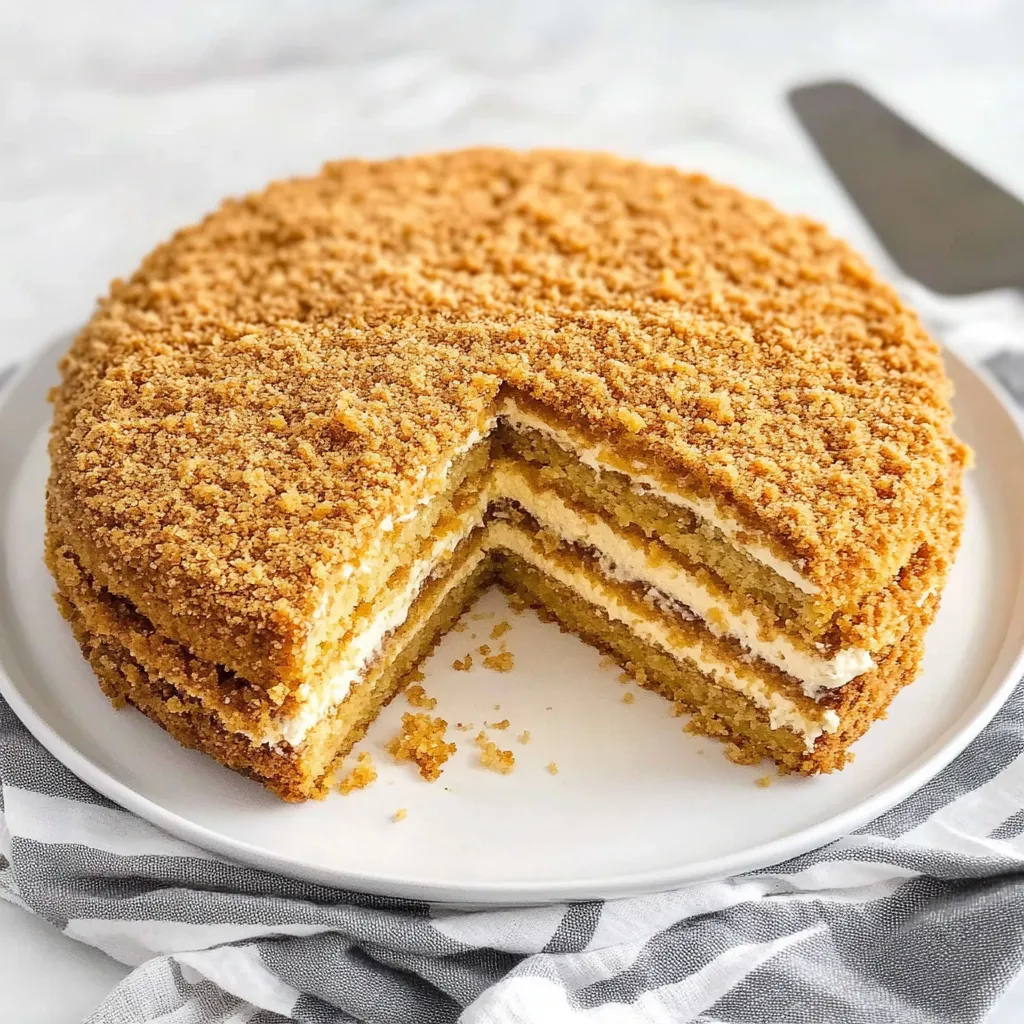
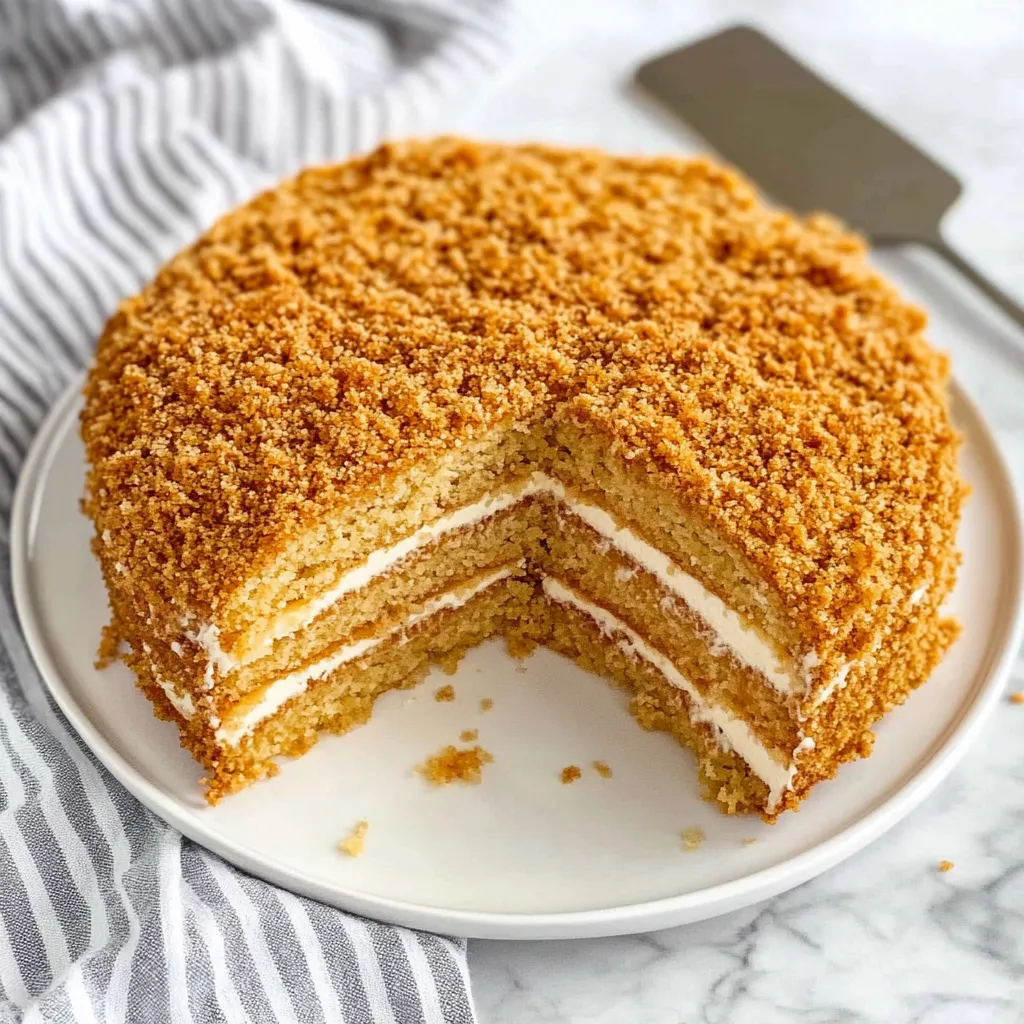
Delicate honey-infused layers unite with tangy cream filling in this enchanting Eastern European dessert. This traditional Medovik features thin, caramelized sponge cake layers that melt in your mouth once they've absorbed the luscious sour cream frosting. The aromatic honey flavor permeates every bite, creating a sophisticated dessert that isn't overly sweet but completely satisfying. Each slice reveals beautiful golden layers wrapped in creamy richness, topped with a dusting of cake crumbs for rustic elegance.
I first attempted this recipe after my Ukrainian husband mentioned missing his grandmother's honey cake. Following traditional methods seemed intimidating until discovering this simplified sponge cake approach. The first time I served it, my husband grew quiet as he took his first bite. When he finally looked up, his eyes were slightly misty as he told me it tasted just like home. Now this cake appears at every family celebration, connecting generations through the timeless combination of honey and cream.
Flavor Building Ingredients
- Raw honey: Forms the foundation of authentic Medovik flavor without refined sugar. Choose runny clover honey for mild sweetness or wild honey for more complex notes.
- Large eggs: Create structure and richness in the delicate sponge layers. Room temperature eggs incorporate more efficiently for proper volume.
- All-purpose flour: Provides just enough structure while keeping layers tender. Measure carefully to avoid tough texture in finished cake.
- Baking soda: Activated with vinegar following Eastern European tradition to eliminate any bitter aftertaste. This reaction creates proper rise and texture.
- White vinegar: Neutralizes the baking soda while adding subtle tanginess that complements the honey. Apple cider vinegar works equally well.
- Sour cream: Creates the signature tangy filling that defines authentic Medovik. Full-fat Daisy brand delivers superior creaminess and stability.
- Whipped topping: Lightens the filling while adding gentle sweetness. Substitute homemade whipped cream for more control over sweetness levels.
- Vanilla extract: Optional but recommended for enhanced depth and complexity. Pure extract rather than imitation makes a noticeable difference.
Baking Process
- Batter Creation:
- Begin by thoroughly beating eggs and honey until significantly lighter in color and texture. This crucial step incorporates air and creates proper emulsion for ideal cake texture. The batter should nearly double in volume with a frothy appearance before proceeding. When dissolving baking soda in vinegar, you'll notice immediate fizzing—add this mixture while still actively bubbling for maximum effectiveness. Mix flour gently until just incorporated to maintain lightness.
- Layer Technique:
- Spread batter extremely thinly using an offset spatula over parchment-lined inverted baking sheets. Working quickly produces the most uniform layers as batter thickens slightly upon standing. Aim for transparency—you should almost see parchment through the batter in some areas. This thinness allows proper caramelization and ensures quick absorption of cream later. Baking temperature must remain consistent for even browning without bitter edges.
- Perfect Timing:
- Watch layers carefully during baking as the transition from golden to over-browned happens quickly. The aroma intensifies dramatically when layers reach perfect doneness—use this sensory cue alongside visual browning. Layers should feel firm but slightly flexible when touched gently in the center. Cool completely on sheets before attempting to peel parchment to prevent tearing or sticking.
- Cutting Precision:
- Use a consistent template for cutting layers to ensure even stacking. A salad plate provides perfect 8-inch circles with clean edges. Stack cut circles immediately and cover with plastic to maintain moisture. Reserve trimmings for crumbs, further drying them in a low oven until completely crisp for easier crushing. These crumbs provide both decoration and textural contrast in the finished cake.
- Frosting Mastery:
- Combine sour cream and whipped topping with gentle folding rather than vigorous stirring to maintain airiness. Apply cream generously between layers, allowing edges to compress naturally rather than forcing alignment. Work from the center outward when frosting each layer to prevent sliding. Apply cream to sides with vertical strokes for the smoothest finish before pressing crumbs into the surface.
 Pin it
My mother-in-law initially questioned my simplified approach to this revered dessert, insisting proper medovik required rolling pins and hours of labor. When she tasted my version, her skepticism transformed into genuine surprise followed by immediate recipe requests. The sponge technique delivers nearly identical results with significantly less effort. I've since learned the secret lies in baking the layers until deeply caramelized—this develops the complex honey notes that define authentic medovik without requiring stovetop preparation.
Serving Suggestions
Transform your medovik experience by pairing thin slices with strong black tea served Russian-style. Consider adding fresh berries alongside each slice for bright color contrast and complementary tartness. Coffee enthusiasts appreciate how the bitter notes in espresso balance the honey sweetness perfectly. For special occasions, drizzle individual servings with extra raw honey just before serving. During winter celebrations, a small glass of honey vodka alongside creates an authentic Russian pairing tradition.
Creative Twists
Elevate this classic with subtle additions of orange zest to the batter for bright citrus notes against the honey background. Create striking presentation by incorporating cocoa powder into one-third of the batter for chocolate-honey striped layers. Experiment with flavored honey varieties like lavender or buckwheat for unique flavor profiles. Transform completely by adding chopped walnuts or hazelnuts to the crumb mixture for textural contrast. Consider a chocolate ganache drizzle over the top for elegant presentation at special occasions.
Storage Success
Maintain perfect texture by storing your assembled cake covered in the refrigerator where it remains fresh for up to one week. The flavor actually improves with time as layers absorb moisture and honey notes develop fully. For longer storage, freeze the entire assembled cake in an airtight container for up to three months with remarkable success. Thaw overnight in refrigerator rather than at room temperature to prevent condensation issues. Bring slices to cool room temperature before serving to enhance flavor perception.
My first attempt at this cake taught me valuable lessons about patience and temperature. When I rushed the cooling process before peeling off parchment, I destroyed several layers. Similarly, spreading frosting on slightly warm layers created melting and sliding. Now I ensure complete cooling and maintain consistent layer thickness throughout. The refrigeration period isn't just for flavors to develop—it allows the layers to properly absorb moisture and transform from separate components into one cohesive, sliceable cake. This seemingly simple dessert has given me profound appreciation for the subtle genius behind generations of Slavic baking traditions.
 Pin it
Frequently Asked Questions
- → Can I use store-bought honey?
- Yes, but raw honey provides the best flavor.
- → Can I make the cake ahead of time?
- Yes, you can make the cake ahead of time and store it in the refrigerator.
- → Can I freeze the cake?
- It's best to enjoy the cake fresh, but you can freeze individual slices.
- → Can I use a different type of frosting?
- The sour cream frosting is traditional, but you can experiment with other types of frosting.
- → How should I store the cake?
- Store the cake in an airtight container in the refrigerator for up to 3 days.