
 Pin it
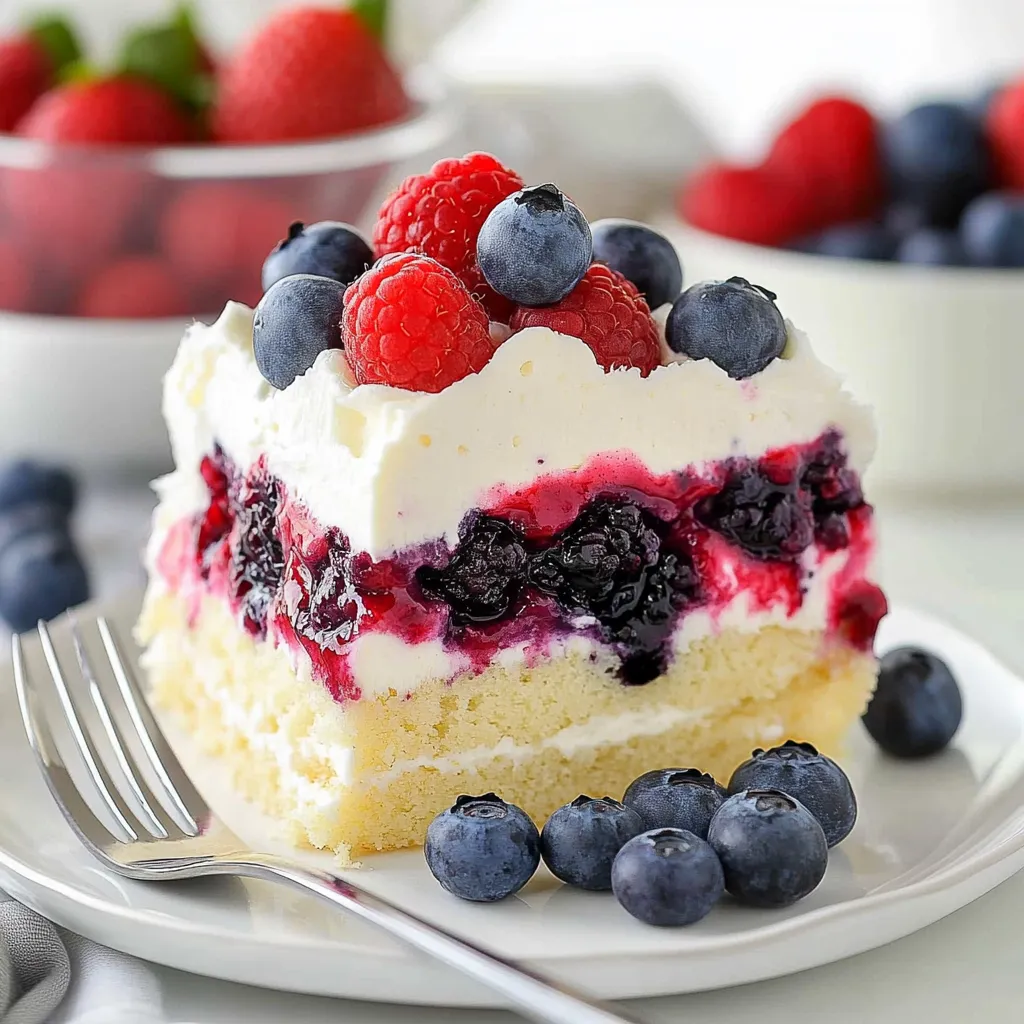
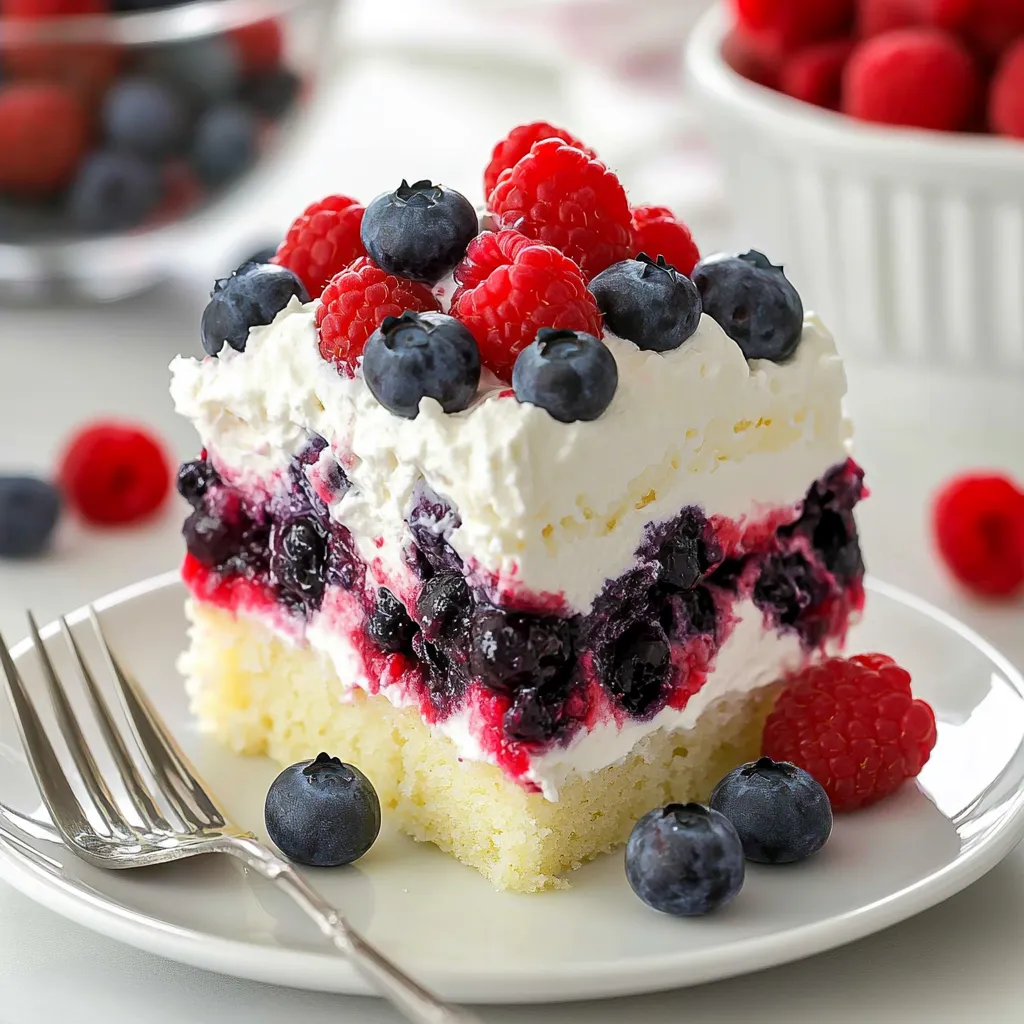
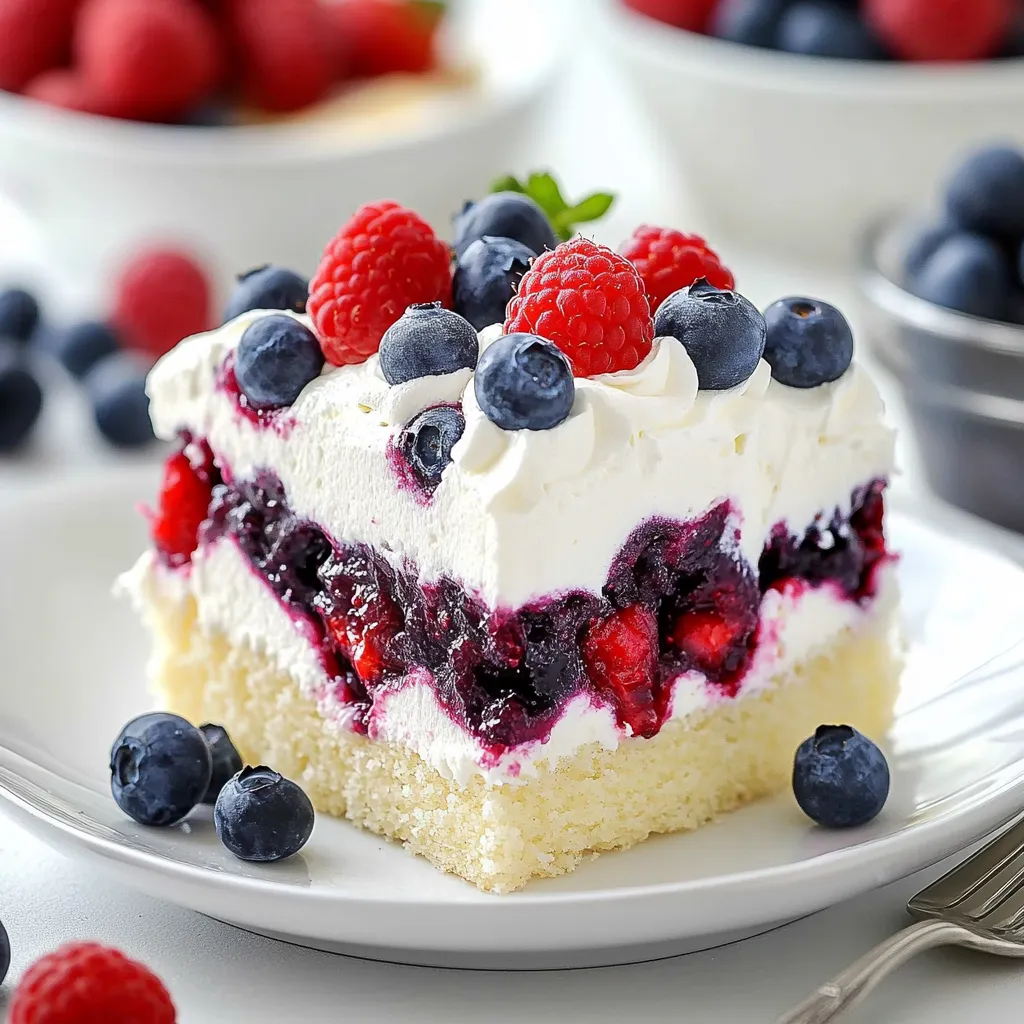
Tender white cake infused with a trio of vibrant berry sauces creates a spectacular marbled effect, all crowned with a cloud-like layer of cheesecake-infused whipped cream and fresh berries. This striking dessert delivers an irresistible combination of colors and textures while capturing the essence of summer's most beloved fruits in every refreshing bite.
My journey with this recipe began while planning a Fourth of July barbecue where I wanted a dessert that would be both impressive and practical for outdoor dining. This cake was such a success that it has become my signature contribution to summer gatherings. The vibrant colors never fail to draw compliments, but it's the perfect balance of flavors and textures that has guests requesting the recipe.
Essential Ingredient Selection
- Quality White Cake Mix: Choose a premium white cake mix for its neutral canvas that allows the berry colors to shine. Super moist varieties provide the ideal texture for absorbing the fruit sauces.
- Fresh Seasonal Berries: Select vibrant, fragrant berries at the peak of ripeness. Strawberries should be ruby-red throughout, blueberries should have a silvery bloom, and raspberries should maintain their shape while yielding slightly to pressure.
- Unflavored Gelatin: This crucial ingredient thickens the berry sauce without compromising the fresh fruit flavor. It creates the perfect consistency that allows the sauce to penetrate the cake while maintaining distinct color definition.
- Full-Fat Cream Cheese: Use brick-style cream cheese at proper room temperature for the silkiest topping texture. The slight tanginess balances the sweetness of the cake and berry sauces.
- Heavy Whipping Cream: Select cream with at least 36% fat content for optimal volume and stability. This higher fat percentage creates a topping that maintains its structure even after hours at room temperature.
Mastering The Technique
- Perfect Cake Preparation
- Begin by baking the cake exactly according to package directions, being careful not to overbake. Allow the cake to cool for precisely 15-20 minutes after removing from the oven – this specific timing ensures the cake is still warm enough to absorb the berry sauces effectively but firm enough that poking won't cause structural damage. Use the handle end of a wooden spoon to create holes approximately 1 inch apart across the entire surface, pushing three-quarters of the way through the cake for optimal sauce distribution.
- Berry Sauce Development
- Prepare each berry variety separately to maintain distinct colors and flavors. Process berries until just broken down, preserving some texture rather than creating a completely smooth puree. When cooking each sauce, stir constantly and watch for the crucial moment when the mixture thickens and becomes glossy – approximately 3-4 minutes after it begins to simmer. Dissolve the gelatin completely in cool liquid before heating to prevent grainy texture in the finished sauces. Allow sauces to cool just until they are no longer steaming before pouring over the cake.
- Strategic Sauce Application
- Pour each sauce color into specific sections of the cake rather than mixing them together – red sauce into one-third of the holes, blue into another third, and the remaining sauce into the final third. This methodical approach creates a beautiful color pattern when sliced. Use a measuring cup with a pour spout for precise control, directing sauce specifically into each hole. Allow time between applications for sauce to absorb completely before adding the next color.
- Topping Perfection
- Beat cream cheese until completely smooth before attempting to incorporate any other ingredients. Gradually add powdered sugar, tasting as you go to achieve the perfect sweetness level. Whip heavy cream separately to soft peaks before gently folding into the cream cheese mixture using a large rubber spatula. This two-stage process maintains maximum aeration for the lightest possible topping. Apply topping only after cake and sauces have chilled completely, spreading in an even layer with decorative swirls around the edges.
- Final Presentation Strategy
- Arrange fresh berries on top in an intentional pattern rather than random scattering. Create symmetrical rows, alternating colors for visual impact, or arrange in a flag pattern for patriotic occasions. Apply berries just before serving or within a few hours to maintain their fresh appearance and prevent them from releasing juice onto the topping. A light dusting of powdered sugar just before serving adds a professional finishing touch while highlighting the natural colors of the berries.
My grandmother always emphasized that poke cakes improve with time, allowing the flavors to meld and the textures to harmonize. "Patience makes perfect poke cake," she would say while instructing me to resist the temptation to serve it immediately. Following her wisdom, I've learned that preparing this dessert a full day ahead not only makes entertaining easier but genuinely improves the eating experience, as the cake develops an almost pudding-like quality beneath its creamy topping.
Serving Suggestions
Remove from refrigerator 20 minutes before serving for optimal flavor. Garnish with additional berries and mint sprigs for fresh color contrast. Serve alongside glasses of sparkling wine or lemonade for a complete summer dessert experience.
Creative Variations
- Create a tropical version with coconut cake and mango, pineapple, and kiwi sauces
- Substitute mascarpone for cream cheese in the topping for subtle elegance
- Add fresh berry liqueurs to each sauce for an adults-only version
- Create an autumn variation with apple cake and cranberry, apple, and pear sauces
Storage Strategy
Cover cake with plastic wrap after topping has set for up to one week in the refrigerator. The cake actually improves for the first 2-3 days as flavors continue to develop and meld. For best presentation, add fresh berries to the top just before serving rather than storing with the cake.
This Summer Berry Poke Cake represents the perfect intersection of visual appeal and delicious flavor, creating a dessert that celebrates summer's bounty while providing practical make-ahead convenience. Its ability to feed a crowd while impressing with both appearance and taste makes it an invaluable addition to any warm-weather entertaining repertoire.
Frequently Asked Questions
- → Can I use frozen berries instead of fresh for the sauces?
- Yes, frozen berries work well for the sauces. There's no need to thaw them first - just add them directly to the saucepan and they'll soften as they cook. You may want to reserve fresh berries for the garnish for the best appearance.
- → Can I make this cake ahead of time?
- Absolutely! This cake actually benefits from being made a day ahead, as it gives the berry sauces time to fully set and flavors to meld. The cake keeps well in the refrigerator for 2-3 days, though I recommend adding the fresh berry garnish just before serving.
- → Is there a substitute for gelatin to make this vegetarian?
- Yes, you can substitute agar-agar powder for the gelatin to make this dessert vegetarian-friendly. Use the same amount as gelatin called for in the recipe, but note that agar sets more firmly, so you might want to use slightly less.
- → Do I need to use both red sauces and blueberry sauce?
- No, you can simplify by using just one type of berry sauce if preferred. The red, white, and blue effect is festive for patriotic holidays, but the cake will be delicious with just one berry flavor too.
- → Why is my berry sauce too runny or too thick?
- The consistency can be affected by the water content of your berries or slight variations in gelatin measurement. If too runny after cooling, refrigerate it for 15-30 minutes, stirring occasionally. If too thick, gently warm it over low heat until it reaches your desired consistency.