
 Pin it
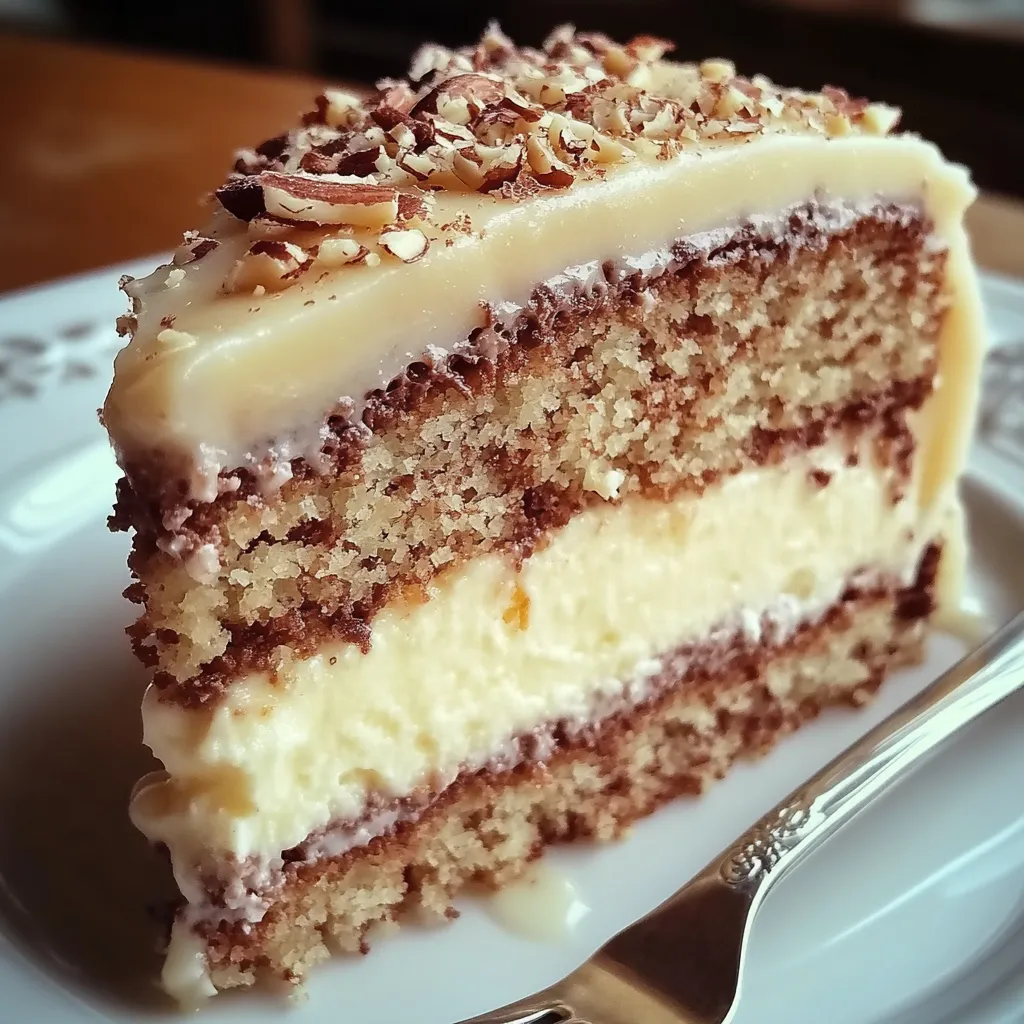
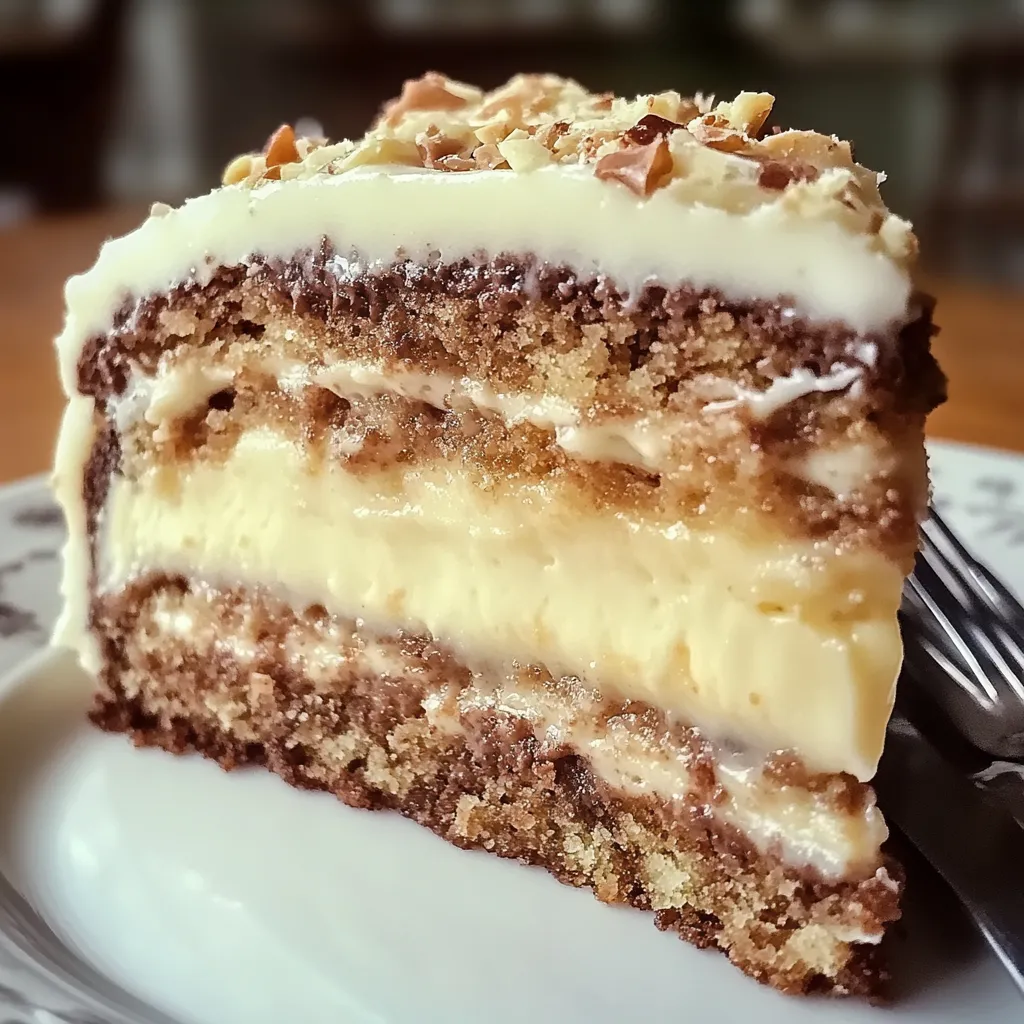
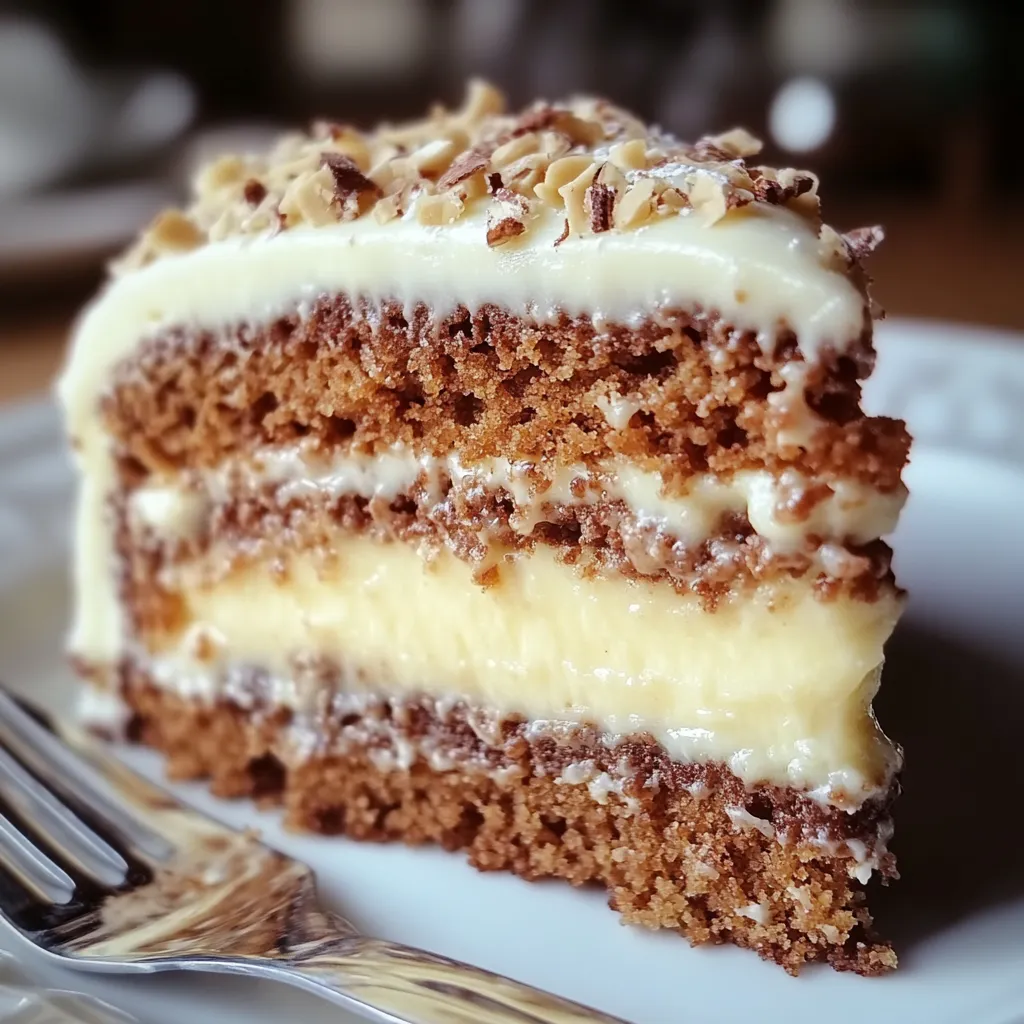
This dessert blends two beloved classics into one unforgettable masterpiece. White German Chocolate Cake, known for its mellow, creamy sweetness, pairs unexpectedly yet harmoniously with a velvety cheesecake layer hidden in the middle. The result is a rich, tender cake with creamy tang in every bite, wrapped in soft buttercream and topped with elegant garnish. It's a cake that turns heads and sparks conversations the moment it's sliced.
There's something extra special about the way this cake comes together. The soft crumb of the white German chocolate layers contrasts with the dense, cool cheesecake center—it's the kind of dessert people talk about long after the party. The first time I made it was for a holiday dinner, and my guests were stunned when they saw the cheesecake reveal.
Cake Layer Essentials
- White German chocolate: The heart of this cake's gentle sweetness; choose a high-quality bar with cocoa butter and no artificial fillers for best melt and flavor.
- All-purpose flour: Provides structure without making the cake too heavy; sift before using for a lighter crumb.
- Baking powder and baking soda: This duo ensures the cake rises evenly while staying moist.
- Salt: Just a pinch enhances the overall flavor and balances the sweetness.
- Butter: Use unsalted, room-temperature butter for a rich base that creams beautifully with sugar.
- Granulated sugar: Provides sweetness and helps create a tender crumb when whipped with butter.
- Eggs: Bind the ingredients and contribute richness; add them one at a time to maintain batter texture.
- Vanilla extract: Rounds out the flavor and highlights the chocolate notes.
- Buttermilk: Adds tang and helps keep the cake moist; bring to room temperature before using.
Cheesecake Filling Musts
- Cream cheese: Full-fat and brick-style work best for a dense, creamy center; let it soften before mixing.
- Granulated sugar: Sweetens without overpowering the tang of the cream cheese.
- Eggs: Allow the cheesecake to set with a silky finish.
- Vanilla extract: Adds warmth and balance to the filling's tanginess.
Toppings and Final Touch
- White chocolate buttercream frosting: Smooth, rich, and mildly sweet—perfect for sealing the cake's layers.
- Shredded coconut (optional): Offers texture and tropical notes if you want to mix things up.
- White chocolate shavings (optional): Elegant and easy decoration for a celebratory finish.
Creating the Cheesecake Center
- Preparing the pan
- Line a springform pan with parchment paper and lightly grease the sides. This makes removal easier and protects the edges of the cheesecake.
- Mixing the filling
- Beat the softened cream cheese and sugar together until completely smooth and fluffy. Avoid lumps by scraping down the bowl regularly. Add eggs one at a time, mixing on low to prevent too much air. Finish with vanilla extract for depth of flavor.
- Baking the cheesecake
- Pour the filling into the pan and gently tap it to release air bubbles. Bake at 325°F (163°C) for 40–45 minutes, until the center is nearly set but slightly jiggly. Let it cool at room temperature, then refrigerate until firm.
Crafting the Cake Layers
- Melting the chocolate
- Break the white German chocolate into small pieces and melt it slowly using a double boiler or microwave in 20-second intervals, stirring each time. Let it cool slightly before adding to the batter later.
- Creaming butter and sugar
- Beat the butter and sugar until pale and fluffy. This incorporates air and creates the perfect texture foundation. Add the eggs one at a time, blending well after each, and stir in the vanilla extract.
- Mixing dry and wet
- Whisk the flour, baking powder, baking soda, and salt in a separate bowl. Alternate adding this mix with the buttermilk into the creamed butter mixture, starting and ending with the dry ingredients. Gently fold in the melted chocolate at the end.
- Baking the layers
- Grease and flour two cake pans, then divide the batter evenly. Bake at 350°F (177°C) for 25–30 minutes. Check with a toothpick near the center—when it comes out clean, they're ready. Let them cool in the pans for 10 minutes before transferring to wire racks.
Assembling the Layers
- Stacking with care
- Once all layers are completely cooled, level the cake layers with a serrated knife if needed. Place the first cake layer on a serving platter. Gently place the chilled cheesecake layer on top, followed by the second cake layer.
- Adding the frosting
- Apply a thin crumb coat of white chocolate buttercream and refrigerate for 10–15 minutes. Then apply the final frosting layer, smoothing the top and sides with an offset spatula.
 Pin it
I've always loved working with buttermilk—it gives baked goods such a soft texture and helps keep cakes moist even after days in the fridge. My daughter once asked for this cake as her birthday request two years in a row, and it's become a family tradition ever since.
Elegant Serving Ideas
This cake deserves the spotlight on any dessert table. Serve chilled or slightly closer to room temperature for the best flavor balance. It pairs wonderfully with a cup of espresso or a glass of dessert wine. For special events, I love adding fresh raspberries on the side to brighten each slice.
Creative Variations
You can easily customize this recipe to suit your taste. Swap in a strawberry swirl cheesecake instead of plain for a fruity surprise. Replace the frosting with a light whipped cream topping if you want something less rich. For texture lovers, mix chopped macadamia nuts into the cake batter.
Keeping it Fresh
Keep the assembled cake covered in the fridge for up to 5 days. I like to use a cake dome to prevent it from drying out. You can also freeze the layers separately (unfrosted) and assemble them after thawing overnight in the fridge. Serve cold or let sit at room temperature for 15 minutes before slicing.
This dessert takes time, but every layer is worth the effort. It's one of those cakes that draws a pause before the first bite—guests know they're about to experience something special. When I serve this, it always sparks conversation, and not a crumb ever makes it back to the kitchen.
 Pin it
Frequently Asked Questions
- → Can I make this cake in advance?
- Yes! This cake is actually perfect for making ahead. You can prepare the cheesecake layer up to 3 days in advance and keep it refrigerated. The coconut-pecan topping can be made 1-2 days ahead and stored in an airtight container in the refrigerator. Assemble the complete cake up to 24 hours before serving.
- → Why is my coconut-pecan topping too runny?
- The topping needs to be cooked until it's thick enough to coat the back of a spoon. Make sure you're cooking it for the full 10 minutes, stirring constantly. If it's still runny, continue cooking for a few more minutes. The mixture will also thicken further as it cools. If it's still too thin after cooling, you can return it to the stove and add 1 teaspoon of cornstarch dissolved in 1 tablespoon of water.
- → Can I use a different size pan for the cheesecake?
- The 8-inch pan is ideal because it makes a cheesecake that fits perfectly between two 9-inch cake layers. If you only have a 9-inch springform pan, you can use that for the cheesecake, but you'll need to reduce the baking time by about 5-10 minutes since it will be thinner, and you won't need to trim the edges when assembling.
- → How do I prevent the cake from cracking when assembling?
- Make sure your cheesecake is thoroughly chilled (overnight is best) before assembly. Handle it gently when removing from the springform pan - run a thin knife around the edge and carefully release the latch. When placing it on the bottom cake layer, you can use two large spatulas to transfer it. If any small cracks appear, don't worry - they'll be hidden between the cake layers!
- → Can I freeze this cake?
- Yes, this cake freezes well! After assembly (but before adding the coconut-pecan topping), wrap the cake tightly in plastic wrap followed by aluminum foil and freeze for up to 1 month. Thaw overnight in the refrigerator, then add the coconut-pecan topping before serving. Individual slices can also be frozen after the cake is fully assembled.