
 Pin it
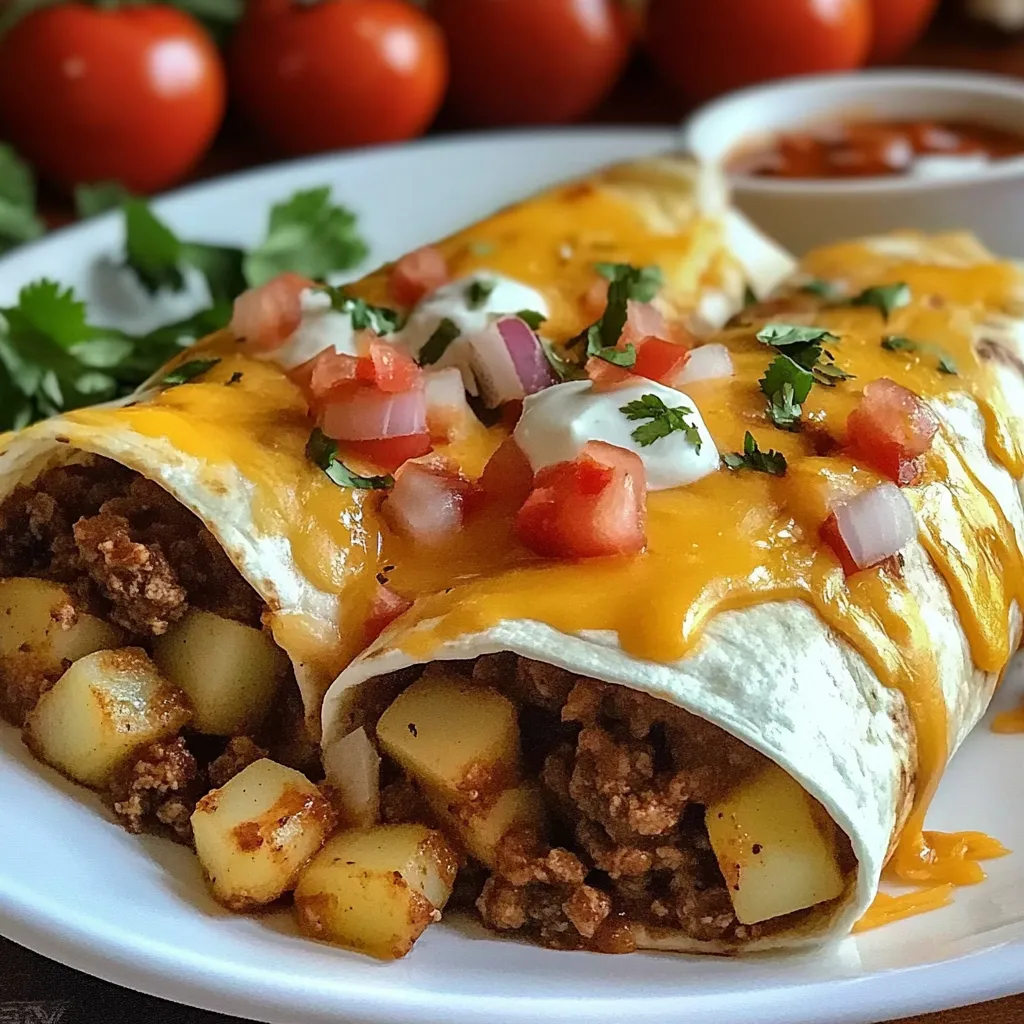
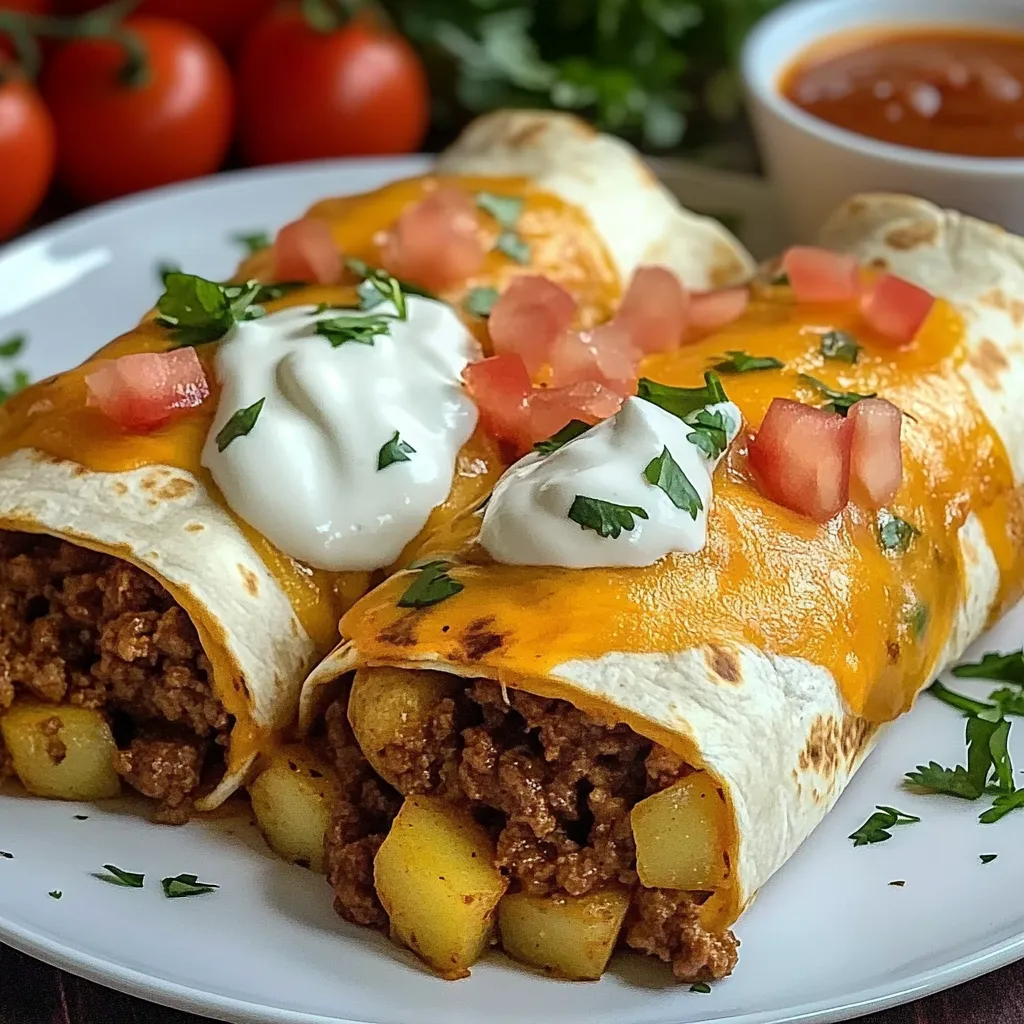
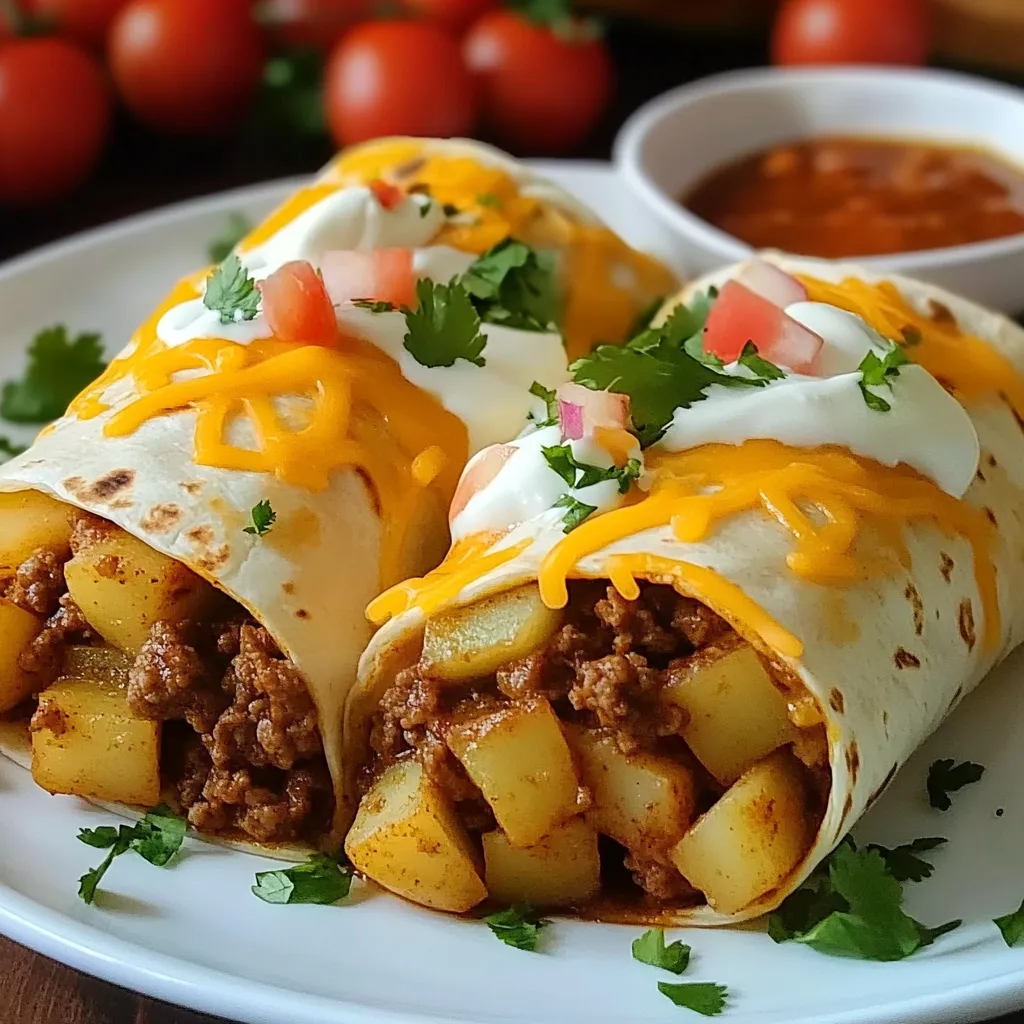
Crispy tater tots, savory ground beef, and melted cheese come together inside a warm tortilla to create these indulgent Cheesy Potato Burritos. This Mexican-inspired comfort food delivers a satisfying blend of textures and flavors that make it perfect for busy weeknight dinners or weekend lunches. The combination of crispy potatoes with seasoned meat and gooey cheese creates an irresistible filling, while the addition of Taco Bell chipotle sauce adds a smoky kick that elevates these burritos beyond ordinary fare.
I first made these burritos when craving something hearty but didn't want to order takeout. The combination of crispy potato with seasoned beef reminded me of late-night fast food runs in college, but the homemade version tasted infinitely better. My kitchen filled with mouthwatering aromas as the cheese melted into the warm filling, creating that perfect pull-apart stretch with every bite.
Key Components
- Ground beef: Select lean ground beef (85/15) for the perfect balance of flavor and fat. Look for beef with bright red color and minimal liquid in the package for freshest quality.
- Frozen tater tots: Choose a quality brand with minimal ingredients for best texture and flavor. The cylindrical shape provides better distribution throughout the burrito than hash browns or diced potatoes.
- Cheddar cheese: Sharp cheddar delivers more pronounced flavor than mild varieties. Freshly shredded cheese melts more evenly than pre-packaged shredded options containing anti-caking agents.
- Monterey jack cheese: This mild, creamy cheese adds excellent melting qualities and balances the sharper cheddar. Select a block and grate it yourself for superior meltability.
- Flour tortillas: Large burrito-size tortillas (10-12 inch) work best for proper filling capacity. Look for tortillas that feel pliable even before warming for easier rolling.
- Taco Bell chipotle sauce: This distinctive sauce adds smoky depth and mild heat. If unavailable, combine equal parts mayo and sour cream with chipotle powder and a touch of lime juice.
- Sour cream: Full-fat sour cream provides the best creamy texture and tangy flavor to contrast with the savory filling. Mexican crema makes an excellent substitute if available.
Preparation Process
- Crispy Foundation:
- Begin by preheating your oven according to the tater tot package directions, typically around 425°F. Arrange the frozen tater tots in a single layer on a baking sheet, ensuring they have space between them to become properly crispy. Bake until they develop a golden brown exterior and crispy texture, usually about 20-25 minutes. The tots should be cooked slightly longer than package directions to ensure they maintain some texture when incorporated into the burrito filling.
- Meat Preparation:
- While the tater tots crisp in the oven, place a large skillet over medium heat and add the ground beef. Break the meat into small, even crumbles using a wooden spoon as it cooks. Season generously with salt and freshly ground black pepper, stirring occasionally until the beef loses its pink color and develops a light brown crust, approximately 7-8 minutes. Drain any excess fat from the pan to prevent soggy burritos, leaving just enough to coat the meat for flavor.
- Creating The Filling:
- Transfer the cooked ground beef to a large mixing bowl. Once the tater tots are finished baking, allow them to cool slightly before adding to the bowl with the beef. Use the back of a spoon to gently crush some of the tots while leaving others whole for textural contrast. Add both the cheddar and monterey jack cheeses to the warm mixture, reserving a small portion for topping the burritos later. The residual heat will begin melting the cheese slightly, creating a cohesive filling that holds together beautifully.
- Assembly Technique:
- Warm your tortillas briefly in a dry skillet or microwave until they become pliable but not crisp. Working with one tortilla at a time, place it on a flat surface and spoon approximately 3/4 cup of the filling mixture slightly below center. Drizzle a tablespoon of the chipotle sauce over the filling and add a dollop of sour cream. Fold the sides of the tortilla inward over the filling, then fold the bottom edge up and over, continuing to roll forward until the burrito is sealed with the seam on the bottom.
- Final Touches:
- Arrange the assembled burritos seam-side down in a baking dish, spacing them evenly. Sprinkle the reserved cheese over the tops and place in the oven for 5-7 minutes until the cheese melts completely and the tortillas develop a light golden color. This final baking step seals the burritos and melds all the flavors together. Remove from oven and let rest for 2 minutes before serving to allow the filling to set slightly.
My grandmother introduced me to the technique of briefly toasting assembled burritos in a dry skillet before serving, which creates a delightful crispy exterior that contrasts beautifully with the soft filling. This extra step takes just 30 seconds per side but elevates these burritos to restaurant quality. My family now requests "Grandma's crispy burritos" specifically because of this simple finishing touch that transforms the eating experience.
Serving Inspirations
Complete your meal by pairing these hearty burritos with complementary sides and garnishes. A simple side salad with lime vinaigrette provides fresh contrast to the rich filling. For authentic restaurant style presentation, serve with Spanish rice and refried beans. Offer a selection of toppings like fresh pico de gallo, sliced avocado, and additional sour cream to allow each person to customize their plate. These burritos also pair wonderfully with corn chips and homemade guacamole for a satisfying feast.
Creative Adaptations
- Transform this basic recipe by experimenting with different proteins and flavor profiles. Substitute seasoned shredded chicken for a lighter option that still delivers satisfying flavor.
- Create a breakfast version by using scrambled eggs instead of beef and adding crumbled bacon for a morning meal that will sustain you for hours.
- For vegetarians, black beans sautéed with taco seasoning make an excellent protein-rich alternative that pairs beautifully with the potato and cheese components.
Preserving Freshness
Enjoy leftover burritos without compromising on quality by storing and reheating properly. Allow any remaining burritos to cool completely before wrapping individually in aluminum foil and placing in an airtight container. Refrigerated burritos maintain optimal freshness for up to three days. For best reheating results, remove foil and wrap each burrito in a damp paper towel before microwaving for 1-2 minutes, or keep them in foil and reheat in a 350°F oven for 15 minutes until warmed through.
The beauty of these Cheesy Potato Burritos lies in their perfect balance of convenience and indulgence. Having prepared countless variations over the years, I've found they strike that ideal middle ground between fast food craving and homemade satisfaction. The contrast between the crispy potato elements and the tender seasoned beef creates a textural experience that keeps you coming back for another bite. Whether served for a casual family dinner or wrapped individually for an on-the-go lunch, these burritos deliver comfort food satisfaction that never disappoints.
Frequently Asked Questions
- → Can I make these burritos ahead of time?
- Yes! Assemble them, wrap individually in foil, and refrigerate for up to 2 days. Reheat in a 350°F oven for 15-20 minutes until hot throughout.
- → What can I substitute for the chipotle sauce?
- You can use taco sauce, hot sauce mixed with a bit of mayo, or even salsa as alternatives to the Taco Bell chipotle sauce.
- → Are these burritos freezer-friendly?
- Absolutely! Wrap each burrito tightly in foil, place in a freezer bag, and freeze for up to 3 months. Reheat from frozen in a 375°F oven for about 30 minutes.
- → What sides go well with these burritos?
- Mexican rice, refried beans, corn salad, or a simple green salad all make great sides for these hearty burritos.
- → Can I make these vegetarian?
- Yes! Simply swap the ground beef for black beans, pinto beans, or a plant-based meat alternative. The rest of the recipe remains the same.