
 Pin it
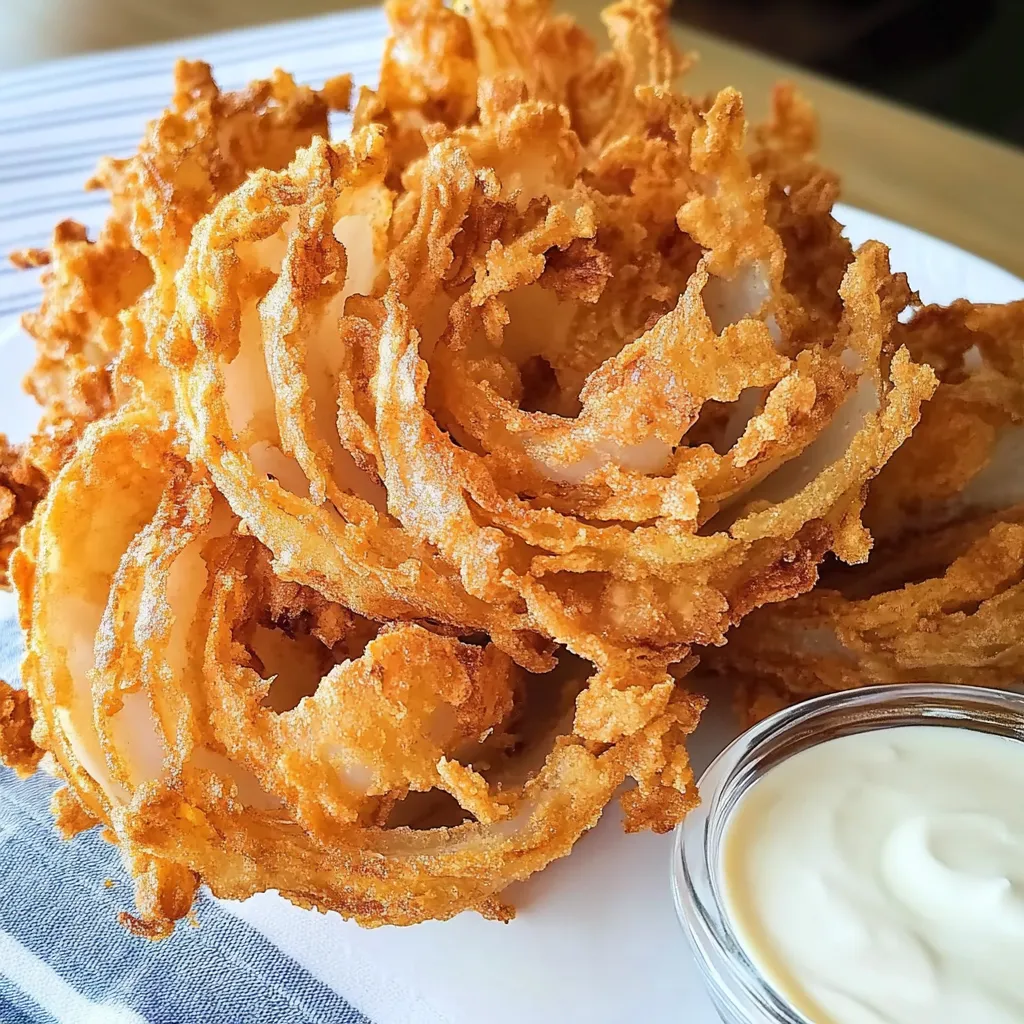
Crispy, golden petals of sweet onion fan out from a tender center in this showstopping homemade blooming onion. Each segment is perfectly coated in a double layer of seasoned breading that crisps to perfection when fried, creating irresistible texture and flavor that rivals any restaurant version. Paired with a creamy, zesty dipping sauce, this impressive appetizer transforms a humble onion into an extraordinary treat that will have everyone reaching for more.
I first attempted to recreate this famous appetizer after moving to a small town without access to restaurant versions. After several attempts, I discovered that the key to success was patience with the cutting technique and maintaining the perfect oil temperature. The first time I served this at a family gathering, my brother-in-law—who considers himself a blooming onion connoisseur—insisted it was better than any restaurant version he'd tried! The way the breading clings to each petal creates the perfect crunch with every bite, while the sweet onion inside becomes meltingly tender.
Perfect Ingredient Selection
- Sweet Vidalia Onions: Provide the perfect flavor foundation with their natural sweetness that intensifies during cooking
- All-Purpose Flour: Creates the base for the breading mixture that adheres perfectly to the onion petals
- Paprika: Adds beautiful color and subtle smoky depth to the coating
- Garlic Powder: Contributes savory notes that complement the sweet onion perfectly
- Cayenne Pepper: Provides just enough heat to balance the richness without overwhelming
- Eggs: Act as the essential binding agent that helps the breading adhere to the onion
- Milk: When combined with eggs, creates the perfect consistency for the binding mixture
- Vegetable Oil: With its high smoke point, allows for the perfect frying temperature
- Mayonnaise: Forms the creamy base of the zesty dipping sauce
- Horseradish: Adds essential pungency and heat to the sauce that cuts through the richness
Creating Appetizer Perfection
- Prepare The Signature Sauce
- Combine creamy mayonnaise with tangy sour cream, zesty horseradish, sweet ketchup, and a perfect blend of spices including paprika, garlic powder, and cayenne pepper. This flavorful mixture should be prepared first and refrigerated to allow the flavors to meld while you prepare the onions.
- Master The Onion Cutting Technique
- Begin with a large sweet onion, trimming a small flat spot on the non-root end to create stability. With the flat side down on your cutting board, make four vertical cuts from the top down toward the root, stopping about half an inch from the bottom to keep the onion intact. Continue making additional cuts between these sections, creating 12-16 "petals" depending on the onion's size.
- Create The Seasoned Coating
- In a large bowl, combine flour with a harmonious blend of seasonings including paprika, garlic powder, oregano, thyme, salt, and pepper. This well-seasoned mixture ensures that every petal will carry the perfect flavor profile. In a separate bowl, whisk together eggs and milk to create the binding mixture that will help the flour adhere.
- Perfect The Double-Breading Process
- Gently fan out the onion petals to create that signature "bloom" appearance, being careful to keep everything connected at the root. Generously dust the onion with the seasoned flour, ensuring it reaches between all petals. Dip the floured onion into the egg mixture, allowing excess to drain, then coat again with the seasoned flour for that essential double layer that creates the perfect crunch.
- Master The Frying Technique
- Heat oil to precisely 350-375°F in a heavy pot or Dutch oven. Carefully lower the prepared onion, root side up, into the hot oil. Maintain consistent temperature throughout cooking, frying for 7-10 minutes until the exterior develops a beautiful golden-brown color and crisp texture.
- Achieve Perfect Draining
- Remove the blooming onion with a large slotted spoon or spider, allowing excess oil to drain back into the pot. Place on paper towels with the root side down, gently blotting excess oil without disturbing the beautiful petal formation. This ensures the perfect crisp texture without greasiness.
- Serve With Style
- Present your masterpiece on a serving platter with the prepared dipping sauce in a small bowl nestled in the center of the bloom. This stunning presentation showcases your culinary skills while making the perfect centerpiece for gathering around and enjoying together.

My family particularly loves when I add a tablespoon of finely grated Parmesan cheese to the flour mixture, which adds an extra dimension of savory flavor to the coating. I've found that refrigerating the breaded onion for 15-20 minutes before frying helps the coating adhere even better during the frying process. For special occasions, I sometimes add a pinch of smoked paprika to both the breading and the sauce for a subtle smoky flavor that complements the sweetness of the onion beautifully.
The recipe evolved from countless experiments to recreate a restaurant favorite, and now it's become a tradition for our football watching parties. There's something uniquely satisfying about the dramatic presentation and the interactive experience of pulling off crispy petals to dip in the tangy sauce.
Flavor Variations
These spectacular blooming onions welcome creative adaptations that build upon the classic version while introducing exciting new flavor profiles. Create a Cajun-inspired variation by adding blackened seasoning to the flour mixture and incorporating a dash of Louisiana hot sauce into the dipping sauce. For an Italian twist, mix dried basil and oregano into the breading, then sprinkle freshly grated Parmesan cheese over the onion immediately after frying while it's still hot. Asian-inspired blooms can be achieved by adding five-spice powder to the flour mixture and serving with a sweet chili dipping sauce. For a Mediterranean variation, incorporate za'atar seasoning into the breading and serve with tzatziki sauce instead of the traditional horseradish dip. Beer lovers might enjoy adding a quarter cup of beer to the egg mixture, which creates an even lighter, crispier coating.
Accompaniment Ideas
This showstopping appetizer deserves thoughtful accompaniments that complement its rich, savory qualities. Serve alongside a selection of additional dipping options like tangy barbecue sauce, creamy ranch dressing, or spicy sriracha mayonnaise to please different palates. For a complete appetizer spread, surround your blooming onion with other finger foods like crispy chicken tenders, loaded potato skins, or buffalo cauliflower bites. When serving as a starter for a meal, follow with lighter entrees like grilled chicken or fish to balance the richness. Cold craft beers, particularly amber ales or lagers, provide the perfect beverage pairing to cut through the richness. For larger gatherings, consider making several smaller blooming onions rather than one large one to increase the crispy surface area and make sharing easier.
Preparation Solutions
Maximize efficiency and enjoyment by breaking down the preparation process strategically. Prepare the dipping sauce up to two days in advance, storing it in an airtight container in the refrigerator where the flavors will continue to develop and harmonize. Mix the dry breading ingredients up to a week ahead and store in a sealed container at room temperature. For entertaining, cut and bread the onions up to 2 hours before cooking, keeping them covered in the refrigerator until ready to fry. If you're serving multiple courses, fry the onion just before guests arrive so it remains the star of the show during appetizer time. For easier cleanup, line your frying area with newspaper or paper bags to catch any oil splatter, and have a dedicated spot prepared for draining the finished onion.
I'll never forget the first time I served this at a neighborhood potluck—conversation stopped momentarily as everyone turned to admire the golden, perfectly bloomed creation. What began as an attempt to satisfy a craving has become a signature dish that friends request whenever we gather. There's something undeniably fun about the communal experience of pulling apart the crispy petals and dipping them into the zesty sauce. The combination of textures—crispy exterior giving way to tender, sweet onion—creates an experience that's so much more satisfying than most appetizers. Whether you're entertaining guests or simply treating your family to something special, this blooming onion delivers restaurant-quality results with the satisfaction of homemade flavor that always exceeds expectations.

Frequently Asked Questions
- → What kind of onion works best for a blooming onion?
- Sweet onions like Vidalia are ideal because of their milder flavor and larger size. Spanish or yellow onions can also work if sweet varieties aren't available.
- → Can I make blooming onions in an air fryer?
- Yes! Preheat your air fryer to 350°F, spray the coated onion with cooking oil, and cook for 10-15 minutes until crispy, checking occasionally.
- → Why did my blooming onion close up during frying?
- Make sure to thoroughly separate the 'petals' before coating and don't overcrowd your pot. If needed, you can insert a small ball of foil in the center to help keep it open.
- → Can I make the dipping sauce less spicy?
- Absolutely. Reduce or omit the cayenne pepper and reduce the horseradish to 1 tablespoon for a milder sauce.
- → How can I cut the onion without it falling apart?
- Be careful not to cut too close to the root end - stay at least 1/2 inch away. The root is what holds everything together.
- → Can I prepare the onions ahead of time?
- You can cut and coat the onions up to 2 hours ahead, but keep them refrigerated. For best results, fry them just before serving.