
 Pin it
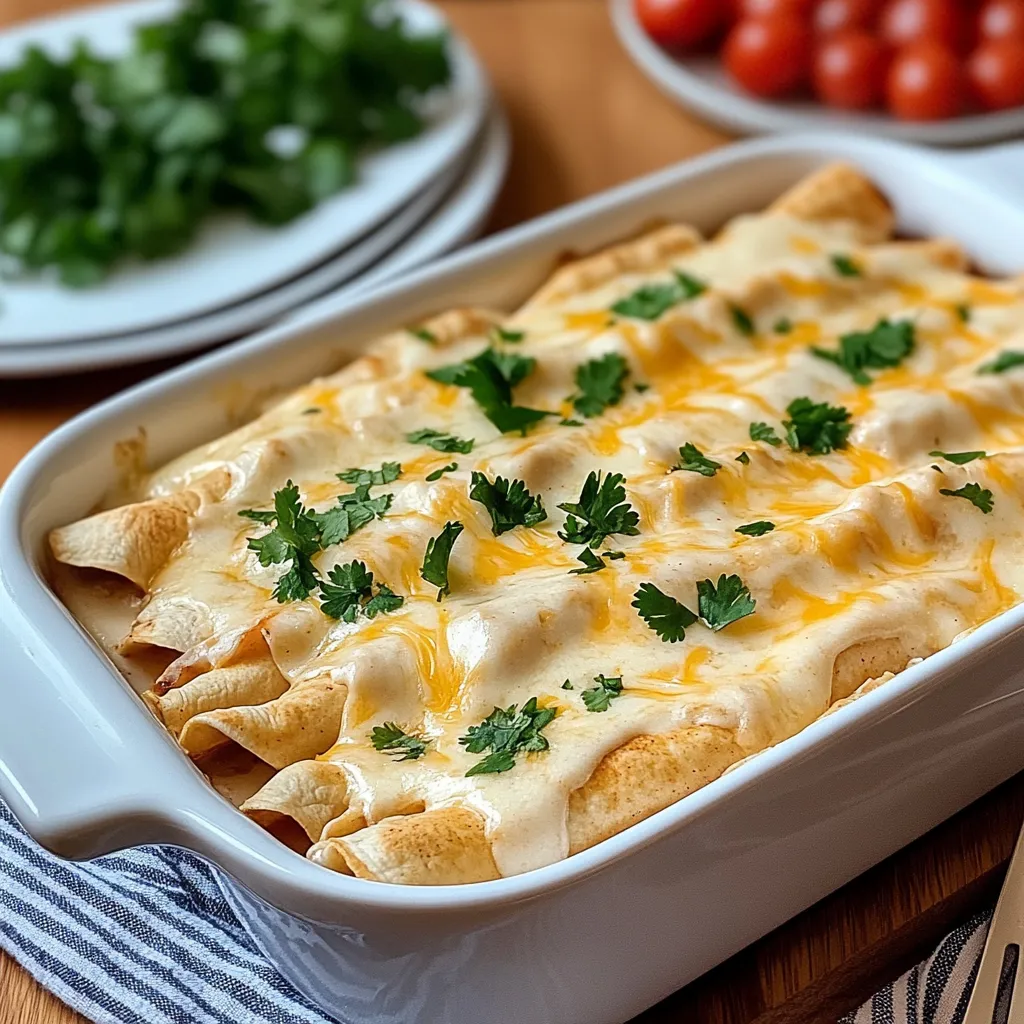
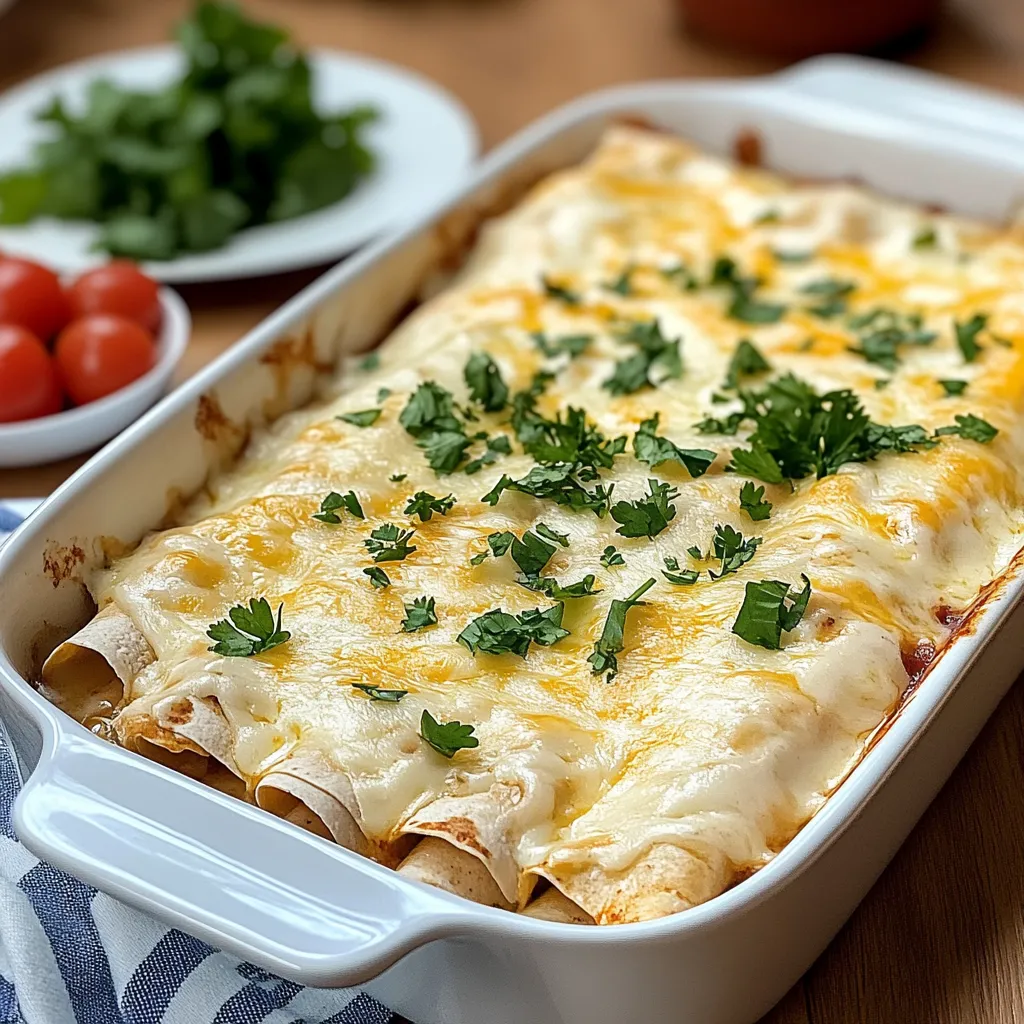
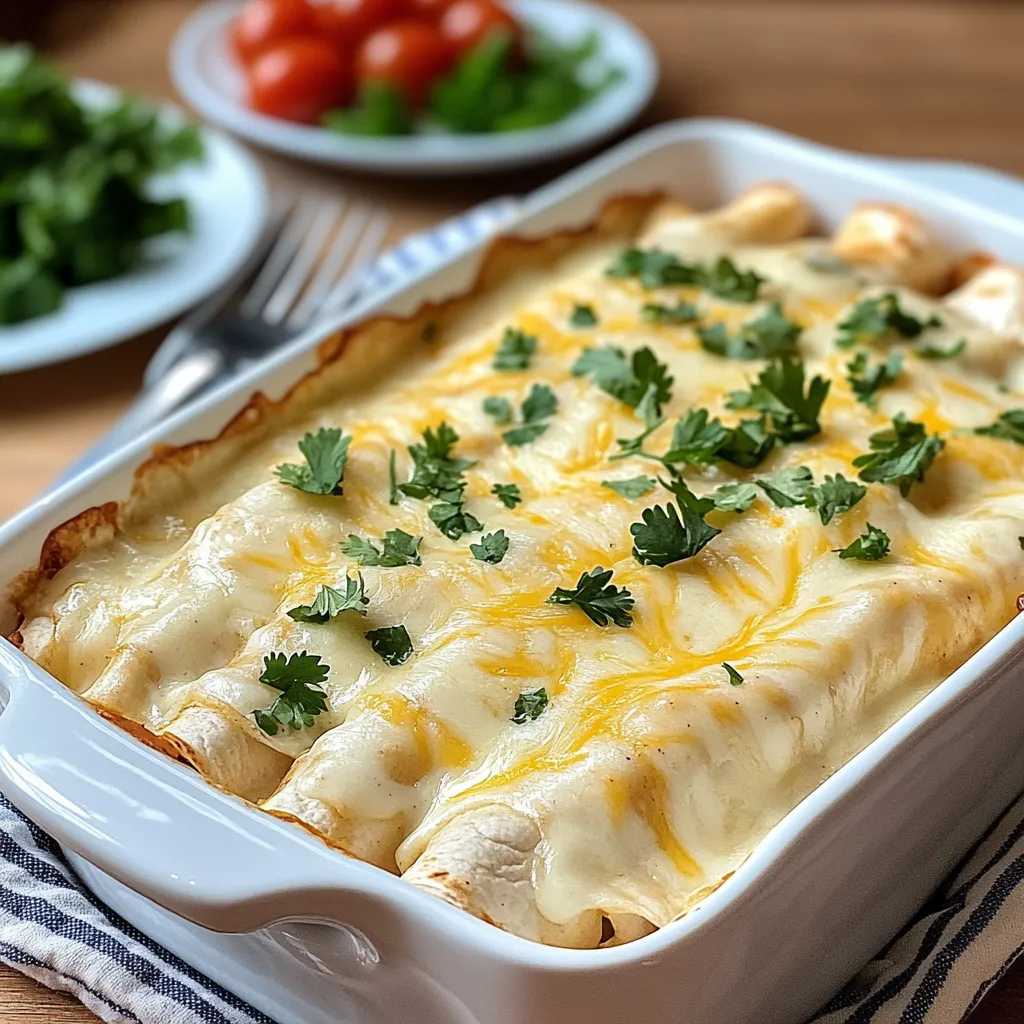
Creamy White Chicken Enchiladas elevate traditional Mexican comfort food into something extraordinarily indulgent. These heavenly bundles feature tender shredded chicken wrapped in soft tortillas before being blanketed with a velvety, rich white sauce that bubbles to golden perfection in the oven. The harmonious combination of mild cheese, perfectly seasoned chicken, and subtle heat creates an irresistible dish that satisfies deep comfort food cravings while still feeling somewhat special. Simple to prepare yet impressive to serve, these enchiladas bring restaurant quality to your dinner table with minimal effort.
I discovered this recipe during a particularly cold winter when I craved something warming yet different from our usual dinner rotation. The first time the aroma of these enchiladas filled my kitchen—that magical combination of melting cheese, subtle spices, and creamy sauce—I knew this would become a family staple. What surprised me most was the reaction from my pickiest eater, who typically approaches new dishes with suspicion. After one bite, she looked up with wide eyes and asked when we could have them again. The subtle heat balanced by the creamy sauce created something approachable yet exciting for everyone at the table.
Flavor Building Blocks
- Rotisserie chicken: This convenient option provides perfectly tender, flavorful meat without additional cooking.
- Monterey Jack cheese: Its exceptional melting quality creates stretchy, gooey perfection while maintaining a mild flavor profile.
- Green chilies: These mild peppers add subtle warmth and complexity without overwhelming spice.
- Cumin and smoked paprika: These aromatic spices bring depth and warmth without dominating the dish.
- Sour cream: Creates unparalleled creaminess in the sauce while contributing pleasant tanginess.
- Butter-flour roux: This classic cooking technique builds the foundation for a silky-smooth sauce.
Creating Enchilada Excellence
- Crafting Perfect Filling:
- Begin by combining shredded rotisserie chicken with freshly shredded Monterey Jack and cheddar cheeses in a large bowl. Add finely diced onion, minced garlic, ground cumin, chili powder, smoked paprika, salt, and freshly ground black pepper, mixing thoroughly until every element is evenly distributed. This combination creates the perfect balance of protein, creaminess, and aromatic spices that will remain moist and flavorful throughout baking.
- Developing Velvety Sauce:
- Melt butter in a saucepan over medium heat until it begins to foam slightly. Whisk in flour to create a smooth paste, cooking for 1-2 minutes to eliminate raw flour taste while developing nutty undertones. Gradually stream in chicken broth while whisking constantly to prevent lumps from forming, creating a smooth base that thickens slightly. Remove from heat before gently incorporating sour cream, diced green chilies, garlic powder, and onion powder for a luxuriously creamy sauce with subtle complexity.
- Assembling with Care:
- Warm tortillas briefly to increase their flexibility, preventing cracks during rolling. Place approximately one-third cup of chicken filling along the center of each tortilla, then roll tightly while tucking in the edges. Arrange each filled tortilla seam-side down in a greased baking dish, positioning them closely together to maintain their shape during baking while allowing even sauce distribution.
- Creating Saucy Perfection:
- Pour the prepared white sauce evenly over the arranged enchiladas, ensuring complete coverage that will protect them from drying during baking. The sauce should reach every crevice between the rolled tortillas, creating uniform moisture throughout the dish. Sprinkle additional shredded Monterey Jack cheese generously across the surface, which will melt into a beautifully golden, slightly browned top layer during baking.
- Achieving Golden Perfection:
- Bake in a preheated oven until the cheese develops an irresistible golden brown color with slightly crispy edges, while the sauce bubbles gently around the sides of the dish. Allow enchiladas to rest briefly after removing from the oven, which helps the sauce set slightly while ensuring the enchiladas maintain their shape when served. Garnish with fresh cilantro and green onions for color contrast and brightness that cuts through the richness.
 Pin it
My most memorable experience with this dish involved preparing it for friends who claimed they didn't care for Mexican food. Their skepticism quickly transformed into enthusiasm after the first bite, leading to recipe requests before the meal ended. What continues to surprise me is how versatile this dish proves—during summer months, adding fresh corn and roasted poblanos creates seasonal brightness, while winter versions with additional spices provide extra warmth. My husband now requests these enchiladas specifically when we're entertaining, claiming they're "impossible to dislike" regardless of guests' usual preferences.
Perfect Accompaniments
These enchiladas pair beautifully with simple sides that balance their richness. A crisp green salad with citrus vinaigrette provides refreshing contrast to the creamy main dish. Spanish rice with its slightly tomato flavor creates traditional harmony without competing with the enchilada flavors. For casual gatherings, serve with fresh guacamole and pico de gallo that guests can add according to their preference, allowing customization of the meal experience.
Creative Variations
Consider incorporating spinach and artichoke hearts for a gourmet variation that brings additional texture and vegetable presence. For seafood enthusiasts, substitute shrimp and crab for chicken, creating elegant enchiladas perfect for special occasions. Those seeking additional texture might add roasted corn kernels and black beans to the filling, creating pleasant bursts of sweetness and earthiness throughout each bite.
Keeping Everything Fresh
Store leftover enchiladas in airtight containers in the refrigerator for up to three days, where the flavors often continue developing beautifully. For reheating, cover with foil and warm in a 325°F oven until heated through, which preserves moisture better than microwave reheating. For make-ahead convenience, assemble enchiladas completely, cover tightly, and refrigerate for up to 24 hours before baking, adding approximately 10 minutes to the baking time.
After exploring countless enchilada recipes throughout the years, this creamy white version continues to earn its place as our household favorite. What began as an experiment has become our celebration meal—the one requested for birthdays, achievements, and whenever comfort is needed. The beauty lies in its perfect balance of familiar and special, everyday and indulgent. This remains the dish that consistently empties plates while creating the particular quiet that descends when everyone is too busy enjoying their food to speak—the highest compliment any cook could hope to receive.
 Pin it
Frequently Asked Questions
- → Can I use corn tortillas instead of flour?
- Yes! Corn tortillas work great and are more traditional. Just warm them slightly before rolling to prevent cracking. They'll also give the dish a more authentic flavor.
- → What's the best way to shred chicken for enchiladas?
- Rotisserie chicken is the easiest option. For homemade, simmer chicken breasts in broth with some onion and garlic until cooked through, then shred with two forks while still warm.
- → Can I make these enchiladas ahead of time?
- Absolutely! Assemble everything up to 24 hours ahead, cover and refrigerate. Add about 10 minutes to the baking time if cooking straight from the refrigerator.
- → How spicy are these enchiladas?
- These are fairly mild. The green chiles add flavor but not much heat. For spicier enchiladas, add diced jalapeños to the filling or sauce, or serve with hot sauce on the side.
- → What sides go well with white chicken enchiladas?
- Mexican rice, refried or black beans, a simple green salad, or corn make excellent sides. Fresh guacamole and pico de gallo are great toppings too!
- → Can I freeze these enchiladas?
- Yes! Freeze them before baking. Cover tightly with foil and freeze for up to 3 months. Thaw overnight in the refrigerator before baking, adding about 15 minutes to the baking time.