
 Pin it
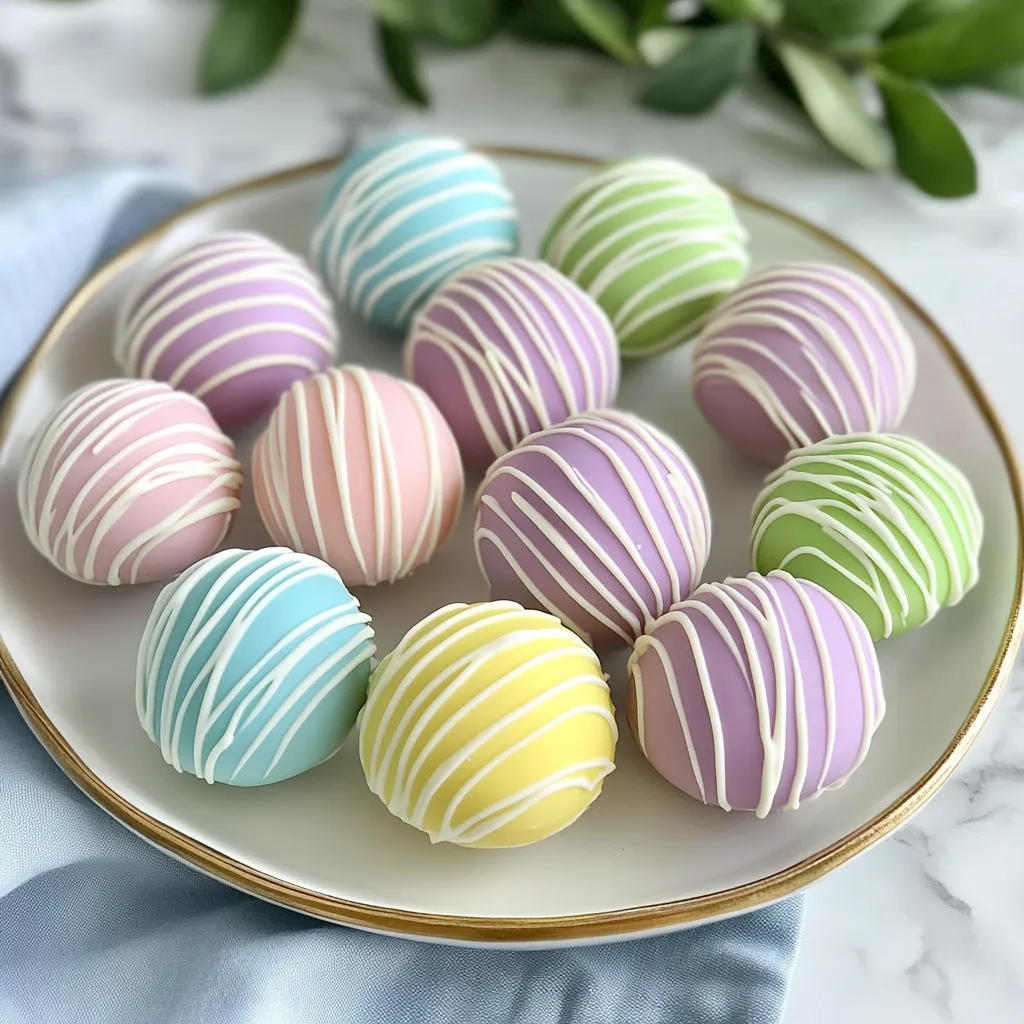
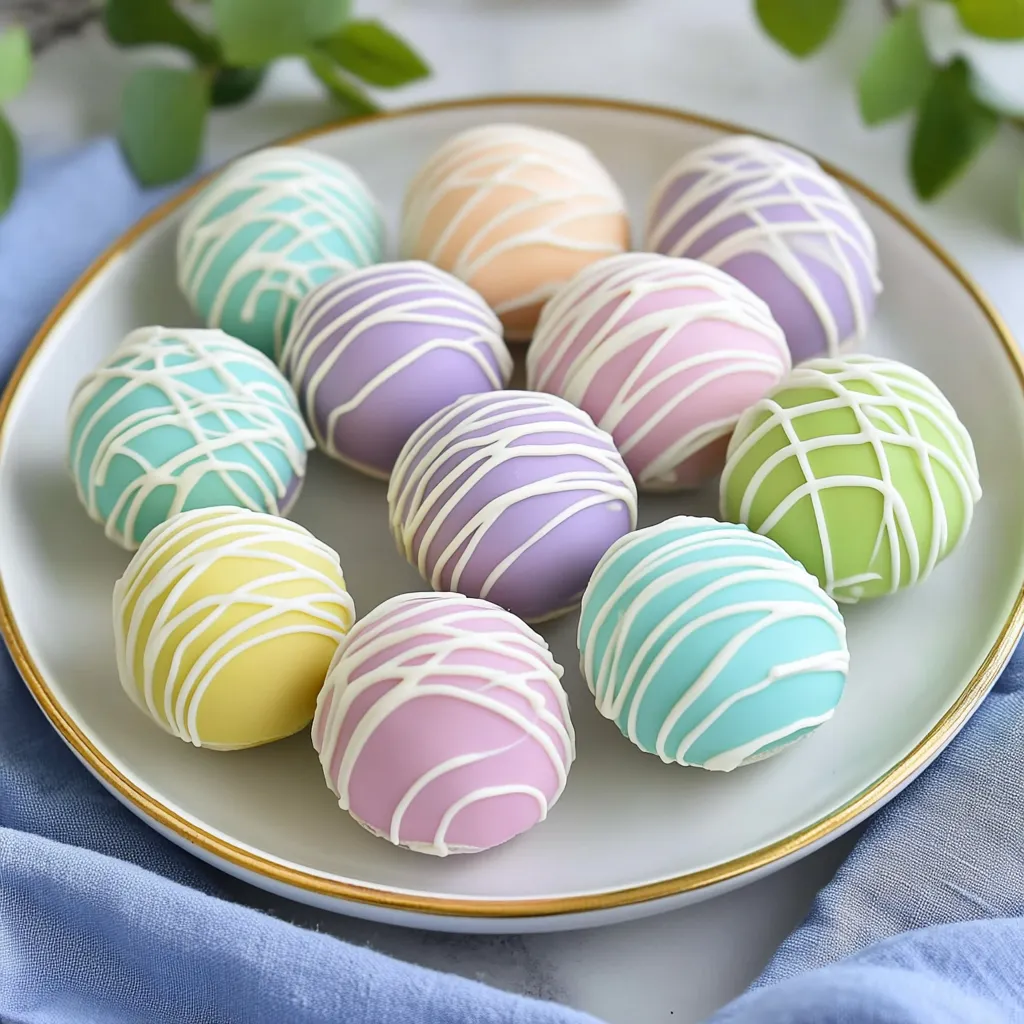
Easter egg Oreo cookie balls transform the classic chocolate sandwich cookie into a festive springtime treat that captures the joy of the season. Shaped like miniature eggs and decorated with pastel-colored chocolate coatings, these bite-sized delights combine the familiar cookies-and-cream flavor with a festive presentation perfect for Easter celebrations. I stumbled upon this recipe when looking for an alternative to traditional Easter candies, and they've since become a non-negotiable part of our family's holiday tradition.
Last Easter, I brought these to our family gathering instead of the usual store-bought chocolates. My nieces and nephews gathered around the kitchen island, mesmerized by the colorful coating and sprinkle decorations. Even my brother-in-law, who typically avoids sweets, couldn't resist trying one—and then promptly returned for seconds and thirds. The combination of childhood nostalgia from the Oreos with the festive presentation creates an irresistible treat that appeals to every generation.
Simple Ingredients
- Classic Oreo cookies: The foundation of these treats; choose regular Oreos for authentic taste or experiment with seasonal flavors like Golden Oreos for a vanilla version
- Cream cheese: Provides creaminess and helps bind the crushed cookies; ensure it's properly softened to room temperature for smooth blending
- Quality chocolate candy melts: Available in various colors perfect for Easter; these specially formulated chocolates melt easily and set with a smooth finish
- Decorative sprinkles: Optional but recommended for adding festive flair; choose pastel colors or tiny egg-shaped sprinkles for seasonal charm
- Food coloring gels: If using white chocolate, these concentrated colorings create vibrant hues without thinning the chocolate consistency
- Pure vanilla extract: A small addition that enhances the overall flavor profile and complements both the cookie base and chocolate coating
My first attempt at these treats taught me a valuable lesson about chocolate quality. Using regular chocolate chips resulted in a coating that never properly set and remained tacky to the touch. Investing in proper candy melts or coating chocolate made all the difference, creating a professional-looking finish that snaps satisfyingly when bitten into.
Creating Eggcellence
Crush With Care
- Processing the Cookies:
- Place whole Oreos (filling included) in your food processor and pulse until they reach a fine, consistent crumb texture. Avoid over-processing into dust—you want some texture to remain. If working without a food processor, place cookies in a heavy-duty zip-top bag and crush with a rolling pin, working methodically from the center outward.
Mix To Perfection
- Combining Ingredients:
- Transfer crushed Oreos to a large mixing bowl and add softened cream cheese. Using a spatula or clean hands, blend thoroughly until the mixture resembles thick, moldable dough with no visible streaks of cream cheese. The warmth of your hands can help incorporate the ingredients if you're finding stubborn spots.
Shape Your Eggs
- Forming the Eggs:
- Scoop tablespoon-sized portions of the mixture and gently roll between your palms to form a ball. Then, slightly elongate and taper one end to create the classic egg shape. Place shaped eggs on a parchment-lined baking sheet, leaving space between each to prevent sticking together.
Chill For Success
- Firming the Mixture:
- Refrigerate your shaped eggs for at least one hour or freeze for 20 minutes. This crucial step firms the mixture, making the dipping process much cleaner and preventing the eggs from falling apart in the warm chocolate. Don't skip this step, even if you're short on time.
Melt With Method
- Preparing the Chocolate:
- Prepare your candy melts by heating in a microwave-safe bowl at 50% power in 30-second intervals, stirring between each until smooth. If coloring white chocolate, add gel food coloring a tiny drop at a time until you achieve your desired shade. Keep the bowl of melted chocolate over a pan of warm (not hot) water to maintain the perfect dipping consistency.
Dip Strategically
- Coating the Eggs:
- Working with just a few eggs at a time (keeping the rest chilled), balance each on a fork and lower into the melted chocolate. Gently tap the fork against the bowl's edge to remove excess coating, then carefully slide onto parchment paper. Add sprinkles immediately before the chocolate sets if desired.
 Pin it
My grandmother taught me to add a teaspoon of coconut oil to my melted chocolate to achieve that perfect glossy finish that looks professionally made. The first year I made these treats without this trick, the coating looked dull and somewhat blotchy. With the addition of coconut oil, they developed a beautiful sheen that made them look like they came from a high-end chocolate shop. This simple addition has become my secret weapon for all chocolate-coated treats.
Elegant Display
These colorful treats deserve proper presentation to showcase their beauty. Arrange them in pastel-colored paper cupcake liners to prevent sticking and enhance their Easter appeal. For a stunning centerpiece, display them on a tiered serving plate interspersed with fresh spring flowers or artificial Easter grass. If gifting, pack them carefully in decorative boxes lined with parchment paper, layering them between sheets to prevent color transfer or sticking.
Creative Variations
While traditional Easter egg Oreo cookie balls are delightful on their own, consider these inspired variations to expand your repertoire. Split the base mixture and add a drop of mint extract to one portion for refreshing mint chocolate eggs. Experiment with different Oreo flavors—lemon Oreos create bright, citrusy treats perfect for spring. For a sophisticated adult version, add a teaspoon of orange liqueur to the mixture and coat in dark chocolate with a sprinkle of candied orange peel on top.
Freshness Tips
Store these treats in an airtight container in the refrigerator, where they'll maintain peak freshness for up to a week. For the best texture, remove them from the refrigerator about 15 minutes before serving to take the chill off. If you're making them ahead of time, prepare the cookie balls and freeze them uncoated for up to a month, then thaw in the refrigerator overnight before dipping in chocolate. Avoid storing them in warm areas as the chocolate coating may soften or develop condensation when returned to the refrigerator.
I've been making these Easter egg Oreo cookie balls for nearly a decade now, and they've evolved from a casual treat to a cherished tradition in our home. What began as a simple recipe has become an annual event where three generations of our family gather around the kitchen island, each person assigned a specific role in the assembly line. My father crushes the cookies (he claims to have the strongest hands), my mother shapes the eggs, I handle the chocolate dipping, and the grandchildren are in charge of decorating with sprinkles—often wearing more than they apply to the cookies. Beyond their delicious taste, these treats have become a vehicle for creating precious memories and passing down family traditions, one colorful egg at a time.
 Pin it
Frequently Asked Questions
- → Can I use different flavors of Oreo cookies?
- Absolutely! Regular Oreos work great, but you can experiment with seasonal flavors, Golden Oreos, mint, or any flavor variation you prefer. Each will give a slightly different taste to your cookie balls.
- → What's the best way to melt chocolate for coating?
- The microwave method works well (30-second intervals, stirring between). You can also use a double boiler for more control. For smoother melting, add 1 teaspoon of coconut oil or shortening per cup of chocolate.
- → How do I get a smooth coating without lumps?
- Make sure the cookie balls are very cold before dipping. If your chocolate starts to thicken while dipping, reheat it briefly. For a smoother finish, tap off excess chocolate and use a fork to remove drips from the bottom.
- → Can I make these ahead of time?
- Yes! These can be made up to a week ahead and stored in the refrigerator. You can also freeze the uncoated balls for up to a month, then thaw in the refrigerator before coating with chocolate.
- → What if I don't have candy melts or coating chocolate?
- Regular chocolate chips can work, but they may not set as firmly. Mix 1 tablespoon of shortening with 1 cup of chocolate chips to help them melt smoother and set better.
- → How do I decorate them to look like Easter eggs?
- For Easter egg designs, try drizzling with contrasting colored chocolate, adding sprinkles while the coating is wet, or using edible food color pens to draw designs once the coating has set.