
 Pin it
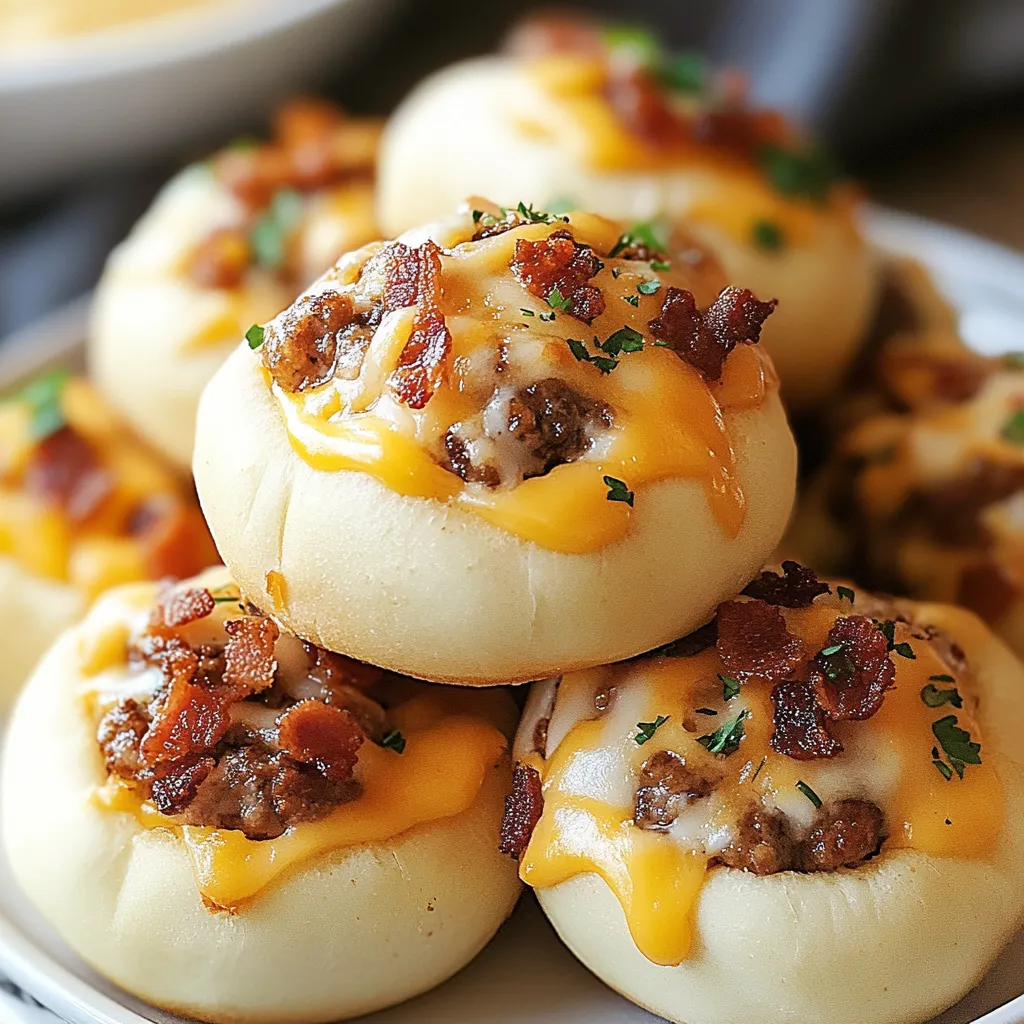
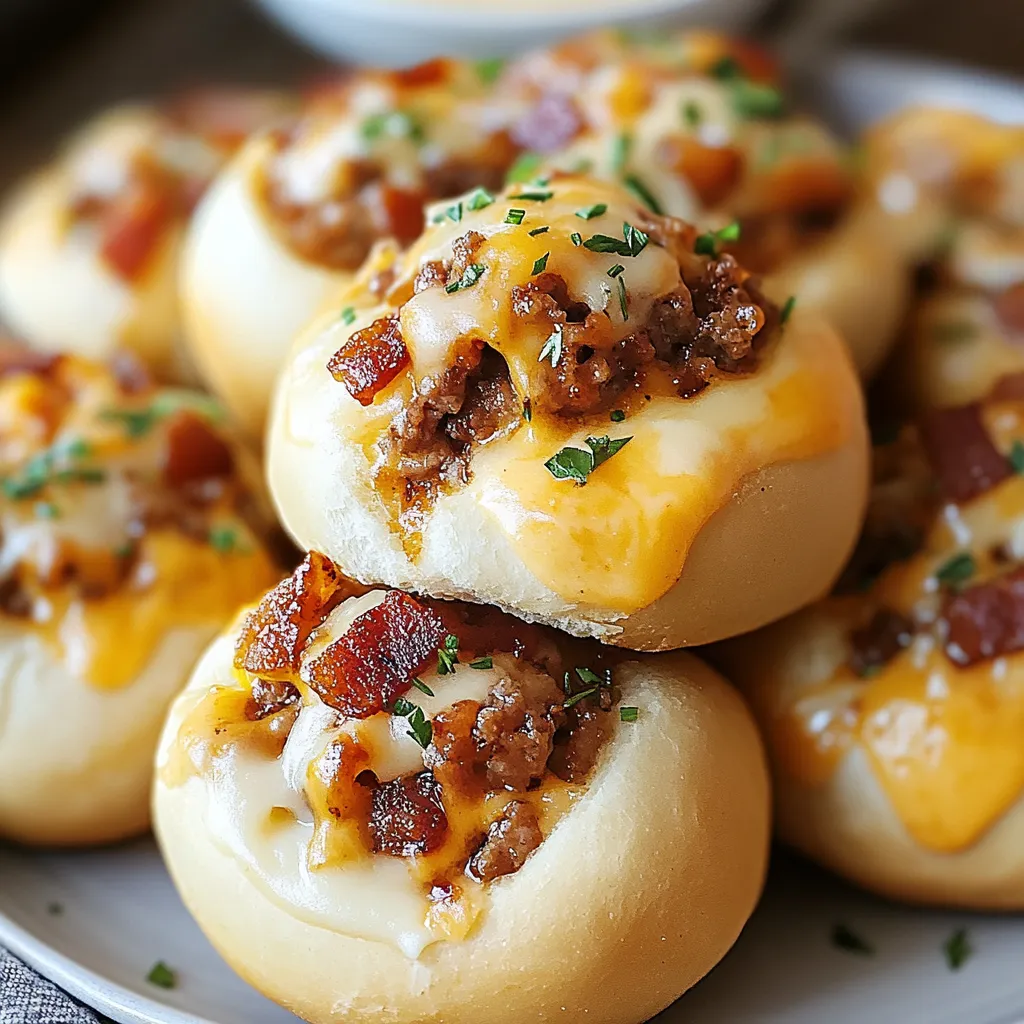
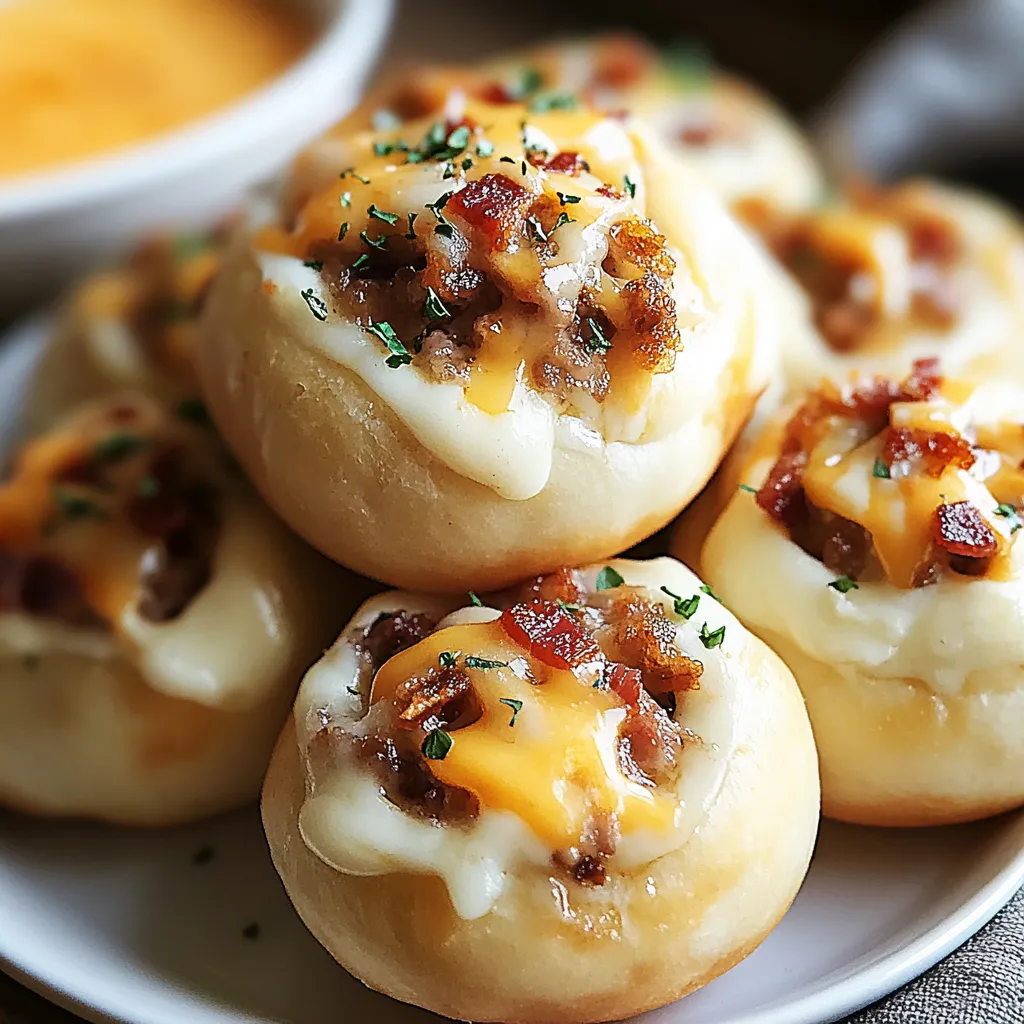
Garlic parmesan bacon cheeseburger bombs transform classic burger flavors into irresistible handheld bites that deliver everything you love about cheeseburgers in an explosively flavorful package. These golden-brown dough bundles surround a savory mixture of seasoned ground beef, crispy bacon, and melted cheese, all brushed with garlic parmesan butter that creates a mouthwatering aroma as they bake. I created these crowd-pleasers for my son's graduation party when I needed substantial finger food that wouldn't require guests to juggle plates and utensils.
When I first served these at a neighborhood Super Bowl party, they disappeared within minutes. What surprised me most was watching my friend's teenage son—who normally picks apart everything he eats—devour four of them without hesitation. Something about the combination of familiar burger flavors in this fun package makes them irresistible to even the pickiest eaters in the crowd.
Essential Elements
- Ground beef: Creates the foundational burger flavor; 80/20 beef provides ideal fat content for juicy bombs
- Thick-cut bacon: Adds smoky crunch and depth; cooking it until crisp ensures proper texture contrast
- Sharp cheddar cheese: Melts beautifully within the filling; freshly shredded provides superior meltability
- Refrigerated biscuit dough: Forms the perfect wrapper; the flaky texture mimics a traditional burger bun
- Butter: Creates the rich, glossy exterior; high-quality butter makes a noticeable difference
- Fresh garlic: Provides aromatic flavor that permeates the dough; mince it finely for even distribution
- Parmesan cheese: Forms a savory crust on the exterior; use freshly grated for best flavor and texture
- Worcestershire sauce: Adds that distinctive burger umami; just a tablespoon transforms the filling
I learned an important lesson about cheese with my first batch of these bombs. Pre-shredded cheese coated with anti-caking agents didn't melt properly, creating a grainy texture in the filling. Taking the extra two minutes to shred my own cheese resulted in that perfect, gooey center that makes these bombs truly spectacular. Some shortcuts just aren't worth taking.
Flavor Fusion
Perfect The Filling
- Cooking the Bacon:
- Begin by cooking bacon until crisp, then removing it to paper towels and reserving a tablespoon of the rendered fat in the skillet. The bacon fat provides the perfect medium for sautéing diced onions until they become translucent and slightly caramelized, about 3-4 minutes. Add ground beef to the onions, breaking it into small crumbles with a wooden spoon. Season generously with garlic powder, onion powder, smoked paprika, salt, and freshly ground pepper.
Create Cheese Magic
- Adding the Cheese:
- Remove the beef mixture from heat and let it cool slightly before folding in crumbled bacon pieces and shredded cheddar cheese. The residual heat will partially melt the cheese, creating pockets of gooey goodness throughout the filling without making it too runny to work with. The slight cooling period is crucial—adding cheese to piping hot filling will cause it to release oils, resulting in a greasy rather than creamy texture.
Master The Assembly
- Working with Dough:
- Working with refrigerated biscuit dough requires quick hands but delivers excellent results. Flatten each biscuit into a disc approximately 4 inches in diameter, keeping the center slightly thicker than the edges. Place a generous tablespoon of filling in the center of each disc, then carefully bring the edges up and over the filling. Pinch the seams firmly to seal, rolling the bomb between your palms to ensure there are no weak spots where filling might escape during baking.
Create Garlic Gold
- Making the Butter Mixture:
- In a small bowl, combine melted butter with freshly minced garlic and grated Parmesan cheese to create a flavor-packed mixture that will transform the exterior of each bomb. Using a pastry brush, generously coat each dough ball with this mixture, ensuring every inch is covered. This garlic Parmesan butter serves three purposes: it adds incredible flavor, promotes beautiful golden browning, and creates an irresistible aroma as the bombs bake.
Bake To Perfection
- Baking Instructions:
- Position the bombs seam-side down on a parchment-lined baking sheet, leaving about two inches between each for proper expansion. Bake in a preheated 375°F oven until they achieve a deep golden brown color, about 15 minutes. The transformation is remarkable—what begins as pale dough balls emerge as fragrant, cheese-crusted delights with a gorgeous amber hue. Allow them to cool just slightly before serving to prevent burned mouths from the molten filling.
The first time I made these for a potluck, I transported them fully assembled but unbaked, planning to use the host's oven. This was a mistake—the filling began to soften the dough during the 30-minute drive, resulting in tears and leaks during baking. I now either bake them at home and transport them warm, or prepare and refrigerate the filling separately, then assemble and bake at my destination. Sometimes the logistics of food preparation are as important as the recipe itself.
Serving Style
These versatile bombs deserve companions that enhance their appeal without overshadowing them. Create a dipping station featuring classic burger condiments like ketchup, mustard, and special sauce in small ramekins. For casual gatherings, arrange the bombs in a spiral pattern on a round platter with dipping sauces in the center. At more formal events, place individual bombs in cupcake liners with a small amount of dipping sauce already applied to the bottom, allowing guests to enjoy them without juggling multiple items.
Flavor Variations
While the classic version is undeniably delicious, this recipe welcomes creative adaptations. For a Southwestern twist, add diced jalapeños and substitute pepper jack for the cheddar. Create a mushroom Swiss version by replacing some of the beef with sautéed mushrooms and using Swiss cheese in the filling. For a breakfast-inspired bomb, incorporate scrambled eggs into the filling and swap the ketchup for maple syrup. Lower-carb alternatives can be created using fathead dough instead of biscuits for those with dietary restrictions.
Storage Strategy
These bombs maintain their quality admirably when properly stored. Keep leftovers (if there are any!) in an airtight container in the refrigerator for up to three days. To reheat, place them in a 350°F oven for 7-10 minutes until warmed through—microwaving tends to make the dough tough and rubbery. For make-ahead convenience, assemble the bombs completely, then freeze them unbaked on a baking sheet before transferring to a freezer bag. They can be baked directly from frozen, adding about 5-7 minutes to the original baking time.
I've been perfecting these bombs for nearly four years, making subtle refinements with each batch. What began as a way to use leftover hamburger fixings has evolved into one of my most requested recipes. Last football season, my son's friend requested them specifically for their viewing party, saying 'those burger balls are better than actual burgers.' The beauty of these bombs lies in how they transform familiar ingredients into something that feels special enough for entertaining while remaining accessible enough for family dinners. They represent the perfect middle ground between comfort food and party fare.
Frequently Asked Questions
- → What ingredients do I need?
- You need ground beef, bacon, cheddar cheese, cream cheese, Worcestershire sauce, garlic powder, biscuit dough, butter, Parmesan cheese, and fresh parsley.
- → How long does it take to prepare?
- Prep time is 15 minutes, and total time is 30 minutes.
- → Can I use a different type of cheese?
- Yes, you can substitute cheddar cheese with another type of melting cheese like mozzarella or Gouda.
- → Is it suitable for gluten-free diets?
- Yes, this recipe is gluten-free.
- → How should I store leftovers?
- Store leftovers in an airtight container in the refrigerator for up to 3 days.