
 Pin it
Lemon cookie cups reimagine classic lemon desserts into adorable bite-sized treasures featuring buttery sugar cookie vessels filled with vibrant homemade lemon curd that creates the perfect balance of sweet and tangy in each perfectly portioned bite. These charming treats solve the common problem of messy lemon bars while delivering all the bright citrus flavor in an elegant, easily served package. I created these for my sister's garden-themed bridal shower when I needed a sophisticated yet practical dessert that guests could enjoy while mingling.
The first time I served these at a summer luncheon, one guest took a bite and immediately declared them "lemon perfection without the mess." What continues to delight me about this recipe is how it transforms familiar lemon dessert flavors into something that feels both sophisticated and approachable. Even friends who typically pass on dessert find themselves reaching for seconds of these bright, citrusy cups.
Citrus Essentials
- Unsalted butter: Creates the tender cookie base; room temperature allows proper creaming for ideal texture
- Fresh lemons: Provide both juice and zest for authentic flavor; Meyer lemons offer delicate sweetness when available
- Granulated sugar: Balances the tartness in both components while creating structure in the cookie
- Egg yolks: Create richness and silky texture in the lemon curd; save whites for meringue cookies
- Vanilla extract: Adds depth to the cookie base; pure extract offers superior flavor to imitation
- All-purpose flour: Forms the structure of the cookie cups; measure by spooning into measuring cups and leveling
- Cornstarch: Stabilizes the lemon curd while allowing a softer set than traditional recipes
- Mini muffin tin: Creates the perfect single-serving vessels; non-stick varieties simplify removal
I learned an important lesson about lemon zest during my first attempt at these cups. Using a regular grater created harsh, bitter pieces that disrupted the smooth curd. I now exclusively use a microplane to remove just the fragrant yellow layer while leaving behind the bitter white pith. This simple tool change transformed both components of the recipe, allowing the true lemon essence to shine through without bitterness.
Sweet Success
- Create The Perfect Cookie Cups:
- Begin by rubbing fresh lemon zest directly into the granulated sugar with your fingertips. This technique releases essential oils from the zest, infusing the sugar with intense citrus flavor before it's even incorporated into the dough. Cream this lemon sugar with room temperature butter until light and fluffy—about three full minutes. This extended creaming creates microscopic air pockets that provide the ideal tender-yet-sturdy texture necessary for cookie cups. Incorporate eggs one at a time, allowing each to fully blend before adding the next, followed by vanilla extract.
- Form Flawless Vessels:
- After mixing in dry ingredients just until combined, portion the dough using a small cookie scoop for consistent sizing. Press each ball into a well-greased mini muffin cup, then create the perfect well using the end of a wooden spoon dusted with flour to prevent sticking. The depression should be deep enough to hold a generous amount of filling without reaching the bottom of the pan. Bake just until the edges begin to turn golden—approximately 8 minutes—as overbaking creates brittle cups that crumble when filled.
- Craft Luxurious Lemon Curd:
- The filling begins with fresh lemon juice—bottled varieties simply can't compare in flavor brightness. Blending the juice with sugar, egg yolks, cornstarch, and lemon zest creates a smooth base that will transform during cooking. Heat this mixture slowly while stirring constantly with a silicone spatula that can reach the corners of the pan. The patience required here rewards you with silky-smooth curd—rushing creates lumps or scorching. The mixture is ready when it coats the back of a spoon and leaves a clear path when you run your finger through it.
- Master The Assembly:
- Allow cookie cups to cool completely before filling to prevent the curd from melting or soaking into the base. Transfer warm lemon curd to a piping bag or zip-top bag with a corner snipped for precise filling without messy drips. Fill each cup just to the top—overfilling creates spillover that makes the cups difficult to handle. Refrigerate for at least two hours to allow the curd to set properly. Just before serving, dust with powdered sugar using a fine-mesh sieve for a professional finish that enhances both appearance and sweetness.
 Pin it
During a holiday party, my friend attempted this recipe but complained that her cookie cups collapsed after baking. After troubleshooting together, we discovered she had created too deep an indentation before baking. I've since learned that making a gentle depression that's later deepened while the cookies are still warm from the oven produces the most stable vessels. Sometimes these small technique adjustments make the difference between frustration and success.
Serving Suggestions
These versatile treats shine in numerous settings throughout the year. For bridal or baby showers, arrange them on tiered stands interspersed with fresh flowers or herbs for a garden-inspired display. During summer gatherings, serve alongside fresh berries for guests to add as optional toppings. At holiday celebrations, garnish with tiny sprigs of rosemary dusted with sugar for a festive appearance. For afternoon tea, pair with Earl Grey or chamomile tea whose flavor profiles complement the bright lemon notes.
Creative Variations
While the classic version delights purists, this adaptable recipe welcomes thoughtful modifications. Create a tangy lime version by substituting lime juice and zest in the filling. For a striking visual, fill half the cups with lemon curd and half with raspberry curd for a beautiful color contrast. Add a decorative touch by piping a small rosette of stabilized whipped cream on top of each cup and garnishing with a tiny mint leaf. For a holiday twist, incorporate a splash of cranberry juice into the curd for a festive pink hue and complementary flavor.
Storage Strategy
These lemon cups maintain their quality remarkably well when properly stored. Keep them refrigerated in an airtight container for up to one week. The texture of both components improves after a day in the refrigerator as flavors meld and the curd sets to the perfect consistency. For make-ahead convenience, prepare the cookie cups and lemon curd separately, storing the unfilled cups at room temperature and the curd refrigerated for up to three days before assembling. For longer storage, freeze filled cups in a single layer until solid, then transfer to a freezer container with parchment between layers for up to two months.
I've been perfecting these lemon cookie cups for nearly five years, making subtle adjustments with each batch. What began as a practical solution to serving challenges has evolved into one of my signature desserts—the one friends specifically request for gatherings. Last spring, a caterer friend asked for the recipe after serving them at a client's event, saying they received more compliments than any other dessert on the table. The beauty of this recipe lies in its ability to transform familiar flavors into an elevated experience while remaining approachable enough for bakers of all skill levels.
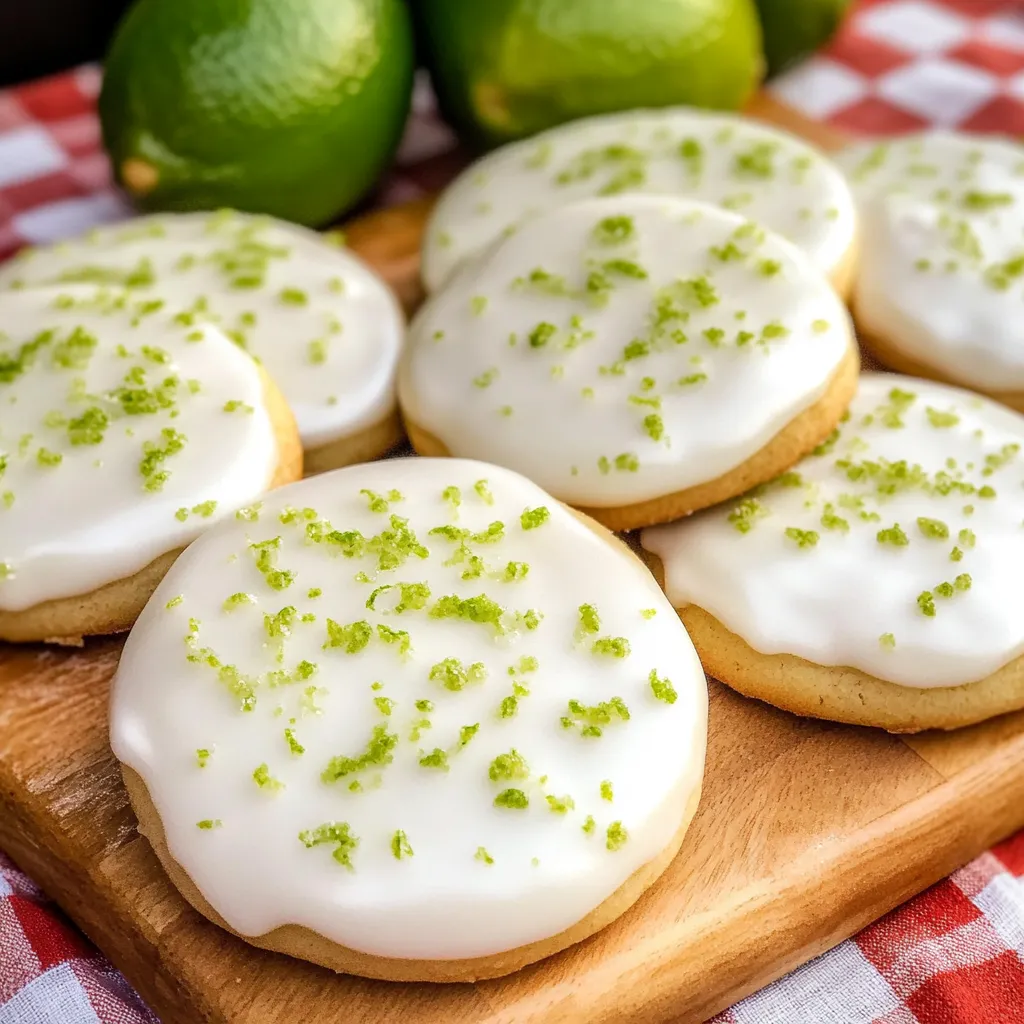
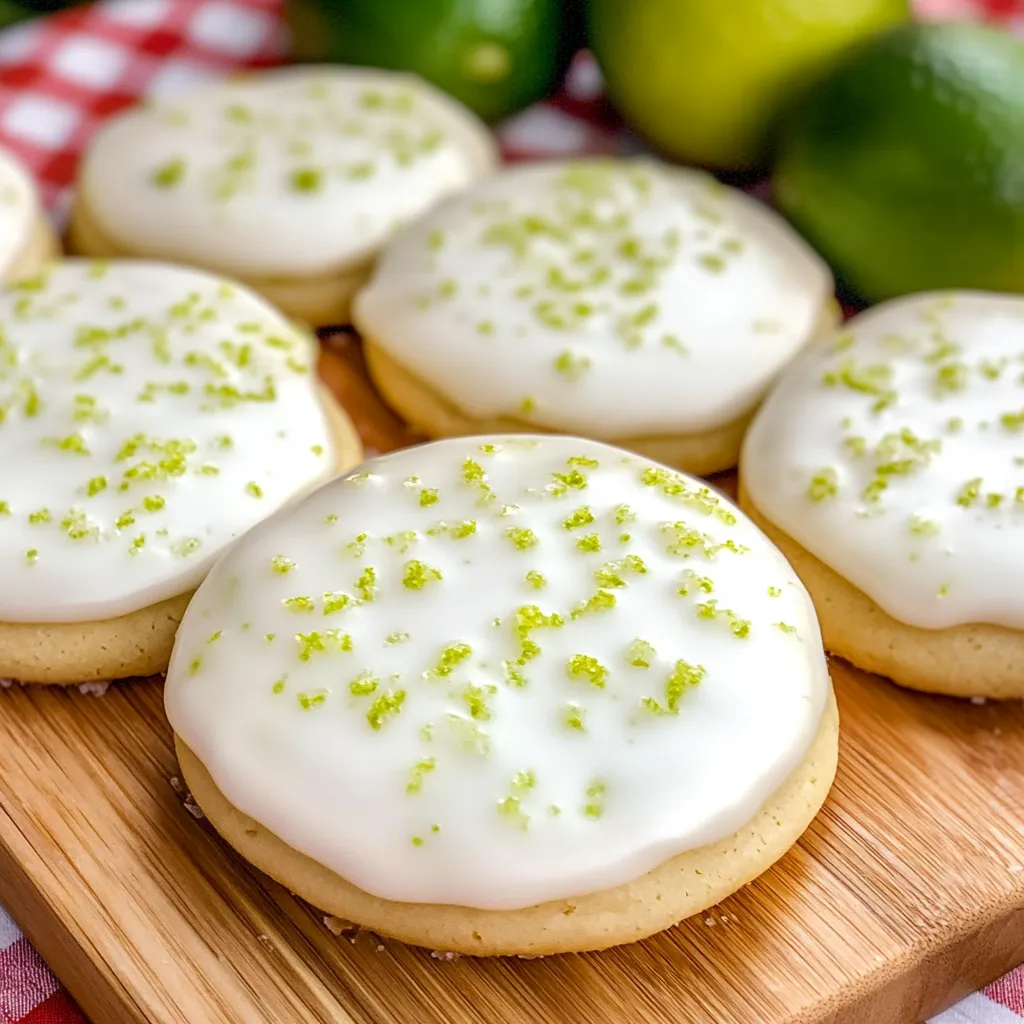
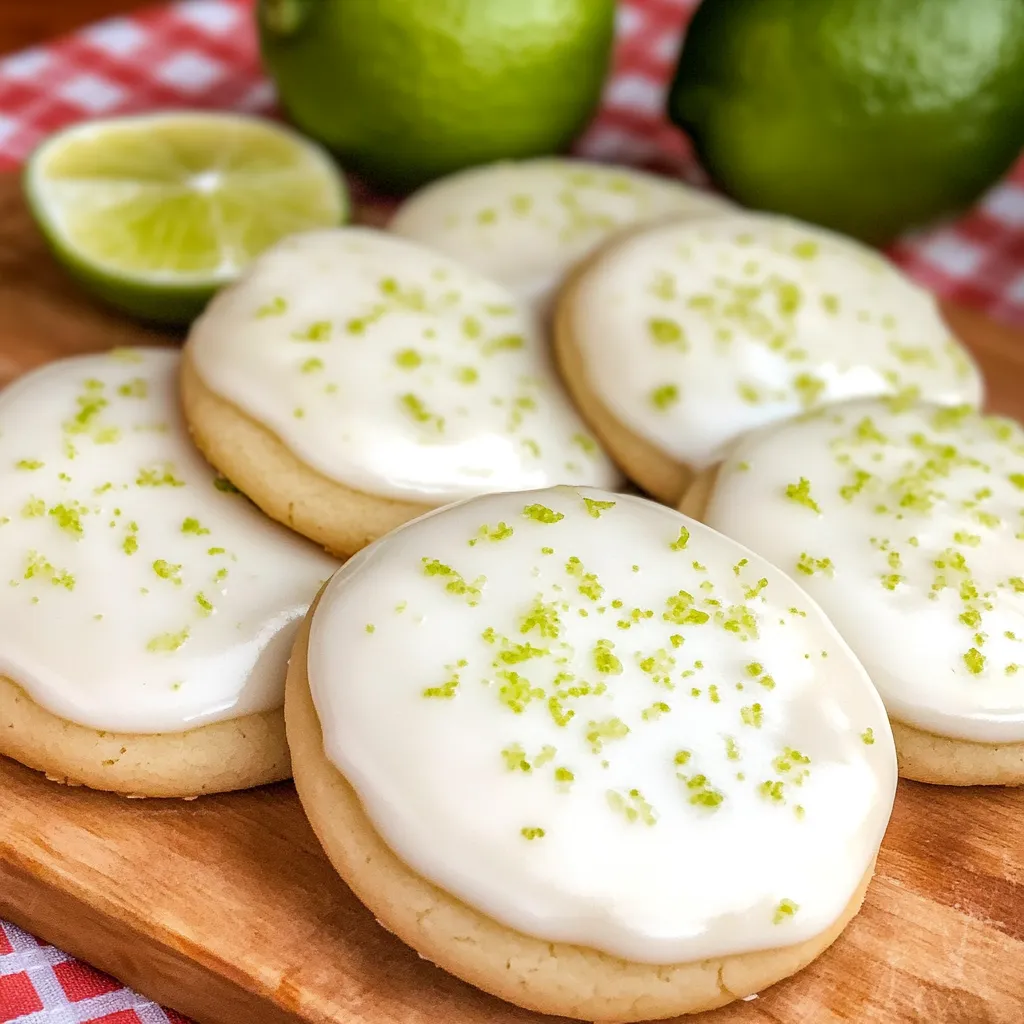
Key Lime Meltaway Cookies
Key lime meltaway cookies transform simple ingredients into extraordinary treats featuring buttery, tender shortbread infused with bright citrus that literally dissolves on your tongue, leaving behind the perfect balance of sweet and tart flavors. These delicate cookies deliver the essence of key lime pie in elegant, bite-sized morsels topped with a silky glaze that enhances both flavor and presentation. I discovered this recipe during a summer vacation to the Florida Keys when I sought to capture those vibrant tropical flavors in a portable, share-worthy form.
The first time I served these at a garden party, my usually stoic father-in-law took one bite and declared them 'dangerous' because he couldn't stop eating them. What delights me most about this recipe is how it transforms humble pantry staples into something that feels sophisticated yet approachable. Even friends who claim they 'don't like lime desserts' find themselves reaching for seconds and thirds of these irresistible cookies.
Citrus Essentials
- Unsalted butter: Creates the tender, rich base; room temperature ensures proper creaming for ideal texture
- Fresh key limes: Provide essential bright, floral notes; regular limes can substitute but lack the distinctive aromatic quality
- Confectioners' sugar: Contributes to the meltaway texture; the fine texture dissolves more readily than granulated sugar
- All-purpose flour: Forms the structure without developing too much gluten; measure by spooning and leveling for accuracy
- Cornstarch: The secret to the dissolve-in-your-mouth texture; don't skip this crucial ingredient
- Pure vanilla extract: Balances the citrus with warm notes; use real extract rather than artificial for best flavor
- Heavy cream: Creates silky, luscious glaze that sets beautifully; don't substitute with milk
- Rum: Adds depth to the glaze; can be omitted but adds wonderful complexity
I learned an important lesson about lime zest during my first attempt at these cookies. Using a box grater created pieces too large that disrupted the delicate texture. I now exclusively use a microplane zester to create fine, aromatic zest that incorporates perfectly throughout the dough. This seemingly small detail transforms both the texture and flavor distribution, ensuring every bite delivers the perfect key lime experience.
Cookie Craftsmanship
- Create The Perfect Dough:
- Begin with room temperature butter—neither too cold nor too soft. It should yield to gentle pressure but still maintain structure. Cream the butter and sugar together until just light and fluffy, about 2-3 minutes; overbeating incorporates too much air and causes spreading. Add egg and zest, mixing just until combined. In a separate bowl, whisk together flour, cornstarch, baking powder, and salt to ensure even distribution of leavening. Add dry ingredients to the butter mixture in two additions, mixing gently just until no dry streaks remain. Overmixing develops gluten, resulting in tough rather than tender cookies.
- Master The Shaping Process:
- Chill the dough for 30 minutes to firm the butter slightly, making it easier to handle. Use a tablespoon-sized cookie scoop to ensure uniform size, which guarantees even baking. Roll each portion between your palms to create perfect spheres, then gently flatten to approximately 1/2-inch thickness. The slight flattening helps them bake evenly while maintaining their tender interior. Place cookies two inches apart on parchment-lined baking sheets—never on unlined sheets, which can cause sticking and uneven browning.
- Perfect The Bake:
- Bake at precisely 350°F for 8-10 minutes—these cookies should not brown except very slightly at the edges and bottom. The centers will appear slightly underdone but will continue cooking from residual heat. Allow cookies to remain on the baking sheet for exactly two minutes before transferring to a cooling rack; this brief resting period allows them to set enough to move without breaking while preventing overbaking from the hot pan.
- Create Luxurious Glaze:
- While cookies cool completely, prepare the glaze by sifting confectioners' sugar to remove any lumps—this ensures silky smoothness. Gradually add fresh key lime juice, heavy cream, and rum, whisking constantly until the perfect consistency is achieved—it should ribbon from the whisk and settle within 10 seconds. Each cookie should be dipped top-down into the glaze rather than spreading it on, creating a more professional finish with even coverage. Allow excess to drip off before placing back on the cooling rack. Garnish with fresh lime zest while the glaze is still wet so it adheres properly.
During a holiday cookie exchange, my friend attempted this recipe but complained that her cookies spread into flat puddles. After troubleshooting together, we discovered her butter had been overbeaten until almost melted. I've since learned that maintaining proper butter temperature throughout preparation is critical—if the dough becomes too warm at any point, refrigerate it briefly before proceeding to the next step. Sometimes these seemingly minor temperature details make the difference between perfect cookies and disappointing results.
Serving Suggestions
These versatile cookies shine in various settings throughout the year. For spring gatherings, arrange them on vintage cake stands alongside fresh berries for an elegant dessert display. During summer, serve them with small scoops of coconut sorbet for a tropical dessert that refreshes after a heavy meal. At holiday cookie exchanges, package them in clear cellophane bags tied with raffia for a gift that stands out from traditional offerings. For afternoon tea, pair them with a delicate white tea whose subtle flavor won't compete with the bright lime notes.
Creative Variations
While the classic version delivers perfect flavor balance, this adaptable recipe welcomes thoughtful modifications. Create a coconut-lime version by replacing a quarter cup of flour with finely ground coconut. For a chocolate-dipped variation, skip the glaze and instead dip half of each cooled cookie in tempered dark chocolate for sophisticated contrast. Add a teaspoon of culinary lavender to the dough for a floral note that complements the citrus beautifully. For a festive touch, incorporate a drop of green food coloring to the glaze and finish with colorful sprinkles for birthday celebrations or holidays.
Storage Strategy
These cookies maintain their quality remarkably well when properly stored. Keep them in a single layer in an airtight container, separated by parchment paper if stacking is necessary. At room temperature, they remain delicious for up to five days, though the texture is best within the first three. For extended storage, freeze unglazed cookies in an airtight container for up to three months. Thaw completely at room temperature before glazing. The dough itself can be frozen for up to two months; form into balls, freeze on a baking sheet, then transfer to a freezer bag. Allow frozen dough balls to thaw in the refrigerator overnight before flattening and baking.
I've been perfecting these key lime meltaway cookies for nearly six years, making subtle adjustments with each batch. What began as a souvenir recipe from a memorable vacation has evolved into my signature dessert—the one friends specifically request for gatherings. Last summer, I created these for my niece's bridal shower, garnishing each cookie with a tiny edible flower that complemented the garden theme. The beauty of this recipe lies in its ability to deliver sophisticated flavor in an approachable form, proving that sometimes the most memorable desserts are the ones that surprise with their simplicity.
 Pin it
Frequently Asked Questions
- → How long do these cookies take to bake?
- These cookies take about 8-10 minutes to bake.
- → Can I use regular limes instead of key limes?
- Yes, regular limes can be used if key limes are not available.
- → How many cookies does this recipe make?
- This recipe makes 24 cookies.
- → Can I freeze these cookies?
- Yes, you can freeze the cookies before glazing. Thaw and glaze before serving.
- → What is the best way to store these cookies?
- Store them in an airtight container at room temperature for up to a week.